Best Way to Organize Photos on iPhone: Everything You Need to Know!
Every one of us has different habits when it comes to organizing our things. Many people need everything neat and tidy, while others love living in clumsy surroundings. However, when it comes to gadgets, everyone likes things organized and easy to locate.
When you love to take photos and images and own an iPhone, you will be in big trouble if you do not organize your photos very well. Finding the right photo you were looking for can be very time-consuming. For instance, you captured ten photos of one scenery and wanted to edit the best one. You were too easy to edit images instantly, and later on, you could not find the picture to be edited.
In today’s article, we will give you tips on the best way to organize photos on an iPhone. You can also apply these tips for any other phone, but a lot of features available on iPhone might not be available for Android phones. Therefore, you will need to look for alternatives in that case.
Without any further delay, let’s get into it and discuss the best ways to organize photos on iPhone.
Tips to Organize Photos On iPhone
You use the Photos app to access your iPhone gallery. Every tip we share today relates to organizing your photos in the iPhone’s default gallery. Here are some tips or ways you can leverage to organize photos on iPhone so that you never feel lost in your own phone’s gallery:
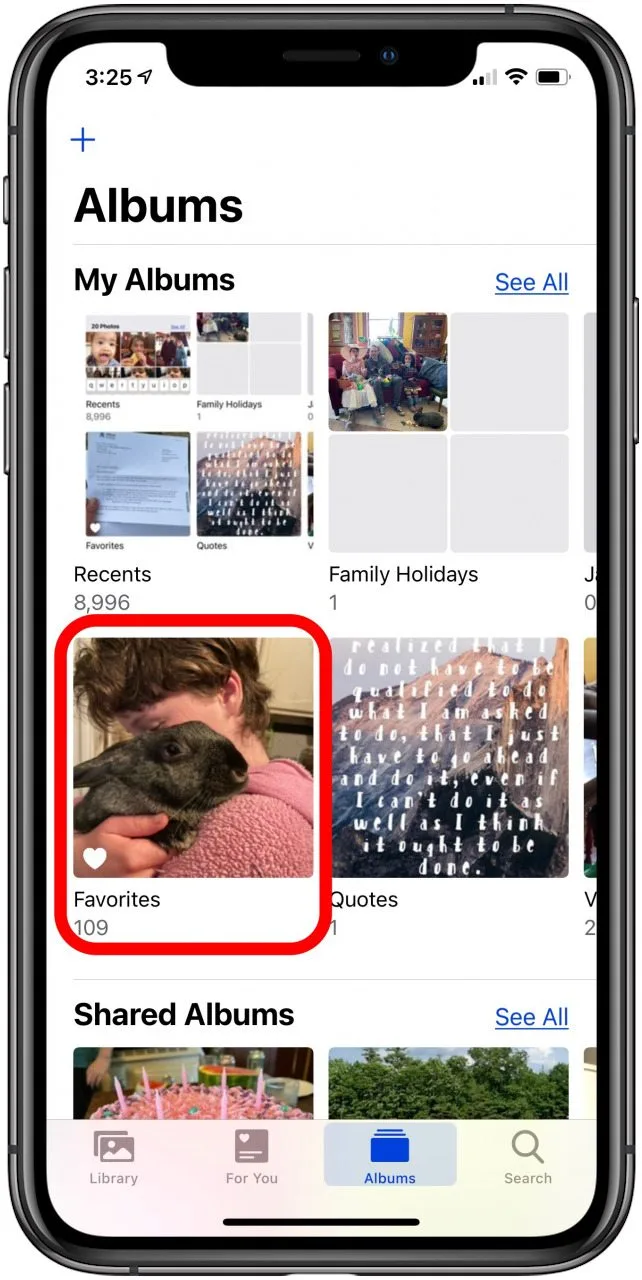
Favorites
Wouldn’t it be best to set aside the photos that means the most?
You can either make an album with the name ‘Favorites’ or even the best ‘Print-Worthy.’ It will save you a lot of time and hassle. Whenever you feel like revisiting your best moments and cherishing the memories, simply open your iPhone’s gallery, head to your favorite album, and set on the journey of your memories.
Wondering how to do that?
It is pretty simple if you want to set aside the Favorites only. First, be decisive about your choice, and then hit that heart on the bottom of photos, and it will automatically send it to the favorites. Now, you can see everything organized when you open the Favorites folder.
Sharing Is Caring
We hear ‘sharing is caring’ right from childhood; this phrase stays with us for the longest time. However, what if we apply the same rule to our photos and videos?
Let’s put things into perspective. You went on a trip with your friends, and you’re that photographer friend who is unapologetically hired for nothing to capture photos on their phone. Cool, the trip ended. The next part is scary. You’re getting bombarded by messages from everyone who was on the trip.
Photos? Photos? Photos?
Now what?
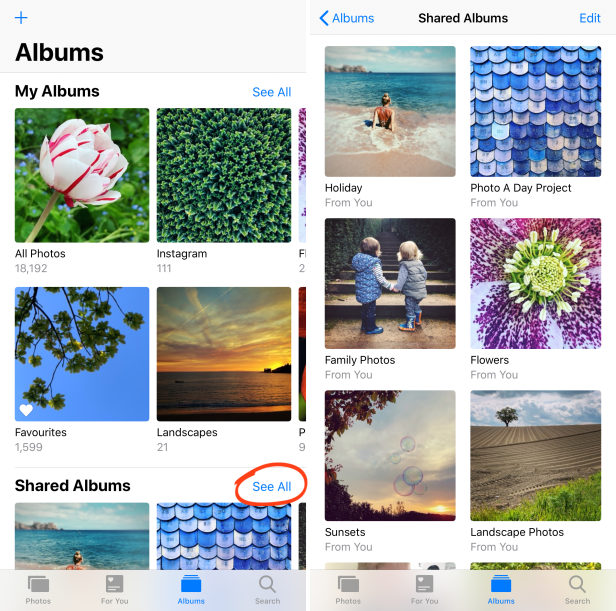
You can do simple things. Organize the photos into an album with the trip name as the album name, make it a shared folder, and give it access to everyone on the trip with you.
You can also do the same for almost any other picture or album you want to share with one, two, or more people. People who have shared albums with you can also add more photos to the album, which means you will get all the pictures you might not have seen before or not captured on your phone.
Library
The library tab is, by default, available on your iPhone, and you can get a curated list of your images in the Library tab. Library Tab is probably the best way to have your iPhone photos organized without putting in any effort.
How?
The Library tab on the iPhone allows you to sort and view your images in different views: yearly, monthly, days, or all photos. In Years View, your pictures will be sorted on a yearly basis, with each photo or video for a specific year. Similarly, it extends to a daily and monthly basis as well. When you choose to view All Photos, it will show you all images irrespective of which album they’re placed in.
Albums
Creating and naming albums is probably the most justified and explainable way to organize photos on your iPhone. Instead of keeping your photos wandering here and there, you can create more and more albums out of camera roll. You can experiment with different things, like albums with names of people, events, or things.
Creating albums might be a time-consuming job to do, but once done, it will be very enjoyable to go down memory lane in such an organized way. The next question is, how are you going to create albums from a camera roll?
Here is how to do it:
- Open your iPhone Gallery and click on the Albums tab at the bottom of the screen.
- Tap on Create New Album.
- Choose the album name and save it.
- Go back to Camera Roll > Select Photos/Videos > Add > Album Name.
- That’s it.
Hidden Album
Hidden Albums are there for a reason, and why not capitalize them as one of the iPhone photo organizing techniques?
If you have some personal photos that you don’t want everyone to see while scrolling through your gallery, moving them to the hidden album is the smart thing to do. You might have confidential documents, intimate memories, or anything else you want to keep away from sneaking eyes.
Here is how to utilize hidden albums to secure your private photos:
- Open Photos.
- Select the photo or video that you want to hide.
- Tap the More button then tap Hide.
- Confirm that you want to hide the photo or video.
Set Priorities
It might sound weird, but if you can’t bear unorganized things, setting priorities for your iPhone Photos will also help. What does it mean?
We already mentioned that finding the photo you were editing or were about to edit can be frustrating when you have to leave your phone and do something else. You can organize and arrange the albums in terms of priority so you never get lost.
First things first, you will need to create an album where you will keep the photos you were editing or you already have edited. It means creating albums with the names ‘Edited’ and ‘To Edit.’ Follow the steps of album creation as discussed above and move all photos to respective folders.
The next step is rearranging your Photo albums. Here is how to do it:
- Go to Albums, tap See All, then tap Edit.
- Touch and hold an album and drag it anywhere you want.
- Tap Done.
Set iPhoto Organizer Routine
You can’t do everything at once. Neither can you do it one time and never do it again. Therefore, you need to set an iPhoto organizer routine for yourself. If you’re following a regular routine, your gallery will always stay in the order. You can set your weekly, monthly, or yearly routine to delete unwanted items, send relevant images to relevant albums, create new albums, and back up your photos to iCloud or Google Drive monthly or yearly.
Backup Your Photos
Another important tip in your iPhone photo organizing is regularly backing up your photos to iCloud or Google Drive. Although iCloud is your device’s automatic backup option, another simple way is Google Photos. You can consider installing the Google Photos app on your iPhone to backup all the photos by default. You can either choose a manual backup or an automatic one. We recommend manual backup and creating a recurring event on your phone calendar for a monthly photo-organizing routine.
Delete Unwanted Photos
Finally, we are going to talk about embracing the practice of deleting unwanted photos. We know that feeling of never having enough courage to delete unwanted photos. It always feels that once you delete the photo, you must revisit it the next day or week.
However, this feeling has to be overcome, and you must embrace the habit of deleting unwanted scrap from your iPhone gallery. We talked about the routine of organizing photos and making sure to add the part of deleting useless photos, screenshots, etc., from your phone.
Conclusion
We have discussed the most important tips and ways you can use to organize your iPhone photos. But that’s not all you can do to organize your content in the iPhone gallery. There are a lot of other ways you can also capitalize. You can organize photos by faces, search and sort the photos in the order you want, and a lot more with your gallery. You can also transfer the photos from your iPhone to your PC and have a manual backup there.
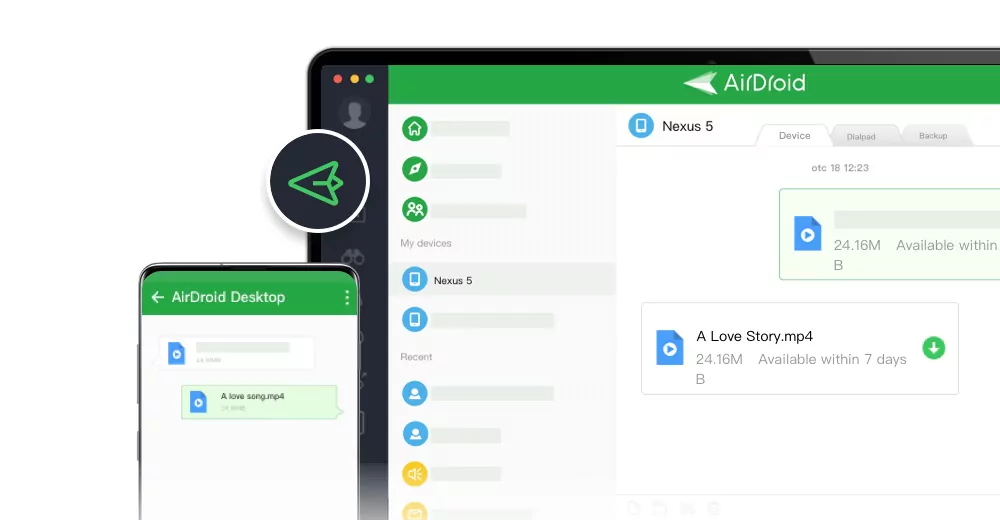
We recommend using AirDroid Personal, a mobile management and data transfer tool, to do this. AirDroid is free to use and comes with a lot of additional capabilities like remote control of your mobile phone, wireless data transfer, remote troubleshooting of the device, and a lot more.


Leave a Reply.