How to Screen Record on a Chromebook [4 Ways]
Q: Can you screen record on a Chromebook?
Yes, there are multiple methods to screen record on a Chromebook, each with its own distinct advantages.
So today, we’re going to quell all your fears about jumping into the versatile and lightweight ChromeOS ecosystem. We’ll show you four different methods to screen record on Chromebooks and how to use them to get a glimpse of what ChromeOS can do.
Way 1. Record Chromebook Screen with Hotkeys
The first method for recording a screen on a Chromebook is by pulling up a shortcut using your keyboard. In terms of speed and convenience, this is the fastest and easiest way to pull up the screen recording feature on a Chromebook.
Most modern Chromebooks will have the same keyboard layout, but if yours is an older model, it might have a different setup. In that case, we’d recommend trying out one of the other methods listed below.
Here’s how to screen record on a Chromebook using hotkeys:
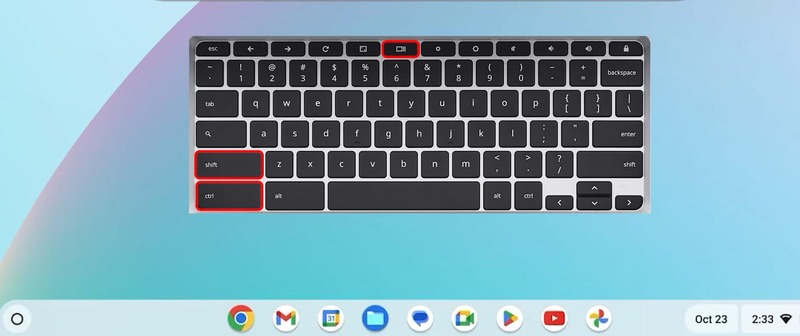
- Step 1.On your Chromebook keyboard, press the Shift + Ctrl + Show windows keys simultaneously.
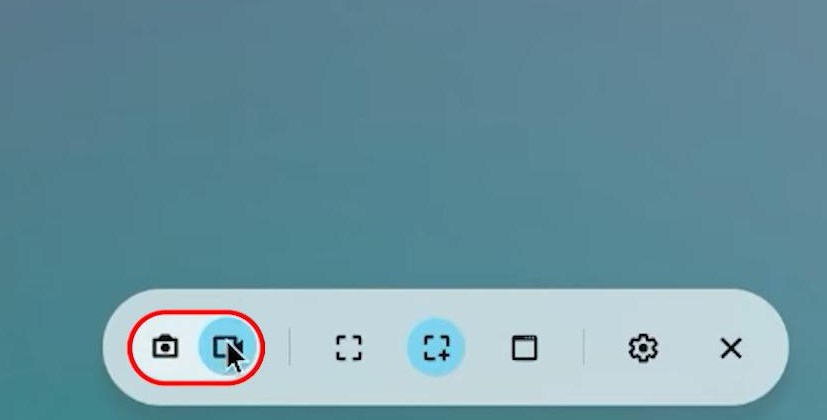
- Step 2.You’ll see a pop-up at the bottom of the screen for taking screenshots or screen recording. Select the ‘Screen Recording’ icon.
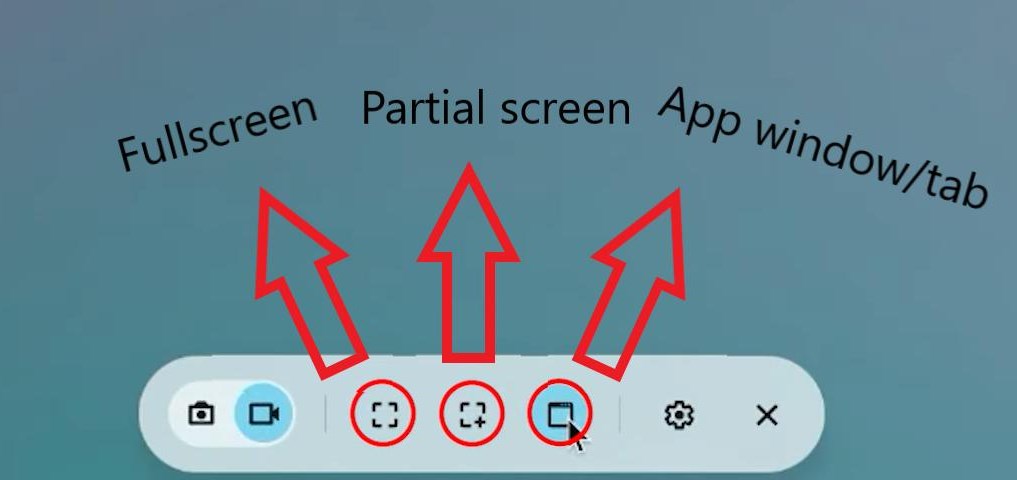
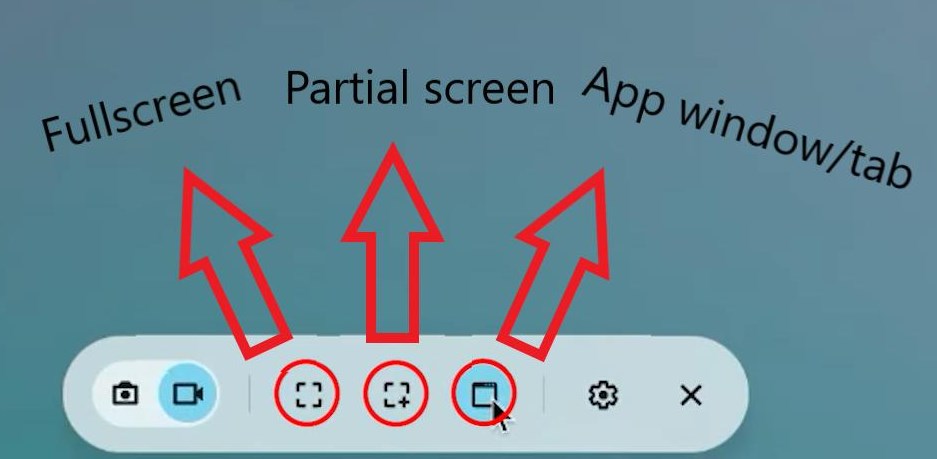
- Step 3.Now select how you’d like to record the screen. You can record the full screen, record a portion of the screen only, or record an entire app window.
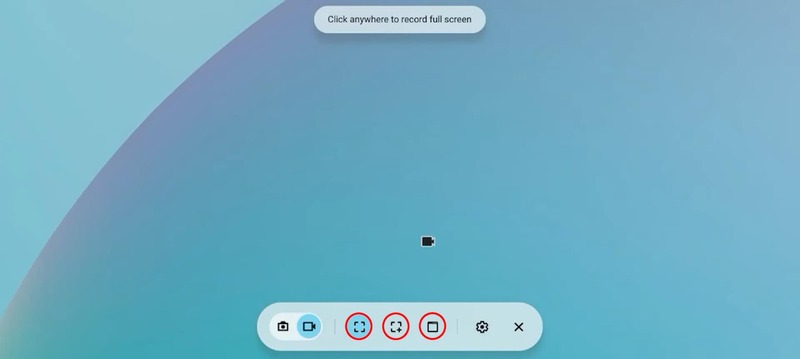
- Step 4.Wait for the screen recording to start.
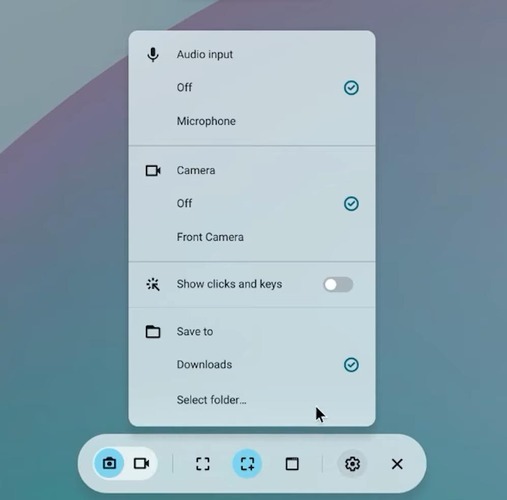
- Step 5.If required, you can edit a few settings for the recording. You can turn on the mic to pick up and record audio or turn on the webcam to record a facecam simultaneously. You can also edit where the recording is saved under the ‘Save to’ sections.
- Step 6.Once you’re done with the recording, select the ‘Stop recording’ button in the bottom-right corner of the taskbar.
Way 2. Record Screen on Chromebook with Screen Capture
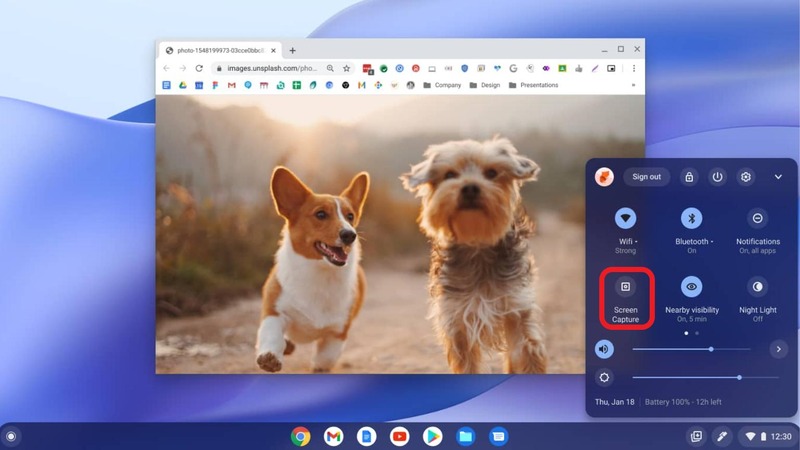
The next method of capturing the Chromebook screen is by using the ‘Screen Capture’ button located in the Quick Settings panel. This will pull up the same screen recording feature that we showcased above using hotkeys.
Here’s how to record your screen on Chromebook using the Screen Capture button:
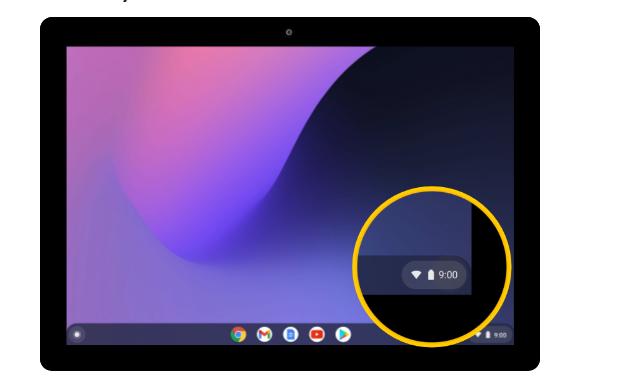
- Step 1.Click on the Time, Wi-Fi, and Battery icons in the bottom-right-hand corner of the taskbar to open the Quick Settings panel.
- Step 2.Select the ‘Screen Capture’ option.
- Step 3.Wait for the screen capture pop-up to show up at the bottom of the screen. Once it shows up, select the ‘Screen Recording’ option.
- Step 4.Select which way you’d like to record the screen. You can record a full-screen capture, record a selected area of the screen, or an app window.
- Step 5.To record your audio, select the ‘Gear’ icon on the right-hand side of the screen recording menu. Enable your Microphone to pick up audio while screen recording.
- Step 6.If you’re recording an instructional video, enable the ‘Show clicks and keys’ toggle to enable the recording to show inputs from your mouse and keyboard.
- Step 7.When you’re done with the video, to stop screen recording on Chromebook, select the ‘Stop recording’ button in the bottom-right corner of the taskbar.


Way 3. Record Screen on Chromebook via Screencast App
Back in 2022, Google introduced a new feature to ChromeOS to make it easier for educators to record lessons or host live classes with the Screencast app. But the good news is anyone can take advantage of the app as long as they have the right OS version.
This new app is only available on Chromebooks running ChromeOS version 103 or newer. If you can’t find the app, you’ll need to upgrade your Chromebook’s OS version to the latest available update.
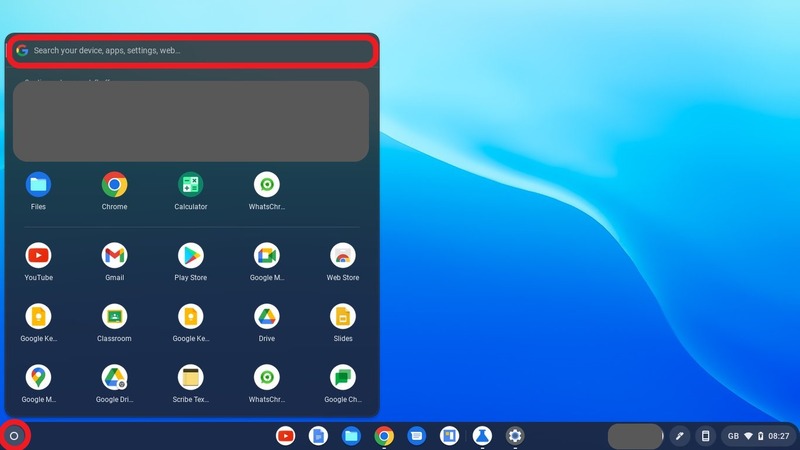
- Step 1.Open the App launcher in the bottom left-hand corner of your taskbar.
- Step 2.Type in ‘Screencast’ and select the app to launch.
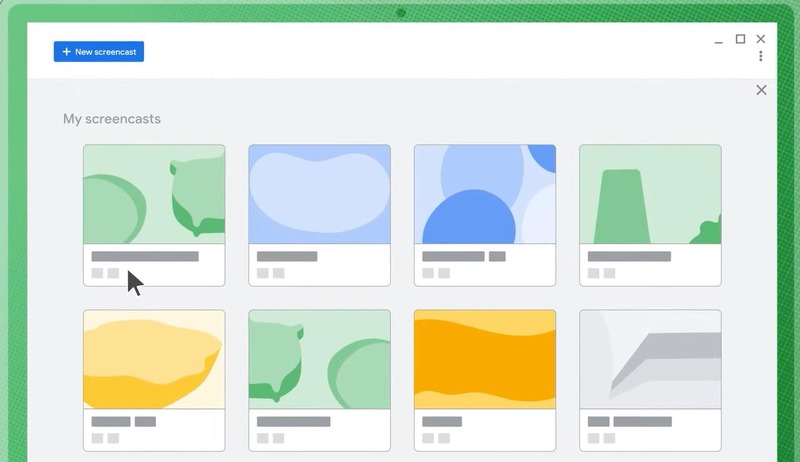
- Step 3.In the Screencast app, select ‘+ New Screencast’.
- Step 4.The app will now begin recording your voice and video with your webcam in a circle on the screen.
- Step 5.You can also use the marker tool in the bottom-right corner of the taskbar to highlight anything on-screen.
- Step 6.To end the screencast, select the ‘Stop recording’ button in the bottom-right corner of the taskbar.
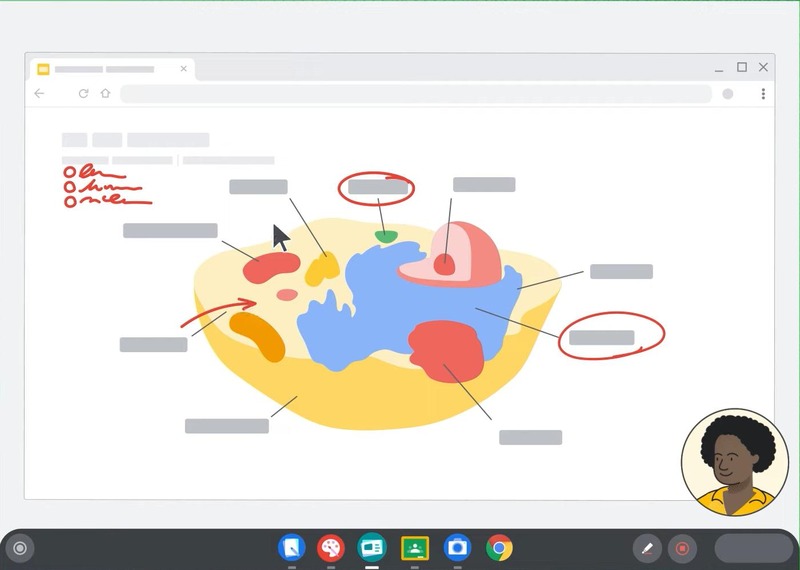
As mentioned earlier, this tool is primarily for educators and teachers, so it will record your face and audio automatically. But it’s a great method in case you need to explain something to someone or for presentations.
Apart from recording your screen, the Screencast app also transcribes whatever you say into the screen recording. Viewers watching your recording can then navigate and search for specific sections in the transcript.
Another thing to note is that screen recordings using the Screencast app are saved directly to your Google Drive and can be viewed within the Screencast app. So you’ll need enough space for your recordings on Google Drive; otherwise, you can’t save anything else in your Drive.
Way 4. Record Chromebook Screen Using Third-party Screen Recording Software
The last option to record your screen on a Chromebook is by using a third-party screen recording software. For many uses, the Chromebook’s built-in recording solution may be a bit too simplistic and lacking in terms of features.
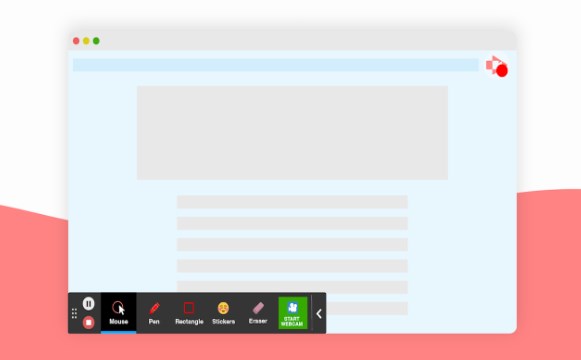
So if you’re looking for a bit more flexibility and features, such as editing the recorded videos, we’d recommend trying out one of the numerous third-party solutions available. Here are some of the top options for screen recording software on Chromebooks: Screencastify, Nimbus, and Loom.
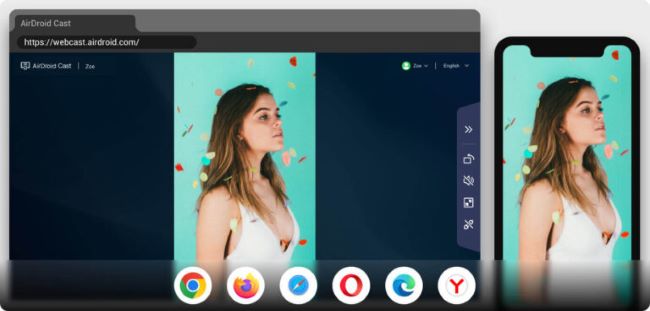
Bonus Tip: Record Phone Screen from Chromebook via AirDroid Cast
Apart from recording the Chromebook screen, you can also record the mobile phone screen from your Chromebook by mirroring the phone screen.
To mirror your phone screen to the Chromebook, you can try AirDroid Cast, which is a one-stop solution for your screen sharing and mirroring needs.
How to mirror the phone screen to Chromebook:
- Step 1.Download and install AirDroid Cast on your mobile phone, and launch the app.
- Step 2.On your Chromebook, open a web browser (such as Chrome or Edge), and navigate to webcast.airdroid.com. There is a QR code and a Cast code.
- Step 3.Now, enter the Cast code on your mobile phone and tap 'Start Casting'.
- Step 4.Accept the request on Chromebook, and your phone screen is mirrored to the computer.
After mirroring your phone screen onto your Chromebook, you can start recording the phone screen on Chromebook easily.
Summary
And with that, we’ve reached the end of our guide on how to record your screen on Chromebook. There are a few great methods to start recording your screen on ChromeOS and they depend on what you’re after.
For the easiest way to do it, use the hotkeys method. To create informational, in-depth recordings/tutorials, use the Screencast app. And for any other features, your best bet is to search for a third-party solution to handle it!


Leave a Reply.