
Improve Your Remote Assistance with Screen Share [Best Practices]
New technologies such as artificial intelligence, online communication, and collaboration are taking the world to the next level. Small, medium, and large enterprises are actively introducing these technologies into their business operations to increase their resources' efficiency and productivity.
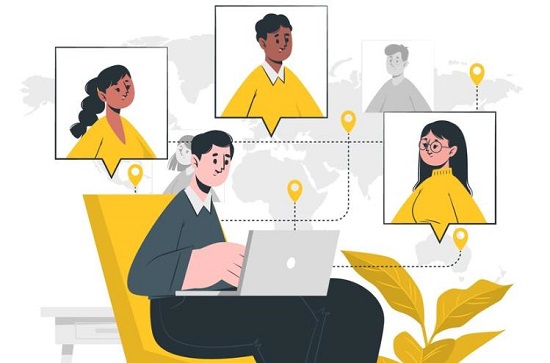
Whether connecting with customers and team members or providing technical support, companies are switching to remote assistance technologies when they can virtually connect and collaborate with customers by simply sharing their device screens remotely.
This article provides screen sharing methods for various platforms and provides an in-depth look at the importance of screen sharing for remote assistance.
How Screen Share Facilitates Remote Assistance
Screen sharing is a dynamic tool that enables remote assistance, enabling individuals to share their computer or mobile screens with others in real time. This technology is essential to bridging the physical gap between those seeking assistance and those who provide it.
Real-Time Collaboration
With screen sharing, remote assistance becomes a collaborative experience. Users can actively participate in problem-solving, troubleshooting, or learning sessions without the limitations imposed by physical distances.
Interactive Problem-Solving
Unlike traditional methods of remote assistance, screen sharing provides a visual context for problem-solving. Users can see exactly what's happening on the screen, making it easier to identify and address issues efficiently.
Enhancing Clarity
Screen sharing allows for step-by-step guidance, ensuring clear and concise instructions. Visual walkthroughs enhance understanding, whether it's setting up software, resolving technical glitches, or learning a new process.
Versatility beyond Platforms and Devices
Screen sharing is a versatile solution that seamlessly integrates into various platforms and devices. Whether you are on a computer, tablet, or smartphone, users can easily share the screen and get assistance.
Reducing Resolution Time
Remote assistance with screen share minimizes the time it takes to resolve issues. Support teams can quickly pinpoint problems and guide users to solutions by eliminating the need for verbal explanations and guesswork, boosting overall efficiency.
Step-by-Step Guide to Screen Share Remote Assistance
Screen sharing between devices is required for teamwork. If you share access to your device screen, others can see your screen activity in real time without wasting time sending files. This post will look at the best way to share the screen with another device. Choose the one that suits your needs.
For Android and iOS
AirDroid Remote Support
AirDroid Remote Support isn't just a tool for sharing screens—it's an all-in-one solution for remote access, assistance, and control. It comes in handy for two main things: getting help with technical stuff and working on projects together, even when you're far away.
Fixing problems with your device becomes super easy with AirDroid Remote Support's cool features like unattended Android access, AR camera, tutorial gestures, live chat, and more. Imagine being able to draw or write on the screen while talking—it's like having a helpful conversation and showing things visually during screen sharing.
Step-by-Step Guide
AirDroid Remote Support works seamlessly with both Android and iOS devices. If you want to know how to use AirDroid Remote Support for screen sharing, follow these steps:
Step 1: Install AirDroid Business on the devices you wish to initiate remote support and control. And install AirDroid Remote Support on the devices you wish to support and control remotely.
Step 2: Start a remote support or control session after the download.
Step 3: To use screen sharing, enter AirDroid Remote Support's 9-digit code on the controller devices.
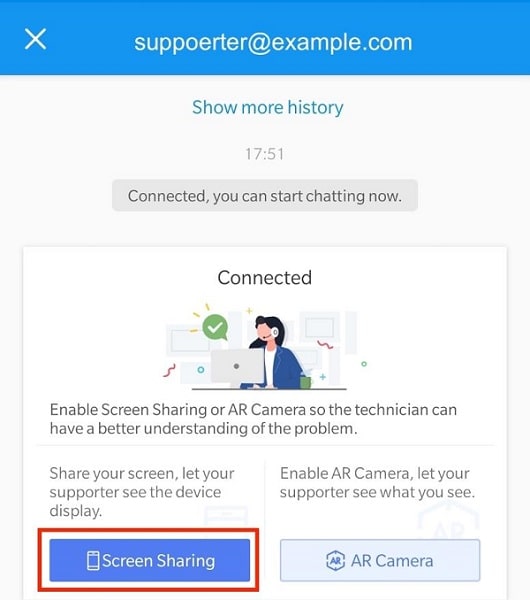
Step 4: From the support specialist's end: After a session is started, click Screen Sharing from the left side of the window to request the customer to accept screen sharing.
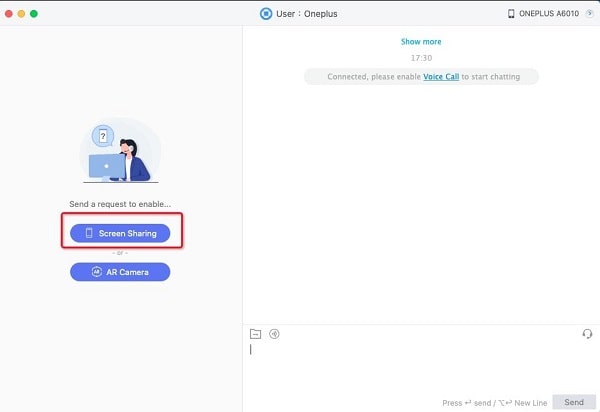
Step 5: From the customer's end: When in a remote support session, a customer can share their screen proactively by clicking the Screen Sharing button.
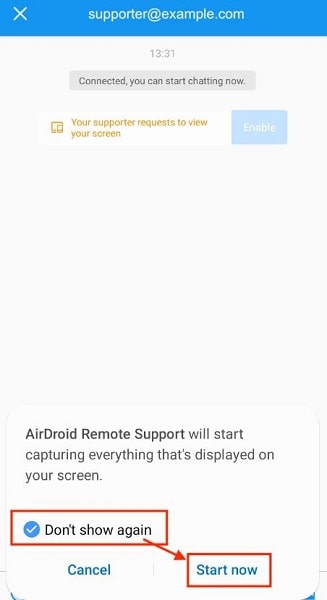
Step 6: After the request is accepted or when the customer chooses to share the screen, there will be a pop-up screen for the customer to confirm to share the screen.
Step 7: For Android 10 or below, please tap on Don't show again and Start Now to share your screen.
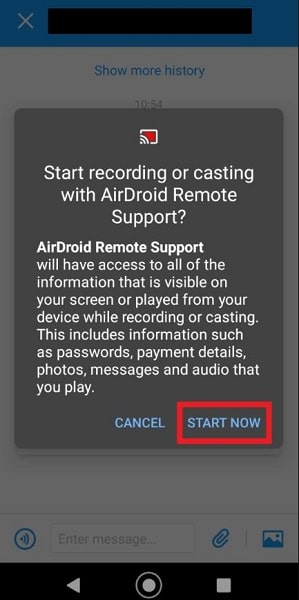
Step 8: For Android 11 or above, please tap on START NOW to share your screen.
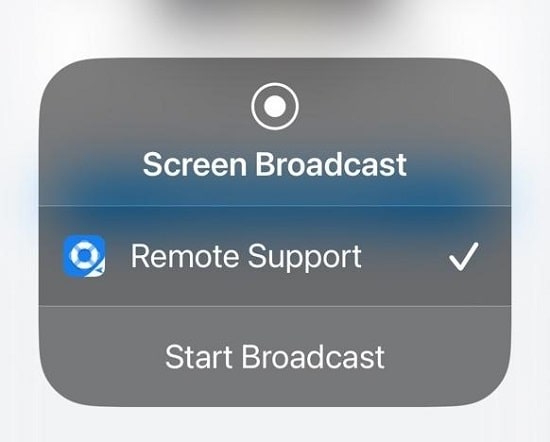
Step 9: For iOS devices, please choose Start Broadcast to share your screen.
Zoho Assist
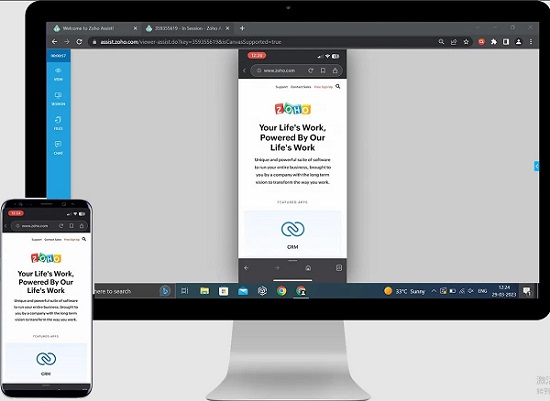
Zoho Assist is remote support software that allows you to share device screen with anyone worldwide using its Screen Sharing feature. You can either start a screen-sharing session instantly or schedule a screen-sharing session depending on your needs. Screen sharing can be used for online meetings, demos, training, and related purposes. Your customers can request a remote control if needed.
Step-by-Step Guide
Step 1: Download the Zoho Assist Customer App from the Google Play Store, depending on your device.
Step 2: Open the Zoho Assist Customer App and enter the session key shared by your technician.

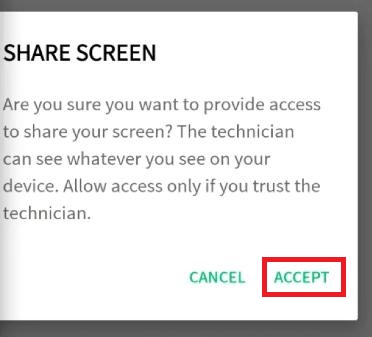
Step 3: Once the session has started, the technician can click on "Screen Sharing" to request that the customer accept screen sharing. The customer can grant access to the screen share by selecting Accept.
Step 4: Finally, customers can share their screens or give you control of their mobile devices.
For Windows
Quick Assist
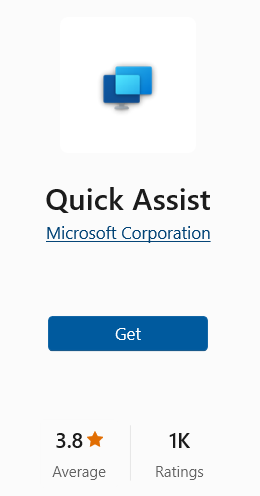
Quick Assist is a Microsoft Store application that allows a person to share their device with another person over a remote connection. It provides support staff to remotely connect to a user's device, view its presentation, annotate, or take complete control. This way, they can troubleshoot, analyze technological problems, and provide guides to users directly on their devices. Quick Assist uses RDP and encryption to protect your privacy and data.

Step-by-Step Guide
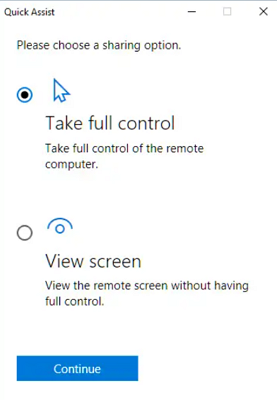
Using Quick Assist, you can allow another device to see your screen, either with or without taking complete control.
Step 1: Search "Quick Assist" in the start menu from your PC or laptop and open it. If the app is not available, you can search the Microsoft Store and download and install the app manually.
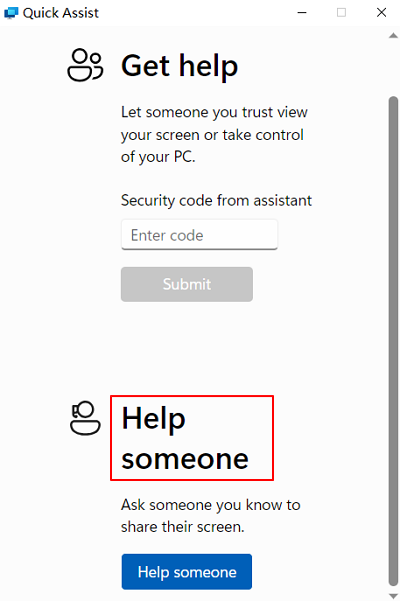
Step 2: Suppose you will help others, click Help someone under Get help.
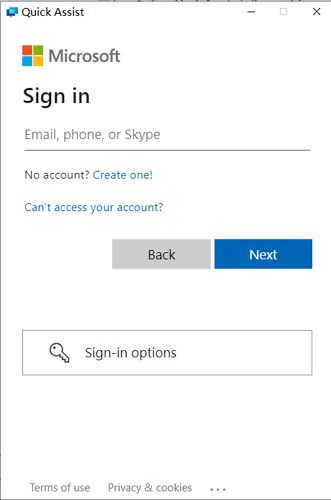
Step 3: Put in your Microsoft account, then click Next. After that, enter the password and click Sign in.
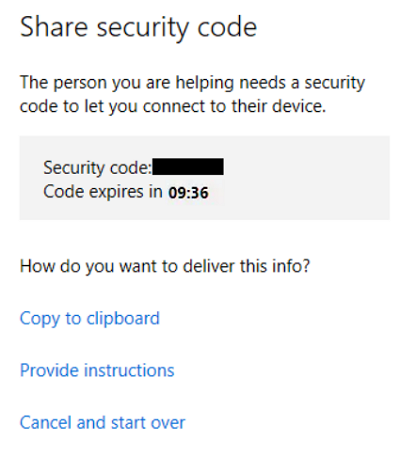
Step 4: You'll receive a security code valid for 10 minutes. Please send this code to the remote side that wants to share the screen.
Step 5: In the computer that needs help, run Quick Assist, and fill in the security code under Get help.
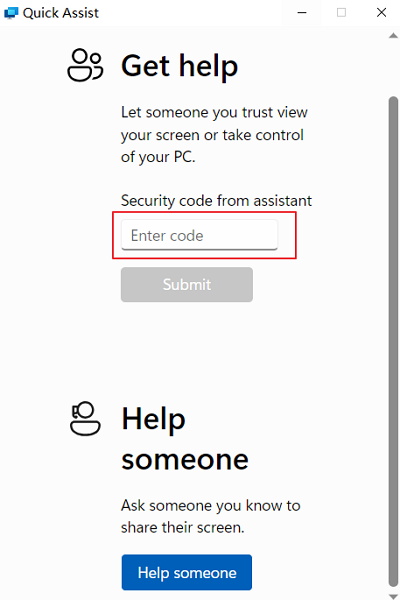
Step 6: Complete the process by clicking the Share screen.
Step 7: Select either Full Control or View Screen, then Continue.
Chrome Remote Desktop
Chrome Remote Desktop is a free remote access tool Google created, typically appearing as a Chrome extension. If you're using a Chrome browser, it's also convenient to share the Windows desktop screen on Windows 10. Let me guide you on how to do it.
Step-by-Step Guide
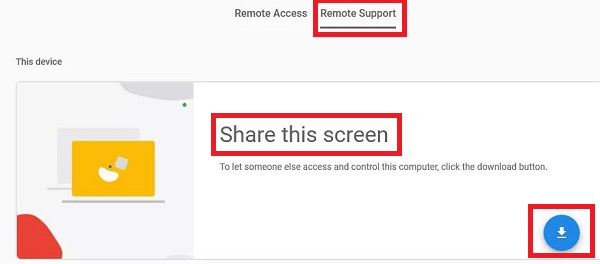
Step 1: Go to the Chrome Remote Desktop download page on your PC. Click Remote Support, select Share this screen, and then click the blue download button.
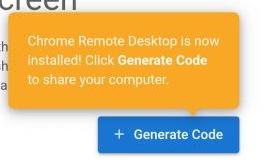
Step 2: Follow the instructions to download and install Chrome Remote Desktop, then click Generate Code under Share this screen.
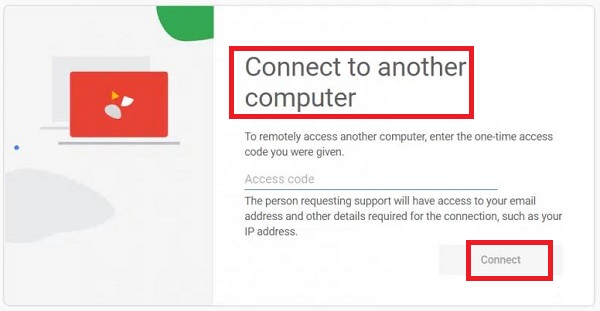
Step 3: On another computer, go to remotedesktop.google.com. Under Connect to another computer, enter the generated code and click Connect.
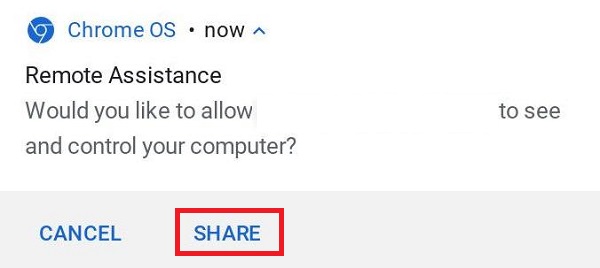
Step 4: On the remote computer, you will be asked if you want to allow remote users to see and control your computer. Click on Share and you are ready for screen share remote assistance.
For Mac
Built-in Screen Sharing Tool
macOS comes with a built-in screen-sharing app called Screen Sharing. It's pretty simple to use. Just use your Apple ID email address to share your device screen with another device easily. Remember, for this to work smoothly, both devices need to have a good and strong internet connection. If the internet is not strong, it might not work, or the screen sharing could be bumpy.
Step-by-Step Guide
Follow the actions below on the target device to share your screen in the screen-sharing app:
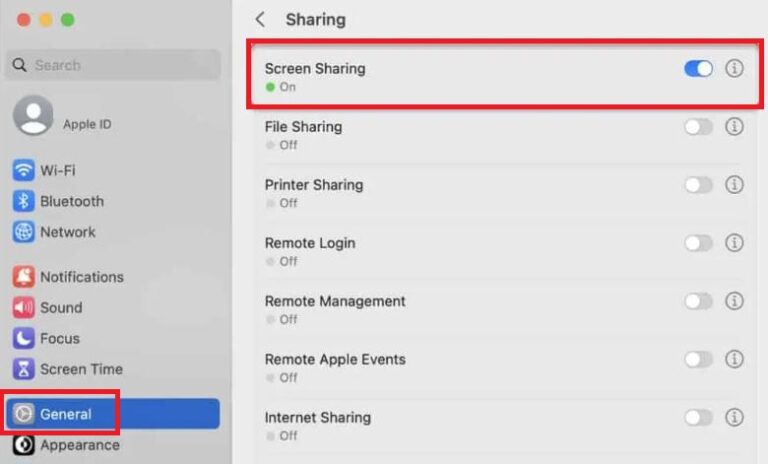
Step 1: Make sure the Mac you want to access has Screen Sharing turned on in System Settings. Go to Apple menu > System Settings > General > Sharing and turn on screen sharing permissions.
Step 2: Next, open the Screen Sharing app on your Mac. You can tap the Launchpad icon in the program dock and type Screen Sharing in the search field.
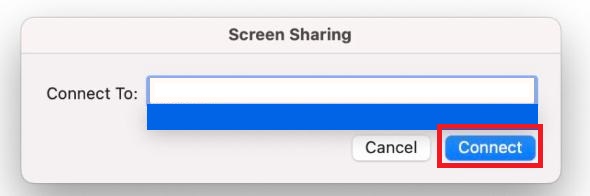
Step 3: Click the Add connection button, enter the hostname or Apple ID of the remote Mac, and click Connect.
Step 4: On a remote Mac, you will receive a notification for screen sharing, which you can choose to accept or decline. After accepting the screen sharing, you can also choose to control the screen or observe the screen. Once the options are all set, you can start screen share remote assistance.

Screen Share via Messages/FaceTime
Screen Share via Messages/FaceTime is a feature that allows you to share your device's screen with another person over Apple's built-in apps. This feature is available on iOS and macOS devices.
Step-by-Step Guide
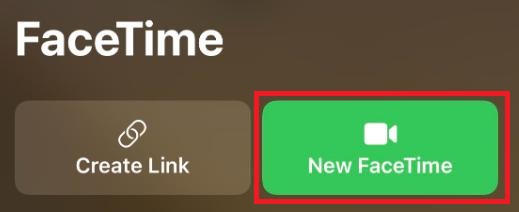
Step 1: Open FaceTime.
Step 2: Click New FaceTime or choose a recent contact and make the call.
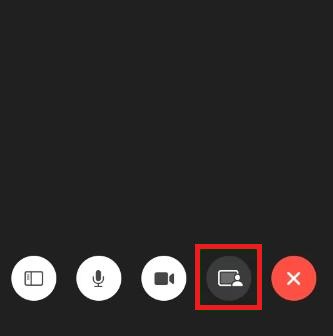
Step 3: Once the call connects, click the SharePlay icon.
Step 4: Select Window to share a specific window or Screen to share your entire screen. If you choose Window, you'll need to pick which app to share.
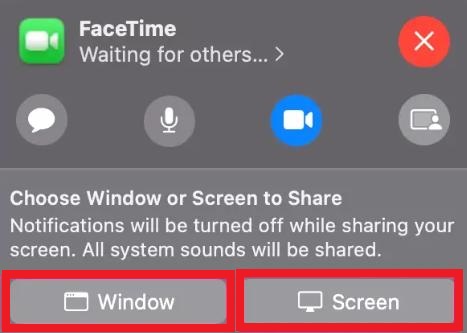
Participants in the FaceTime call can see the screen or window you shared until you decide to stop sharing.
Via Video Conferencing Software and Chat Applications
Some video conferencing software such as Zoom and Google Meet and chat applications such as Skype and Discord allow you to share your screen with other users for remote assistance. Here, we introduce one software screen share method for each type.
Google Meet
Google Meet is a video-conferencing service developed by Google that allows dozens of people to join the same virtual meeting and communicate with each other over video and text from anywhere with internet access. It is primarily designed for business and office use but can be used by anyone with a Google account.

Step-by-Step Guide
Step 1: Join your Google Meet session.
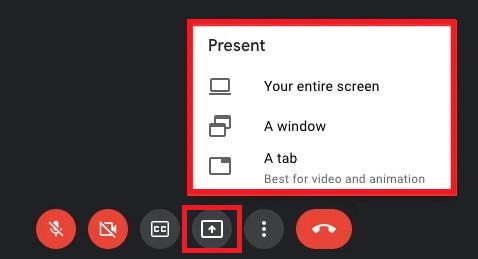
Step 2: Look at the icons in the toolbar at the bottom center of your screen and click on the Present now icon, which resembles a square with an arrow inside.

Step 3: In the pop-up menu, choose whether you want to share Your entire screen, a window, or a tab.
Step 4: Choose the part of your screen you want to share in the pop-up window. Then click on Share.
To finish presenting, select either Stop presenting in the top-right corner of the device screen or Stop in the top-left.
Discord
Discord, a free communication app, blends the voice chat features of services like Skype and Teamspeak with the text chat aspects of Internet Relay Chat (IRC) and instant messaging services. It's initially made for gamers but can be used by anyone with an internet connection. Discord lets you create or join servers, like chat rooms, where you can interact with different users through text, voice, and video.
![]()
![]()
Step-by-Step Guide
Step 1: Begin sharing your screen by opening Discord on your computer. On the app's left sidebar, select the server where you wish to share your screen.
Step 2: Once you've picked a server, join a voice channel within that server.
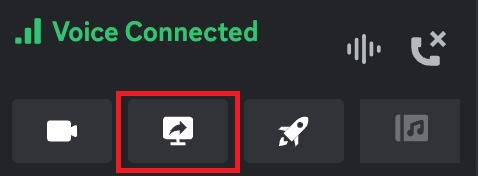
Step 3: Below your channel list, there's a section labeled Voice Connected. Now, click on the Share Your Screen option—it's an icon featuring a monitor with an arrow in it.
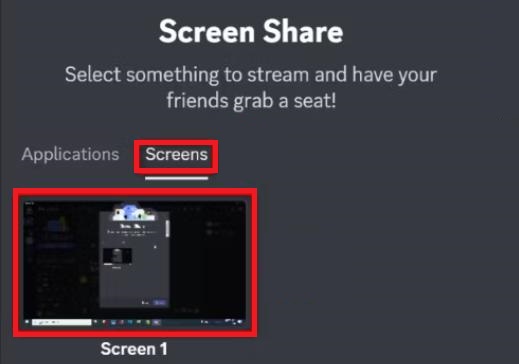
Step 4: A box labeled Screen Share will appear. To share your entire screen, click on the Screens tab and select your screen.
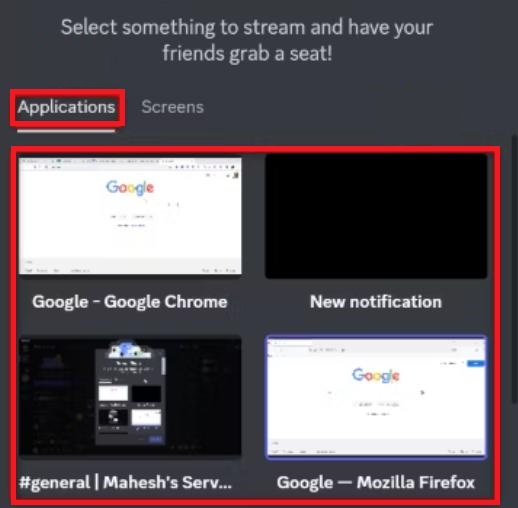
Step 5: To share a particular app window, like a Firefox window, go to the Applications tab and pick your app window. Let's proceed with this choice.
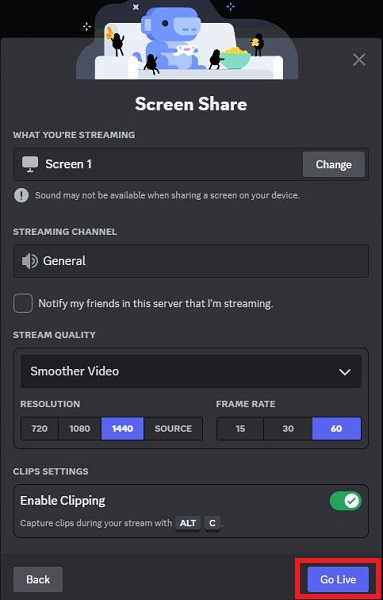
Step 6: Additional screen-sharing options will appear once you've chosen a window to share. Discord has already filled in the "What You're Streaming" and "Streaming Channel" options. After all options including Stream Quality are set, click Go Live.
Step 7: A floating window will appear on your screen, showing the content of the app you selected. This is the material that Discord is currently sharing in your chosen channel.
To end your screen sharing, move your cursor over the floating window and select the "X" in the window's bottom-right corner.
What Other Features Can Improve Remote Assistance Besides Screen Sharing
Screen share is the most intuitive and primary tool for remote assistance. However, remote assistance is an ever-evolving field for businesses and remote workers, and other features can make remote assistance more efficient. Now, let's explore what other features can facilitate remote assistance:
File Transfer
Allows user-to-user file exchange and is essential for providing necessary documents and troubleshooting materials. In remote assistance, the technician can send an instructional document to the customer for a text explanation, and the customer can follow the instructions to troubleshoot the problem.
Live Chat
Live chat is also an essential tool in remote assistance, allowing you to express yourself in real-time in screen sharing, effectively facilitating communication and understanding.
Remote Control
Provides support agents to control the user's device, facilitating hands-on assistance and problem-solving. Some remote problems can be complex to resolve even after multiple communications, and remote control allows the technician to troubleshoot by directly controlling the customer's equipment.
Annotation Tools
Enables users and support agents to draw or highlight specific areas on a shared screen to increase clarity during description. Features such as shared whiteboards or collaborative document editing enhance teamwork and problem-solving during remote sessions.
Conclusion
The dynamic landscape of remote assistance thrives on screen sharing, empowering collaboration and problem-solving. While various tools offer unique approaches, AirDroid Remote Support emerges as a standout solution, excelling in versatility and user-friendly features.
As the digital landscape evolves and the need for remote assistance increases, AirDroid's holistic approach sets the standard for efficient, user-centered screen share remote assistance, making it the preferred choice for seamless, effective collaboration.


Leave a Reply.