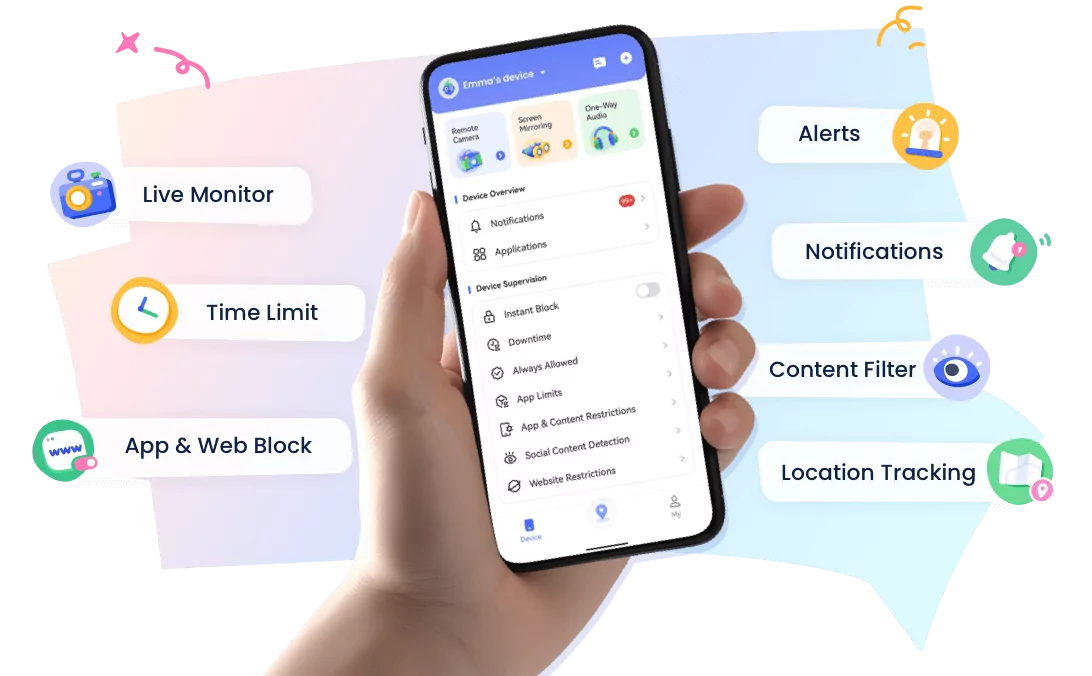
AirDroid Parental Control
24/7 Kids' Guardian via App & Web
- 👀Live surroundings and location tracking
- 🔞Content Monitoring and App/Web Blocking
- ⚠Instant alerts for online risks and geofences
- ⌛Screen time control and monitor
15+ Creative and Fun Summer Crafts for Kids: Easy DIY Ideas for Every Age!
Summer may be a break from school, but it's the perfect time for kids to flex their creative muscles.
And let's be honest: instead of hearing the dreaded words "I'm boooored!" as a parent, wouldn't it be nice to have some easy, mess-free crafts that keep little hands busy (and maybe even teach them something).
That's exactly why we've curated this handy guide where you'll find nearly 20 summer crafts for kids of all ages—from toddlers to tweens—plus easy DIY ideas using recycled materials, nature finds, and everyday supplies. Whether you're indoors or outside, there's something here for every mood, mess level, and mini maker.
Summer Crafts for Toddlers (1–3 years)
Toddlers are naturally curious and love exploring new textures, colors, and sounds, however, they aren't yet ready for complex problem solving or critical thinking.
The best summer crafts for this age are all about hands-on fun, not perfection. Think simple materials, easy movements, and a splash of mess. Here are four creative craft ideas for toddlers that are safe, engaging, and take under 15 minutes to set up:
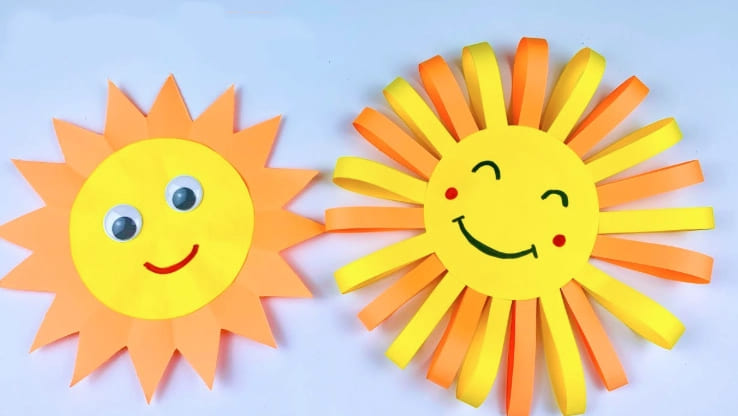
1Paper Plate Sun Faces
Here's a craft that'll help your child learn about shapes, emotions, and colors, as well as bring a little dose of sunshine indoors. The end result? A happy sun, and (hopefully) a happy toddler.
What You'll Need:
- Paper plates
- Yellow paint or crayons
- Orange and yellow construction paper
- Glue stick or tape
- Googly eyes (or markers if not available)
Steps:
- 1. Have your toddler color or paint the plate yellow.
- 2. Help them tear or cut strips of paper to make sun rays.
- 3. Tape or glue the strips around the edge of the plate.
- 4. Let them stick on googly eyes or draw a smiley face using markers in the center.
You can even talk about other feelings by switching up the face—happy sun, sleepy sun, silly sun! These plates also make for a super cute wall decoration, which is a bonus.
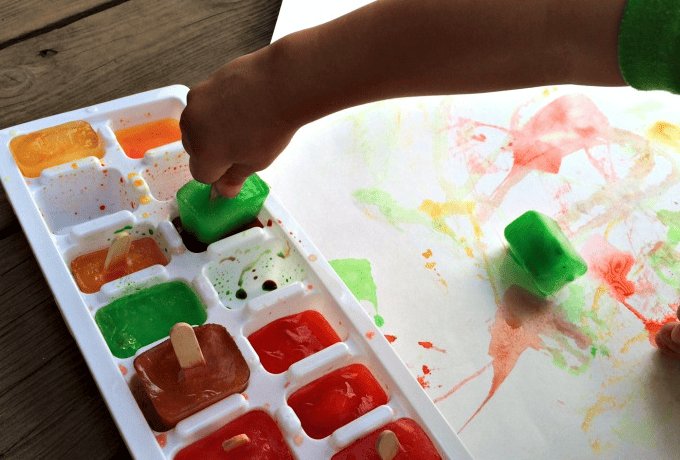
2Frozen Paint Cubes
This craft is perfect for a hot day! Your kid gets to play with colors, watch the ice melt, and create their very own artwork, no paintbrushes needed.
What You'll Need:
- Washable paint
- Ice cube tray
- Popsicle sticks or toothpicks
- White paper or cardstock
Steps:
- 1. Mix washable paint with a little water and pour into an ice cube tray.
- 2. Stick popsicle sticks into each section and freeze.
- 3. Once frozen, pop the cubes out and let your toddler "paint" on paper with the melting colors.
The cold cubes keep them engaged longer, and the melting paint creates beautiful, abstract art. Just make sure to do this one outdoors or on a washable surface. It can be slightly messy, but in a delightful way.
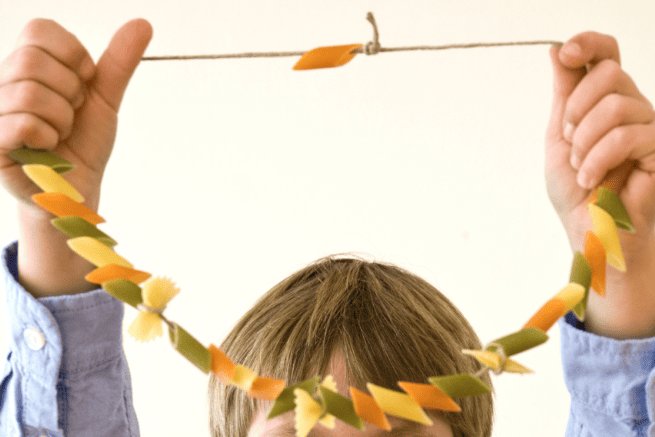
3Colorful Pasta Necklaces
Who needs fancy beads? With a little prep, you can turn dry pasta into a toddler-friendly jewelry project they'll love showing off. Here's a fun indoor activity that'll help your kid build hand-eye coordination while making their own wearable art.
What You'll Need:
- Dry pasta with big holes (penne, rigatoni)
- Food coloring
- Vinegar
- Ziplock bags
- Yarn or shoelaces with taped ends
Steps:
- 1. Dye the pasta: Add a few drops of food coloring and a splash of vinegar to a ziplock bag. Toss in pasta and shake. Let dry overnight.
- 2. Cut the yarn to necklace length and tape the end to make threading easier.
- 3. Show your toddler how to thread the pasta and let them create their own design.
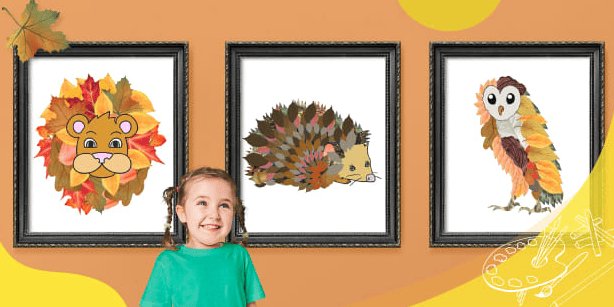
4Sticky Wall Nature Collage
If your kid loves collecting things outside, this is one of the best summer crafts for toddlers! It's a super-easy, mess-free way to turn twigs, leaves, and petals into a little piece of art.
What You'll Need:
- Clear contact paper
- Painter's tape
- Natural objects: leaves, petals, grass, feathers
- Optional: tissue paper or fabric scraps
Steps:
- 1. Tape a large piece of contact paper to a wall, sticky side facing out.
- 2. Head outside with your toddler to collect leaves, petals, and other soft items.
- 3. Let them press the objects onto the sticky surface to create a collage.
It's a great way to introduce your child to textures and patterns found in nature. Also, there's no glue or cleanup required. You can also change up with new materials anytime and explore different themes.
Summer Crafts for Preschoolers (3–5 years)
Preschoolers are bursting with imagination and curiosity. At this stage, they love asking questions, experimenting with new tools, and showing off their creations. They're ready for a bit more structure than toddler crafts, with plenty of room for creativity.
These summer crafts for preschoolers are designed to match their growing skills while keeping things simple, safe, and a lot of fun:
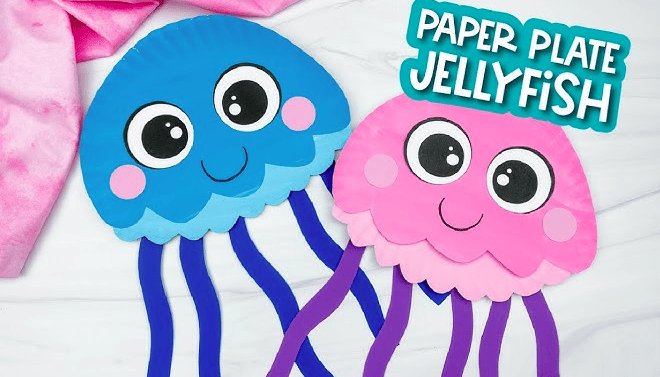
5Paper Plate Jellyfish
If your preschooler is fascinated by sea creatures, they'll love turning a simple paper plate into a jellyfish with flowing, colorful tentacles. It's a great mix of painting, gluing, and identifying colors, and the finished jellyfish look adorable hanging in a window or on the fridge.
What You'll Need:
- Paper plate (cut in half)
- Paint, markers, or crayons
- Strips of ribbon, yarn, or crepe paper
- Googly eyes or sticker eyes
- Glue and scissors
Steps:
- 1. Have your preschooler paint or color the plate half any color they like—rainbow jellyfish are totally allowed!
- 2. Cut strips of ribbon or paper to make the tentacles.
- 3. Glue the strips to the flat edge of the plate so they hang down.
- 4. Add googly eyes or draw on big cartoon eyes to bring your jellyfish to life.
For a fun twist and extra learning, try counting the tentacles together for a little math moment! You can also punch a hole at the top and hang it with string to make it swing.
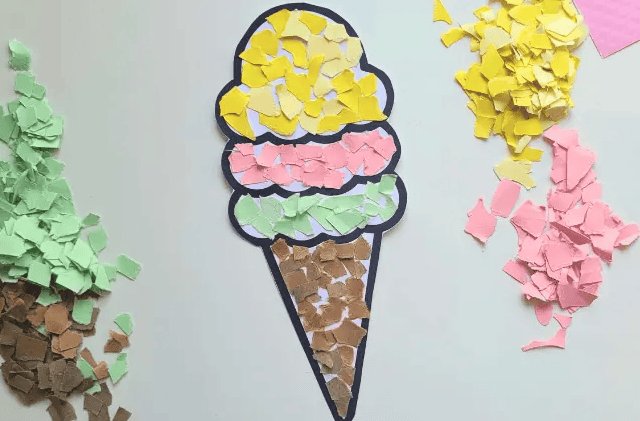
6Ice Cream Cone Tearing Collage
This summer-inspired craft is simple, fun, and perfect for working those fine motor skills. Tearing paper is great for building finger strength, and pretending you're building your own ice cream sundae? Even better.
What You'll Need:
- Brown construction paper (cone)
- Colorful paper (ice cream scoops)
- Glue stick
- Safety scissors (optional)
- Cotton balls or pom-poms (optional toppings)
Steps:
- 1. Cut or tear brown paper into a triangle for the cone.
- 2. Tear colorful paper into scoop shapes. No perfect circles needed—just rounded blobs!
- 3. Glue scoops on top of the cone.
- 4. Add cotton balls or pom-poms for whipped cream, sprinkles, or cherries.
For some extra fun, let your kids name each scoop and make a whole "menu." Cherry cloud swirl? Dinosaur bubblegum? The sillier, the better. Creative storytelling = bonus skill points!
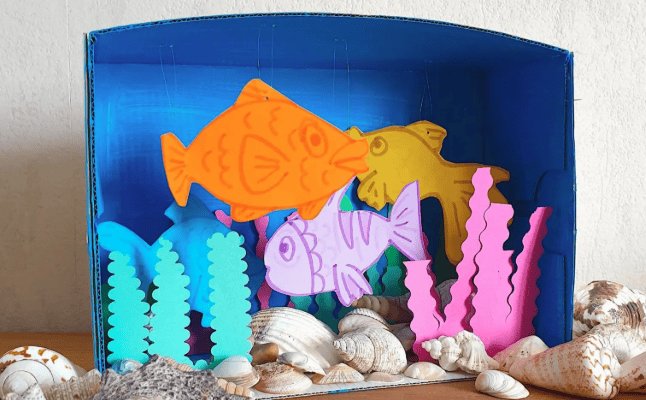
7Shoebox Aquarium
One of the best summer ideas for preschoolers involves building a tiny ocean world your child can peek into and play with. It's fun, colorful, and perfect for curious little ones who love sea animals, stories, or pretend play. Best of all, it uses things you probably already have at home!
What You'll Need:
- An empty shoebox
- Blue paint or construction paper
- String or yarn
- Tape or glue
- Paper, scissors, and crayons
- Seashells, foil, sand, googly eyes (optional)
Steps:
- 1. Line the inside of the shoebox with blue paper or paint it to look like water.
- 2. Help your child draw and cut out simple fish, seaweed, or jellyfish.
- 3. Tape string to the top of each cut-out and hang them from the top of the box so they "float" inside.
- 4. Decorate the bottom with shells, paper rocks, or foil "treasure."
- 5. Close the box lid halfway to create a shadowy, underwater feel.
Once it's done, your child can move the fish around, tell stories, or even name all the sea creatures they made. It can also be a fun way to spark storytelling, just ask your child what's happening in their ocean scene!
Summer Crafts for School-Age Kids (5–10 years)
So, your kid has passed preschool. They're now full of ideas and starting to take real pride in making things "all by themselves."
To cater to their independence, the following summer crafts for school-age kids are fun, screen-free boredom busters that give kids room to explore, create, and feel accomplished:
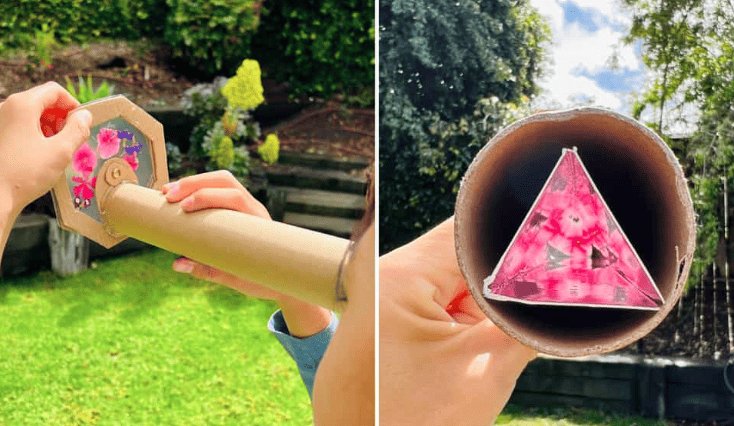
8DIY Kaleidoscope
Why just look at colors when you can make them dance? This simple science-meets-art project lets kids build their own kaleidoscope and watch the magic happen right in their hands. Kids can learn about light and reflection while designing a popular scientific instrument.
What You'll Need:
- Empty toilet paper roll
- Aluminum foil
- Clear plastic (from packaging or sandwich lids)
- Colored beads or sequins
- Tape, scissors, construction paper
Steps:
- 1. Line the inside of the toilet roll with foil (shiny side in).
- 2. Tape a piece of clear plastic over one end to make a window.
- 3. Fill the window with a mix of colorful beads and sequins.
- 4. Seal it with another piece of clear plastic.
- 5. Decorate the outside with construction paper, stickers, or washi tape.
Pro Tip: Use colored plastic gems for extra sparkle when turned in sunlight.
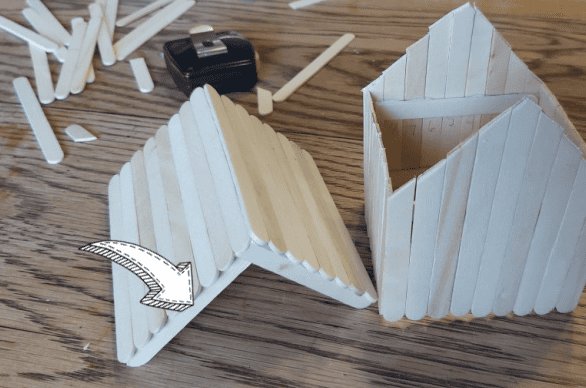
9Popsicle Stick Birdhouse
If your kid loves building structures, this project can be a summertime favorite. It's simple, satisfying, and leaves you with a cute wooden house that birds might call home. Meanwhile, it also teaches patience, coordination, and simple building skills which can be extremely useful.
What You'll Need:
- Popsicle sticks (craft sticks)
- White glue or hot glue (with supervision)
- Cardboard square (for base)
- Paints and brushes
- String (optional, for hanging)
Steps:
- 1. Start by gluing craft sticks side by side onto the cardboard base to form the floor.
- 2. Stack and glue sticks around the edges to build up the walls.
- 3. Use sticks to create a roof—triangle style or slanted.
- 4. Once dry, paint and decorate it however they like.
- 5. Add a loop of string if they want to hang it outside.
You can even sprinkle birdseed nearby and turn it into a mini nature-watching activity!
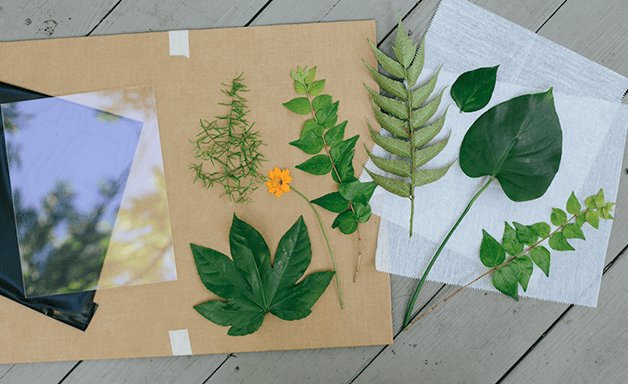
10Sunprint Art (DIY Nature Cyanotypes)
This STEM-based project lets kids create beautiful prints using only the sun and a few natural objects. It's a cool way to show how sunlight affects color—and the results are frame-worthy!
What You'll Need
- Dark construction paper or sunprint paper
- Leaves, flowers, feathers, or small toys
- Clear plastic wrap or cardboard sheet (to hold items in place)
- Sunny outdoor space
Steps:
- 1. Place leaves or objects on the paper in a pattern or scene.
- 2. Carefully cover with plastic wrap or hold flat with cardboard.
- 3. Leave in direct sunlight for 10–20 minutes.
- 4. Remove objects to reveal your custom silhouette print.
Summer crafts spark imagination, but screen time can sneak in too. With AirDroid Parental Control, you can:
Set app time limits, Block distractions during DIY time.
Summer Crafts for Teens (10+ years)
Tweens may be "too cool" for finger painting, but hand them a DIY project that feels creative, personal, or a little trendy—and they're all in. At this age, kids are ready for crafts that look good, serve a purpose, or let them express their style. These summer crafts for tweens are designed to:
- Show off their personal style (think Instagram-worthy results)
- Challenge their creativity with more advanced techniques
- Create something they'll actually use (no clutter allowed!)
11DIY Tie-Dye Beach Towels
This one's part art project, part fashion statement. Tweens love making something they can actually use, especially if it's colorful and one-of-a-kind. These towels are perfect for beach days, pool hangs, or just lounging around in style.

What You'll Need:
- White cotton towel
- Tie-dye kit or fabric dye
- Rubber bands
- Gloves and plastic table cover
Steps:
- 1. Lay out the towel and scrunch, spiral, or fold it into your desired pattern.
- 2. Wrap rubber bands tightly around different sections.
- 3. Apply dye according to kit instructions (gloves highly recommended!).
- 4. Let it sit for 6–8 hours, then rinse and wash separately.
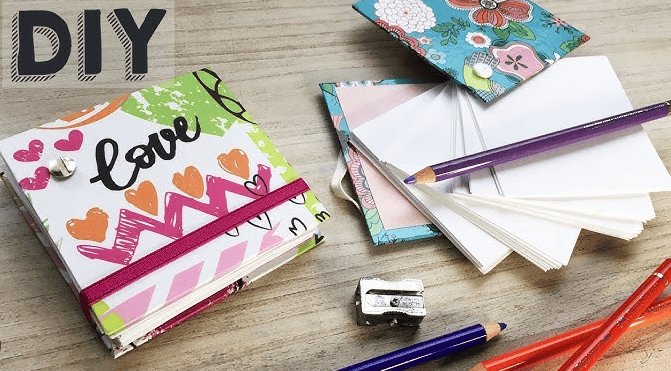
12Personalized Journals or Sketchbooks
For those who love to write, draw, or doodle, our next craft turns a plain notebook into a reflection of their personality. Tweens have a lot going on in their heads, and this will give them a fun way to express it, making it feel extra special.
What You'll Need:
- Plain notebook or sketchbook
- Scrapbook paper, washi tape, stickers
- Mod Podge or glue
- Alphabet stencils or stamps (optional)
Steps:
- 1. Cover the front and back of the notebook with patterned or colored paper.
- 2. Decorate with stickers, quotes, initials, or drawings.
- 3. Seal the design with a layer of Mod Podge for a polished finish.
For a nifty upgrade, add corner bookmarks with ribbon or pressed flowers. They can use this for sketching, journaling, list-making, or even creating a summer bucket list. This one also makes a great gift, or a summer diary to fill with memories.
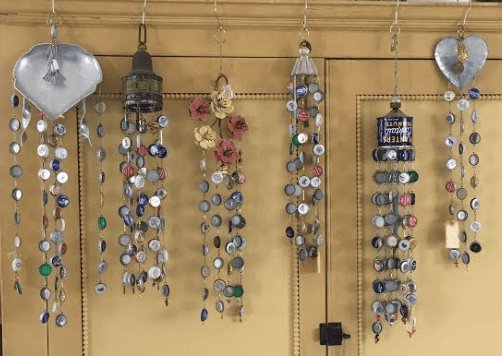
13Bottle Cap Wind Chimes
Turn soda bottle caps into a musical and colorful backyard decoration that's both eco-friendly and artistic. It's a great way to upcycle and get creative with patterns and sound.
What You'll Need:
- Bottle caps (metal or plastic)
- Acrylic paint and paintbrushes
- Fishing line or string
- Nail and hammer (for making holes—adult help advised)
- Small sticks or embroidery hoop (for top)
Steps:
- 1. Paint the bottle caps in bright colors and let dry.
- 2. Carefully hammer a small hole in each cap (parents, this part's for you).
- 3. Thread fishing line through the holes and tie to your base stick or hoop.
- 4. Hang it outside and enjoy the gentle summer sounds.
Pro Tip: Add beads between caps for extra sparkle and sound.
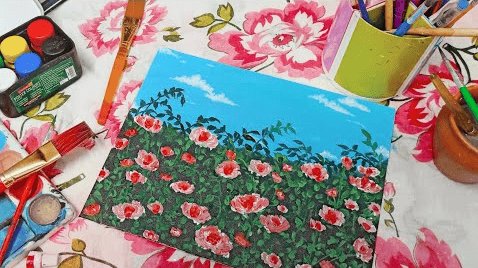
14Mini Canvas Wall Art
Tweens love decorating their own space, and these small, stylish canvases are the perfect outlet to channel their inner artist. They can create bold abstract pieces, paint meaningful quotes, or just experiment with color and shapes.
What You'll Need:
- Small canvas boards or thick cardboard squares
- Acrylic paint, brushes, or paint pens
- Optional: stencils, tape for patterns, glitter, stickers
Steps:
- 1. Set up a painting space (outside is great for cleanup).
- 2. Let them paint abstract designs, favorite quotes, or geometric patterns.
- 3. Layer in glitter, gems, or stickers to add texture and flair.
- 4. Once dry, prop on a shelf or mount with removable adhesive.
This is a craft that actually looks good on a bedroom wall, and no two are alike. Your kids can basically create their own gallery wall with these mini masterpieces. Some style ideas you can try are galaxy swirls, quotes, or emoji replicas.
Get More Summer Craft Ideas
Summer crafting doesn't have to be complicated, or expensive. These simple, budget-friendly projects use everyday materials, encourage sustainability, and let kids explore their creativity without boundaries. Whether you're looking for upcycling cardboard or collecting shells at the beach, these projects make the most of what you already have:
15Recycled Magazine Collage Faces
This is a hilarious one, and a great excuse to turn old magazines or junk mail into Picasso-style portraits while teaching kids about reusing materials.
What You'll Need:
- Old magazines or catalogs
- Safety scissors
- Glue stick
- Construction paper or cardboard backing
Steps:
- 1. Flip through magazines and cut out eyes, noses, lips, and accessories.
- 2. Glue the pieces onto a paper base to create silly or realistic faces.
- 3. Add drawn-on details or speech bubbles for fun storytelling.
The results are guaranteed to get laughs. For some extra fun, challenge kids to create a self-portrait (or their friends' portraits) using only magazine cutouts!
16Upcycled T-Shirt Tote Bag
Turn an old shirt into a stylish, reusable tote bag your kids can use at the library, beach, or for toy storage. You don't need any sewing skills for this project.
What You'll Nee:
- Old T-shirt
- Scissors
- Ruler and pencil
Steps:
- 1. Cut off the sleeves and neckline to create handles.
- 2. Cut slits along the bottom hem (both front and back layers).
- 3. Tie each front strip to its matching back strip in a tight knot.
- 4. Flip inside out for a clean look.
It's simpler than you think, and this can be a cool intro to upcycling for your kid. They can learn the value of creating useful objects out of scrap while having fun.
17Sand Art Jars
Layered sand in a jar makes for a mesmerizing keepsake or calming desk decor. It's a great way to capture beach memories without the mess of actual sandcastles.
What You'll Need:
- Clean, clear jars or plastic containers
- Colored craft sand (or dye your own with food coloring and salt)
- Funnel or spoon
Steps:
- 1. Use a funnel or spoon to layer colored sand into the jar.
- 2. Gently tap the jar to settle the layers.
- 3. Seal with the lid and decorate the outside if desired.
Pro tip: Let kids "design" a custom color scheme, like a Pokemon or Mickey Mouse themed jar.
18Leaf Rubbing Art
Chances are you (and your kid) have already done this before. It's such a classic activity that helps kids appreciate the patterns and textures in nature. But if you've never tried it with your kid, now is a great time.
What You'll Need
- Assorted leaves
- Crayons (peeled) or colored pencils
- White paper
Steps:
- 1. Place a leaf underneath the paper.
- 2. Rub the side of the crayon gently over the paper to reveal the leaf's texture.
- 3. Use different colors and leaves to make a full collage.
Conclusion
The true magic of these summer holiday craft ideas isn't just in the finished creations—it's in the muddy hands and the quiet focus of a child fully immersed in making something theirs.
Every parent knows the feeling when their kid says "Look what I made!" with pride. These moments become the quiet highlights of summer.
Now that you've got plenty of inspiration, all that's left is to pick your favorite project and start making!


Leave a Reply.