How to Use Steam Deck on TV/Monitor?
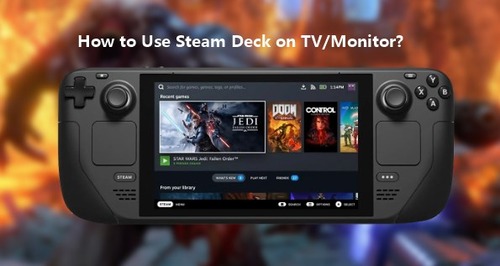
Every Steam Deck user has wondered how cool it would look to play these games on a large TV screen. But can Steam Deck connect to TV? Yes, it can. All you need is an HDMI cable or a docking station. Moreover, using the remote play feature, you can even connect both devices wirelessly. In this article, we'll share the detailed steps on how to connect Steam Deck to TV.
Hardware Requirements for Connecting Steam Deck to a TV
Before we begin connecting Steam Deck to TV, let's have a look at the system requirements:
- A properly working Steam Deck with a USB-C port
- An HDMI cable to connect Steam Deck to TV
- A USB C to HDMI adapter to connect the HDMI cable in the Type C port of the Steam Deck
- TV with an HDMI input
So, if you have an HDMI-supported TV and a working Steam Deck, then let's start linking Steam Deck to the TV.
How to Connect Steam Deck to TV via HDMI Cable?
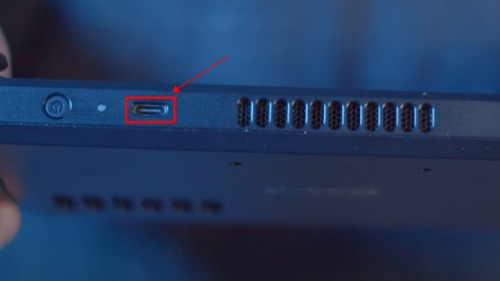
How does Steam Deck connect to TV via HDMI? Just like connecting a laptop to a TV, you can connect Steam Deck to a TV using an HDMI cable. However, Steam Deck doesn't have an HDMI port. For this, you'll have to use a USB C to HDMI adapter, and make sure your TV has an HDMI port. Here's how you can connect Steam Deck to TV with an HDMI cable:
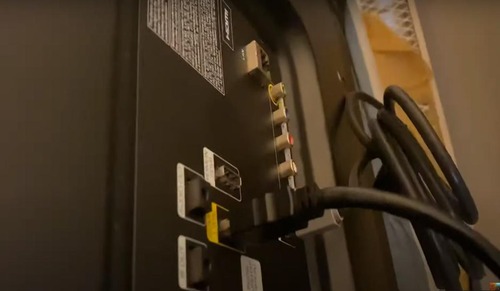
- Step 1.Locate a free HDMI port on your TV.
- Step 2.Clean it if it's dirty for better integration.
- Step 3.Plug one end of your HDMI cable into the TV port.
- Step 4.Connect the USB-C adaptor to the USB- C port of your Steam Deck.
- Step 5.Plug the other end of the HDMI cable into the USB-C adaptor.
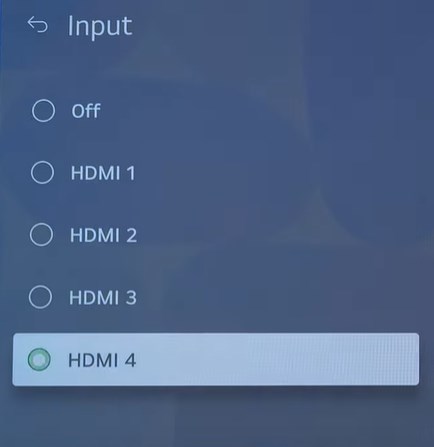
- Step 6.Next, turn on your TV and switch your TV's input to match your selected HDMI port.
- Step 7.Turn on your Steam Deck, which should recognize the HDMI display.
- Step 8.Next, head over to the system settings of the Steam Deck, then the hardware settings. Then, click Display and Monitor; configure your settings for an optimum display.



Congrats! You've connected Steam Deck to the TV through an HDMI cable, and you can view Steam Deck on TV now.
How to Connect Steam Deck to TV via Docking Station?
Though using an HDMI cable offers instant mirroring, it doesn't last long. Once the battery drains off, you'll have to plug out the HDMI cable from Steam Deck and plug in the charging cable.
However, a docking station has multiple Type C ports, and you can use one for screen mirroring and one for charging.
Furthemore, the remaining ports can be used to plug in the keyboard, mouse or external controllers for a versatile gaming experience. The process is way simpler than it seems. Here is how to connect Steam Deck to the TV using a docking station:
- Step 1.Plug one end of your HDMI cable into the free socket of the TV.
- Step 2.Connect the other end to the docking station output port.
- Step 3.You can connect any other accessories you like with the remaining ports.
- Step 4.Next, insert the cable of the dock into the USB-C port on Steam Deck.
- Step 5.Finally, connect your Steam Deck power supply to the socket of the USB-C docking station.
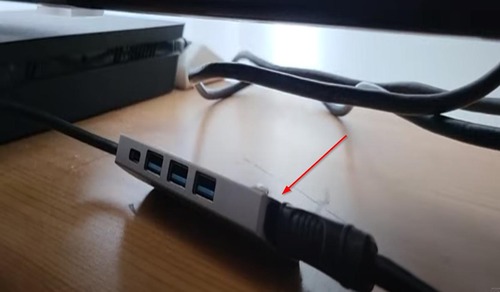

That's it! Now you can see Steam Deck stream to TV, and you can control Steam Deck and enjoy gaming on the big screen.
How to Connect Steam Deck to TV via Steam Link App?
Steam Link App was released by Valve to cast Steam Deck to TV with a breeze. Most smart TVs can install this app. Moreover, you can go to the official site of your smart TV to check if it supports the Steam Link App or not.
For instance, the Steam Link App is supported on the 2016-2023 models of Samsung Smart TV. Connecting Steam Deck to TV doesn't take hours. Here are the step-by-step instructions to connect Steam Deck to TV through the Steam Link App.
- Step 1.Turn on your smart TV and install the Steam Link App.
- Step 2.Follow the on-screen instructions and sign into your Steam account.
- Step 3.Next, turn on your Steam Deck and make sure it's connected to the same network as your smart TV.
- Step 4.Now in the Steam Link App on TV, find and select the Steam Deck controller.
- Step 5.Wait for the PIN and enter it on your Steam Deck.

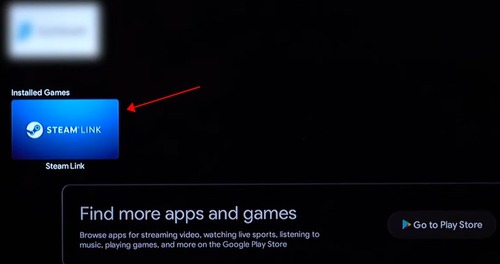
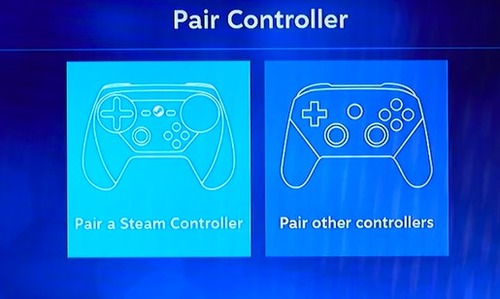
Now your steam deck is connected to the TV. To ensure smooth gameplay, connect both devices to high-speed internet.
How to Configure a Steam Deck for TV Gaming?
Steam Deck isn't primarily designed for TV gaming, which means you need to customize it to enjoy immersive gameplay. There are various tips that you can use to boost the Steam Deck on TV performance.
Use a Wireless Controller
The steam deck comes with built-in controllers, but when connecting it to a TV, it's better to opt for external controllers. External Bluetooth controllers don't tie you up with the chord. Moreover, they give that long-awaited console gaming vibe when coupled with a big screen.
You can pair Xbox, PlayStation and even Nintendo Switch controllers with your Steam Deck. Here's how to do it.
- Step 1.Turn on the wireless controller on your preferred controller and put it in pairing mode.
- Step 2.Next, on your Steam Deck, go to Settings.
- Step 3.In Settings, choose Bluetooth. Enable Bluetooth if it's turned off.
- Step 4.Your controller must be showing up there. Select it and it should connect.
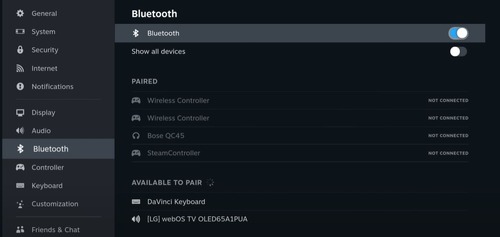
Or you can connect your controller to your Steam Deck via the the USB dongle or wired way. It depends on the controller you have.
Adjust the Display Settings
If the display on the TV is blurring or doesn't fit the orientation, you need to adjust the display settings on your Steam Deck. Most modern TVs come with a 16:9 resolution, but some older ones also have a 4:3, so make sure to read your TV's manual.
Confirmed your standard resolution? Now let's jump into adjusting the display settings on your deck.
- Step 1.Connect your Steam Deck to the TV with an HDMI cable or a docking station.
- Step 2.On your Steam Deck, go to settings and then Display.
- Step 3.From there, choose your preferred screen resolution.

Use a Stable WiFi Network
To ensure a seamless gameplay on your TV, you need a stable WiFi Network. Move your TV and Steam Deck close to the router. Moreover, if possible, connect your deck and TV with an ethernet cable. It offers better speed and lower latency compared to wireless connections.
Bonus: Screen Mirror PC to Steam Deck via AirDroid Cast
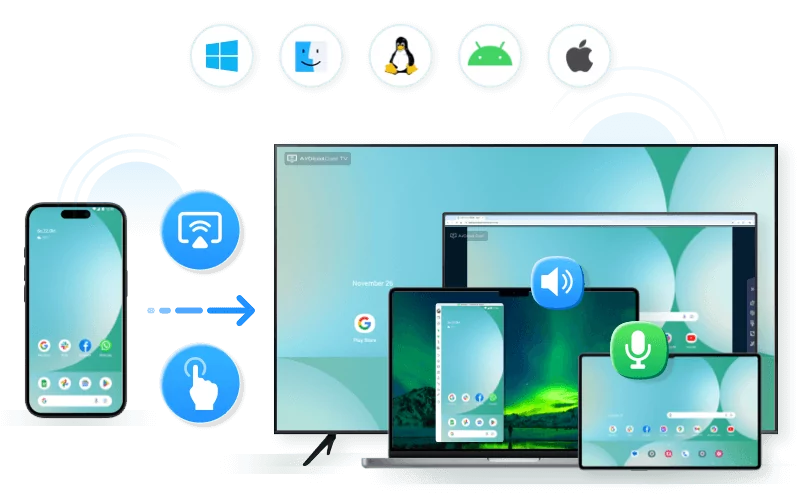
Aside from displaying Steam Deck on TV, another possible way to fiddle with your Steam Deck is to mirror your PC screen to the deck. If you plan to screen mirror PC to Steam Deck and want to skip the hassle of a messy wired connection, use AirDroid Cast. AirDroid Cast is a third-party screen mirroring software that instantly mirrors PC to Steam Deck.
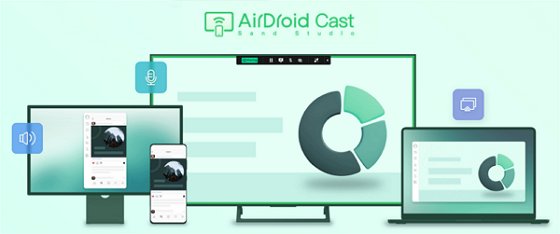
Using AirDroid Cast, you can control games on your deck and enjoy them on the big screen of your PC.
Moreover, the AirDroid webcast feature is completely free and easy to use. No tangled wired installation and no need to buy expensive docking stations. Just use the cast code provided by the AirDroid Cast web feature and link both devices within seconds. Here are the detailed steps for it:
- Step 1.Download and install AirDroid Cast on your PC and launch it. Then click Cast to.
- Step 2.Next, on your Steam Deck browser, go to webcast.airdroid.com and you will see the Cast Code.
- Step 3.Fill in the Cast Code on your PC, and it will start connecting.
- Step 4.Accept the requests and start broadcasting.
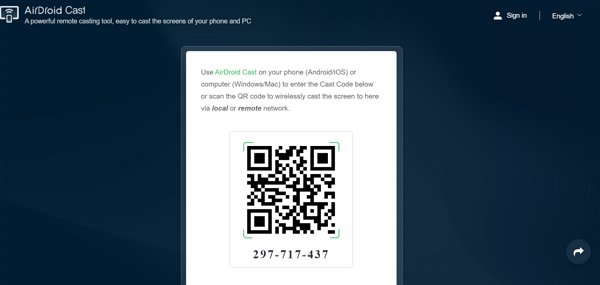
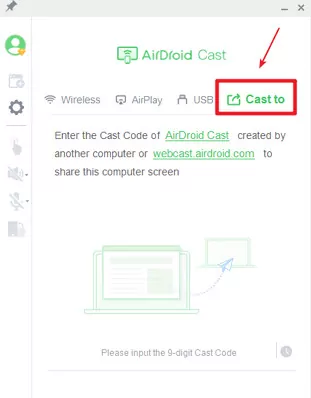
That's it. Now you can screen mirror your PC to Steam Deck and enjoy the buttery smooth gameplay.
Troubleshooting Steam Deck Not Showing or Working on TV
Although connecting Steam Deck to TV is a seamless process, you might experience some issues like no display on TV. Luckily you can fix it with simple troubleshooting methods.
Restart Devices
To start with, restart both your Steam Deck and TV. Restarting will remove any glitch that may have made its way while inserting the cables. Here's how to restart your Steam Deck:
- Step 1.Press and hold the power button on the top of your Steam Deck.
- Step 2.Once the pop up menu appears, navigate to the Restart option and tap it.
- Step 3.Wait for a few seconds, and the Steam Deck will restart.
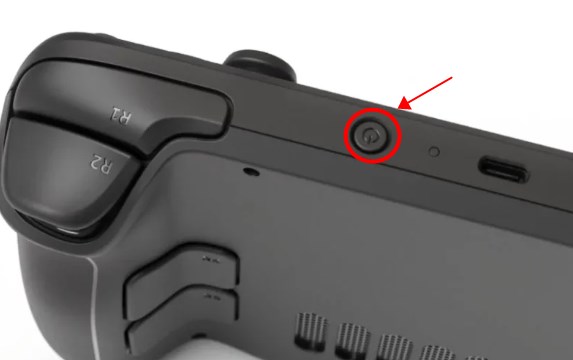
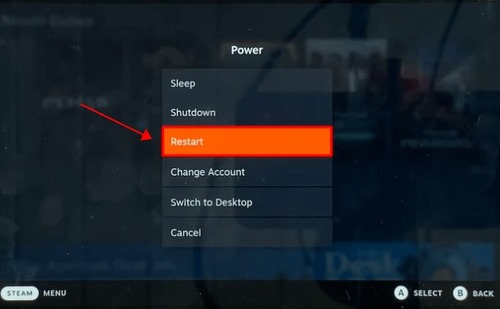
To restart your TV, simply turn it off using the power button on your remote, then plug out the power supply and plug it in again.
Check for Updates
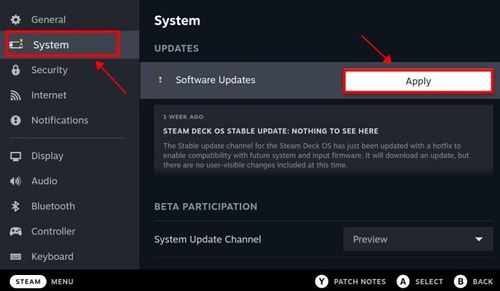
If restarting didn't solve the problem, then maybe your Steam Deck isn't updated to the latest version. Update it, and your problem shall be solved. Here's how to check for updates:
- Step 1.Press the Steam power button on the Steam Deck.
- Step 2.Choose Settings from the menu.
- Step 3.Next, choose System from the left-hand menu.
- Step 4.Finally, tap on Software Updates > Apply.
Select the Display Input for TV
If the problem still continues, then you need to check your display input for your TV. you might not have selected the right HDMI. For this:
- Step 1.Turn on your TV.
- Step 2.Under Display Input Settings, check if the right HDMI is selected or not.
Summary
So this was all about connecting Steam Deck to TV. Using an HDMI cable, you can connect in seconds. However, if you want to experience this immersive TV gaming for a longer period of time, then use the docking station. This way, you can mirror and charge your Steam Deck at the same time.
Moreover, if you want to stream Steam Deck on your PC, then try AirDroid Cast. Its webcast feature turns your PC screen into a thrilling Steam Deck gaming experience without charging a penny.





Leave a Reply.