Table of Contents


How to use Kiosk Launcher for AirDroid Business?
Table of Contents[ShowHide]
Kiosk Launcher is a feature of AirDroid Business that transforms Android devices into purpose-specific kiosks. It allows you to restrict device usage to specific apps and settings, ensuring that your devices are used effectively and securely.
In this article, we will walk you through how to use the Kiosk Launcher with AirDroid Business.
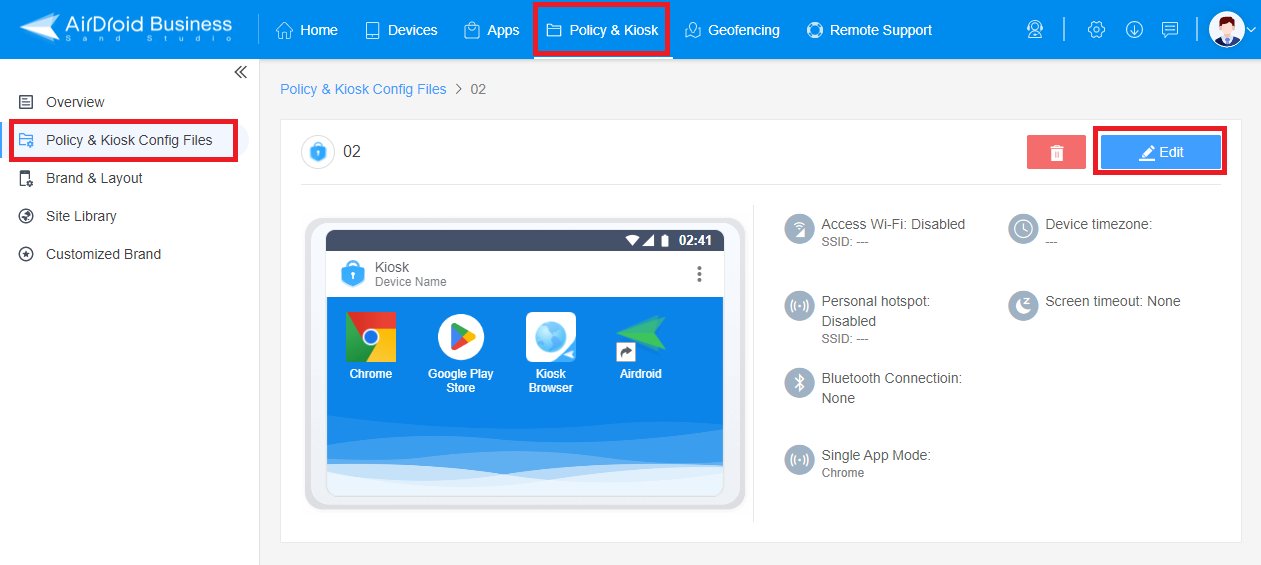
- Step 1Access Kiosk Launcher
- For Kiosk Launcher's settings, please go to Admin Console > Policy & Kiosk > Policy & Kiosk Config File > Any Kiosk-related Config file > Kiosk Launcher.
- Step 2Configure Kiosk Launcher Settings
- Within the Kiosk Launcher setting, you will find three main sections:
- Single App Mode
- Home Screen
- Notification Center
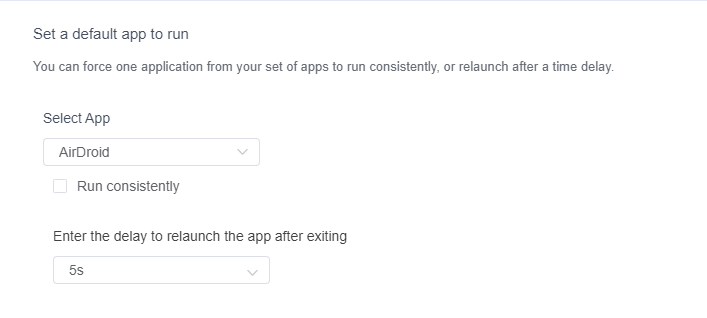
1Single App Mode
- You can use Single App Mode to force one application from your set of apps to run consistently, or relaunch after a time delay.
1Select App
- Choose a default App only to run under Kiosk mode from the drop-down box.
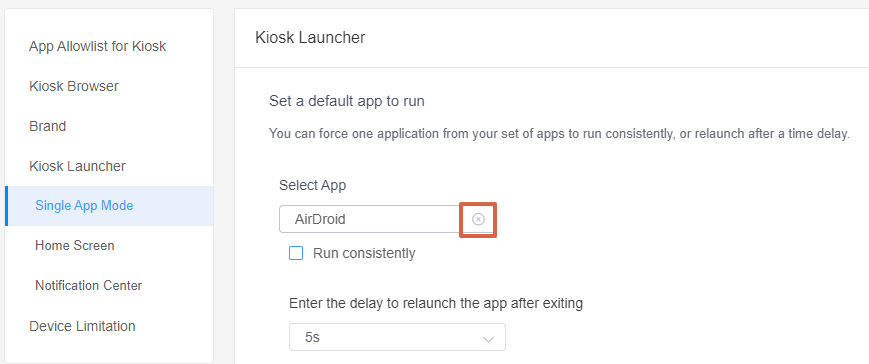
- You can also disable the Single App Mode by clicking on the icon.
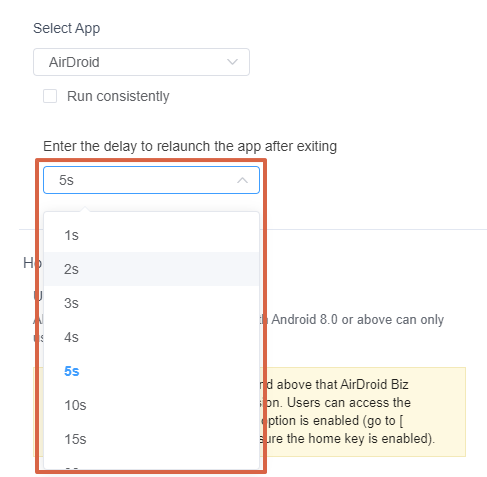
2Relaunch Duration
- Define the duration of relaunching the App.
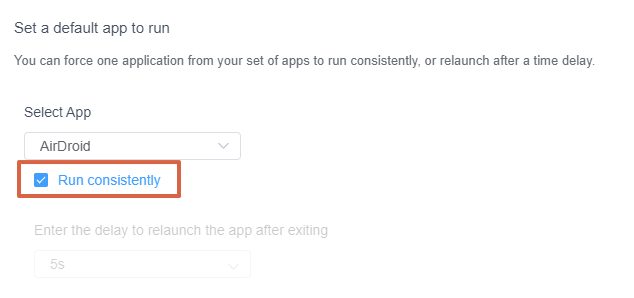
- ● Run consistently
- For some single-purpose Kiosk devices, we suggest you enable Keep Running to avoid users tempered with your devices.
- ● Enter a delay to relaunch the browser (In seconds)
- If you want to exit Kiosk from your device, you can select the interval (1s - 15 min) for relaunching the browser/app.
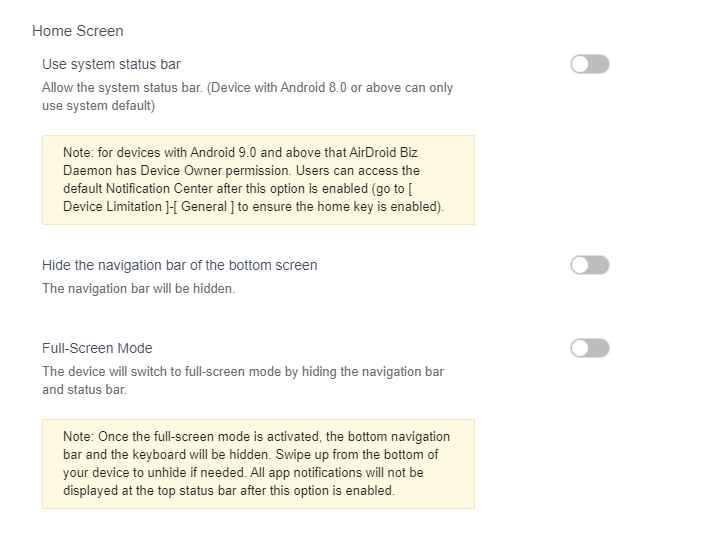
2Home Screen
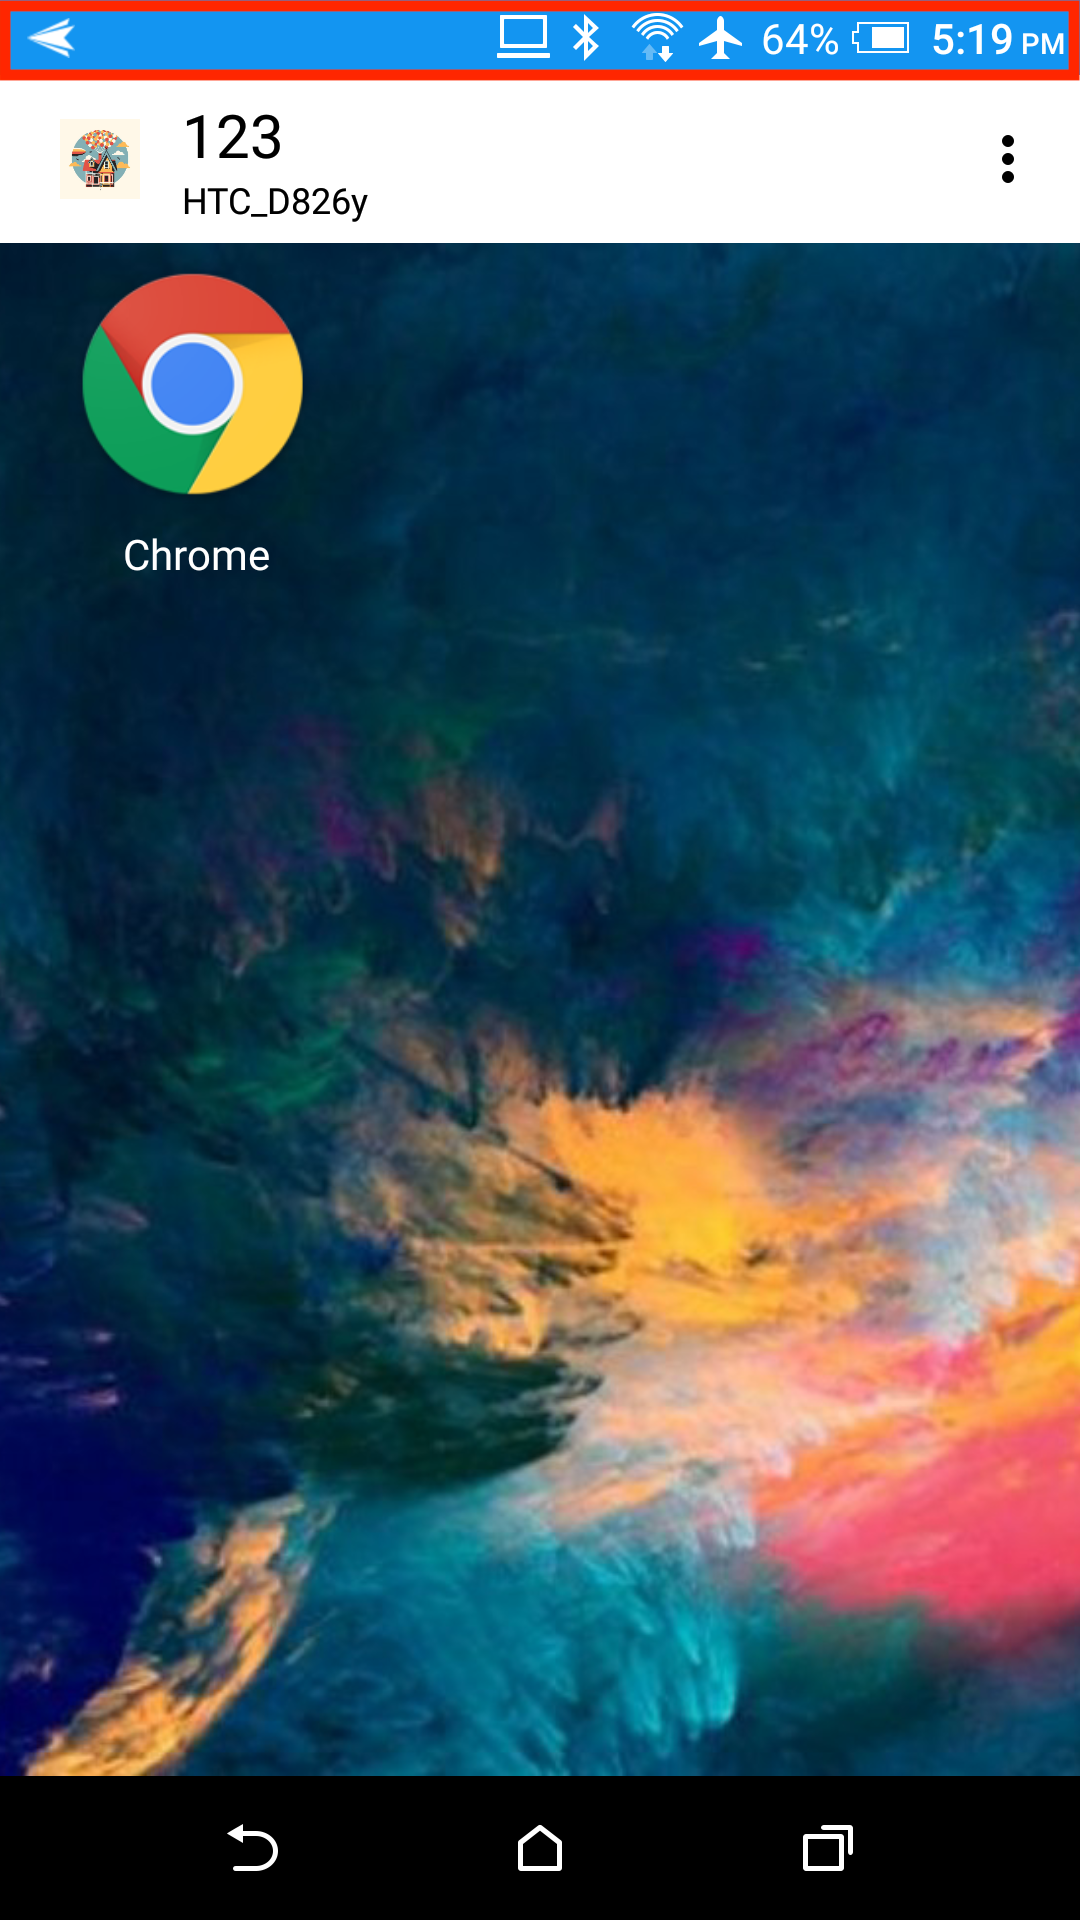
1 Use system status bar
- This option allows or disables the system status bar.
- If you enable this option, you will see more information about the system bar.
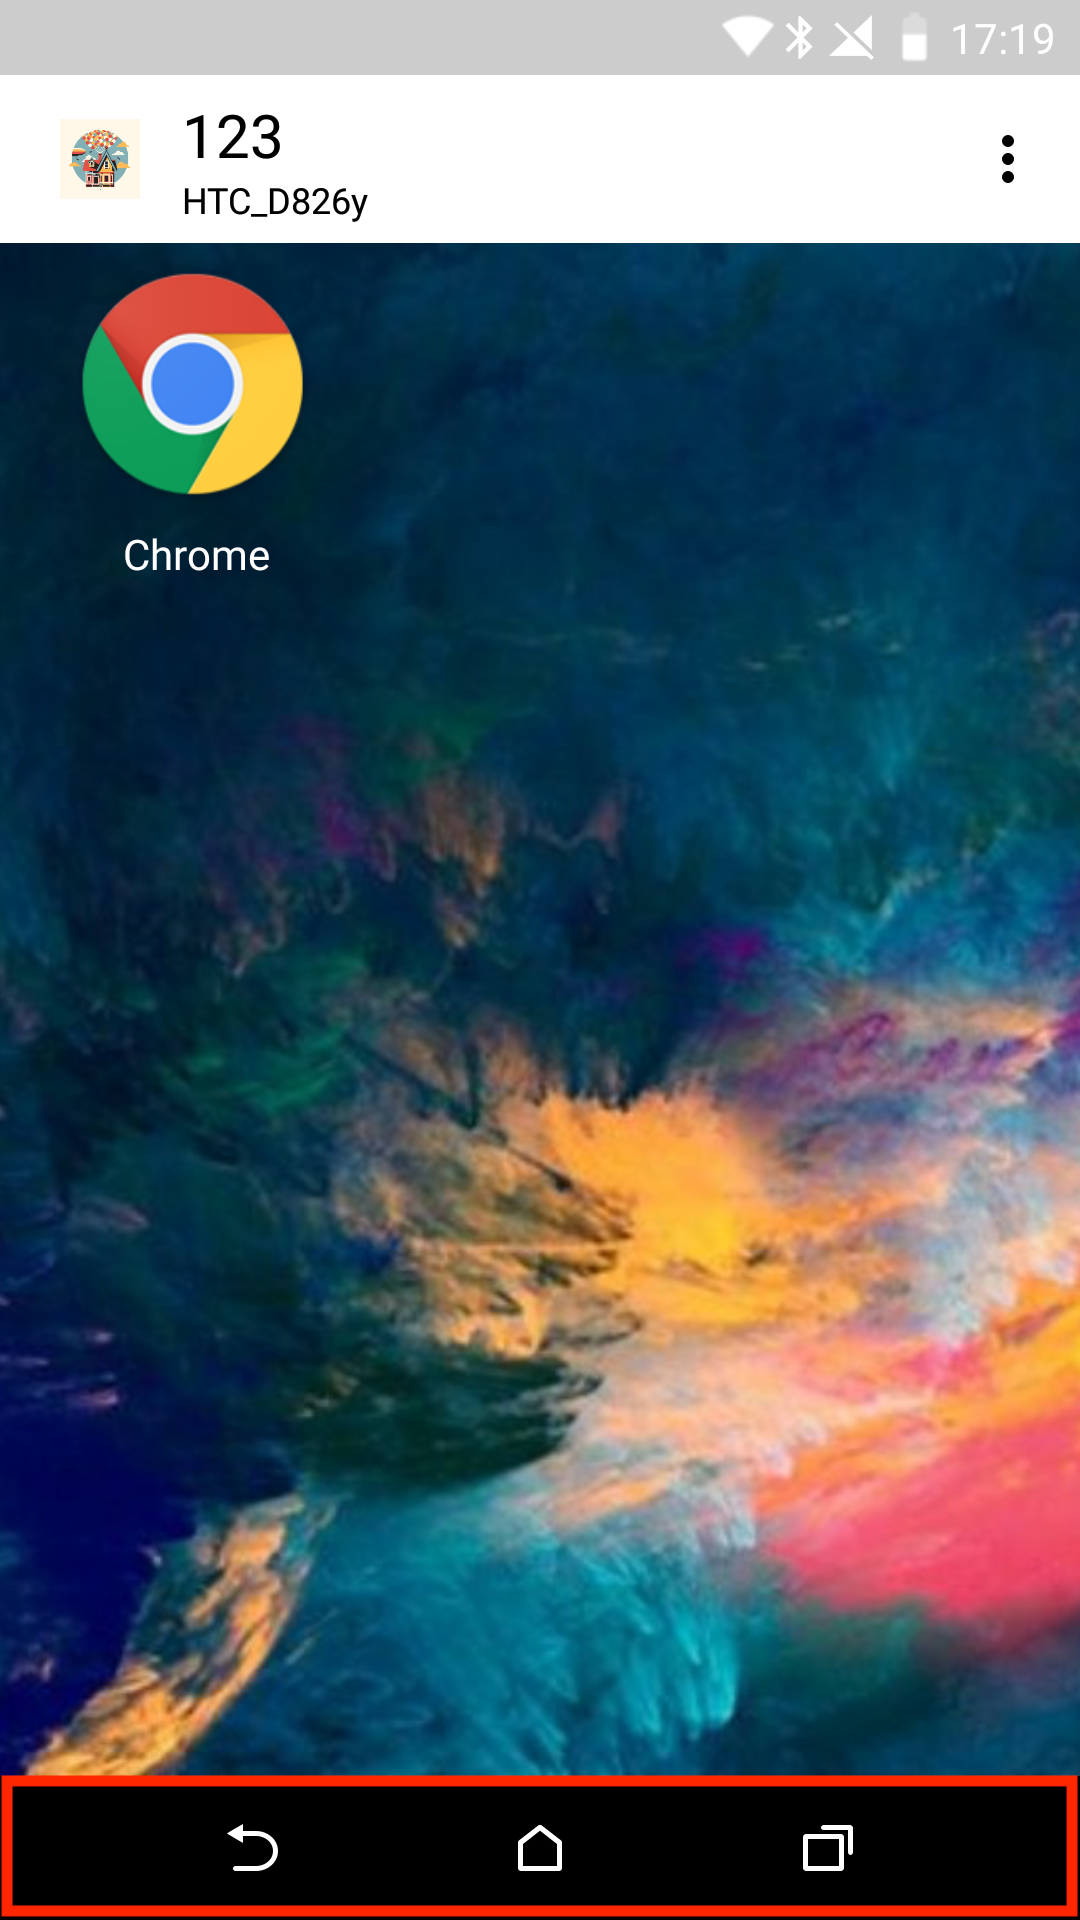
2Hide the navigation bar of the bottom screen
- If you enable this option, it will hide the navigation buttons at the bottom.
3Full-Screen Mode
- Enabling this option will switch the device to full-screen mode by hiding the navigation bar and status bar. Notification messages will not be displayed.
- Once the full-screen mode is activated, the bottom navigation bar and the keyboard will be hidden. Swipe up from the bottom of your device to unhide if needed. All app notifications will not be displayed at the top status bar after this option is enabled.
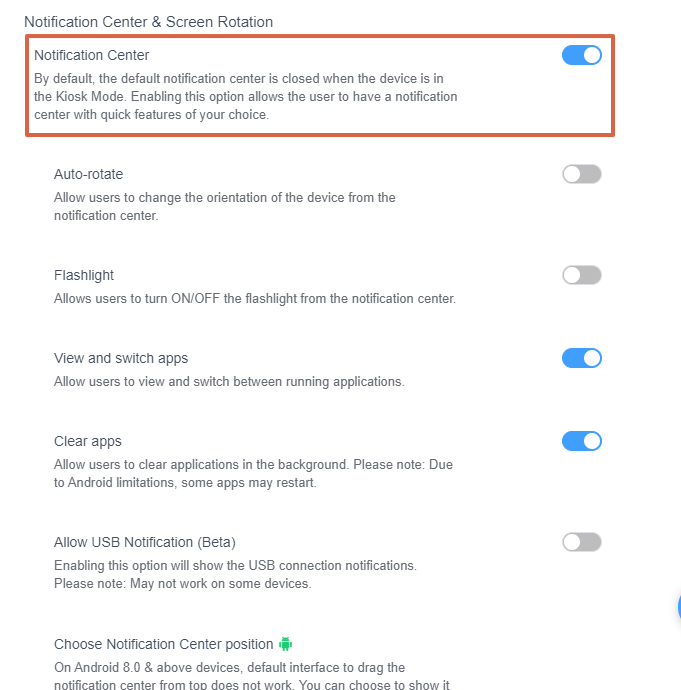
3Notification Center & Screen Rotation
- You need to enable Notification Center to restrict users to access your devices' settings:
1Auto-rotate
- This allows users to change the orientation of the device from the notification center.
- If you disable it, the users cannot rotate the device and use apps that only support the horizontal display.
2Flashlight
- Allow users to turn ON/OFF the flashlight from the notification center.
3View and switch apps
- This allows users to view and switch between running applications.
- If you disable it, the users cannot switch and access between different apps. It is useful for devices that need to run multiple apps.
4Clear apps
- This allows users to clear applications in the background.
5Allow USB Notification
- Enabling this option will show the USB connection notifications.
- If you disable this option, you will not see the USB connection notification and change the USB connection type.
6Choose notification Center position (Android 8.0 and above)
- You can choose to show the notification center from the screen's top, bottom, left or right side to access the notification center.

Note : 1. If you enable Keep running, you can only exit Kiosk mode from Admin Console.
2. For more information, please refer to How to exit the Kiosk Mode? the paragraph about Exit from Admin Console.
2. For more information, please refer to How to exit the Kiosk Mode? the paragraph about Exit from Admin Console.

Note : 1. Devices with Android 8.0 or above can only use the system default will be hidden.
2. For devices with Android 9.0 and above that AirDroid Biz Daemon has Device Owner permission. Users can access the default Notification Center after this option is enabled (go to [ Device Limitation ]-[ General ] to ensure the home key is enabled).
2. For devices with Android 9.0 and above that AirDroid Biz Daemon has Device Owner permission. Users can access the default Notification Center after this option is enabled (go to [ Device Limitation ]-[ General ] to ensure the home key is enabled).
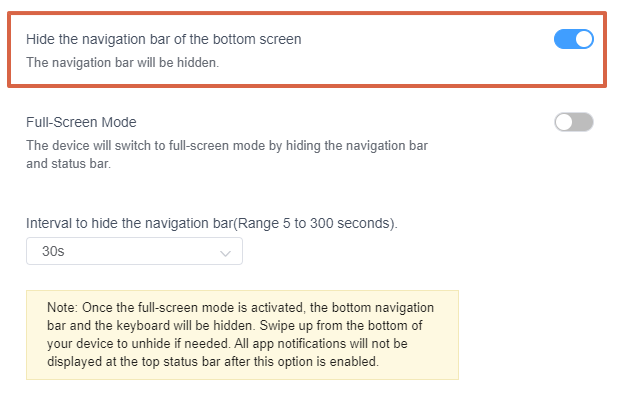
Note : 1. It only works for devices that have the virtual navigation bar.
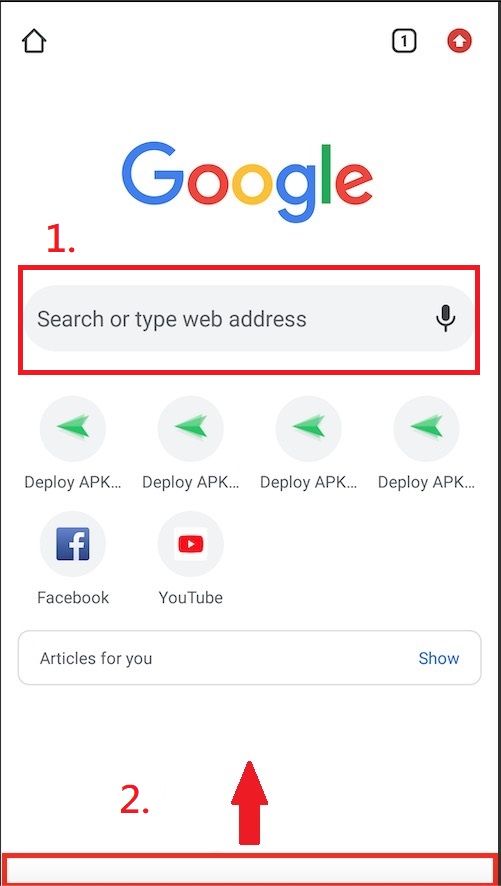
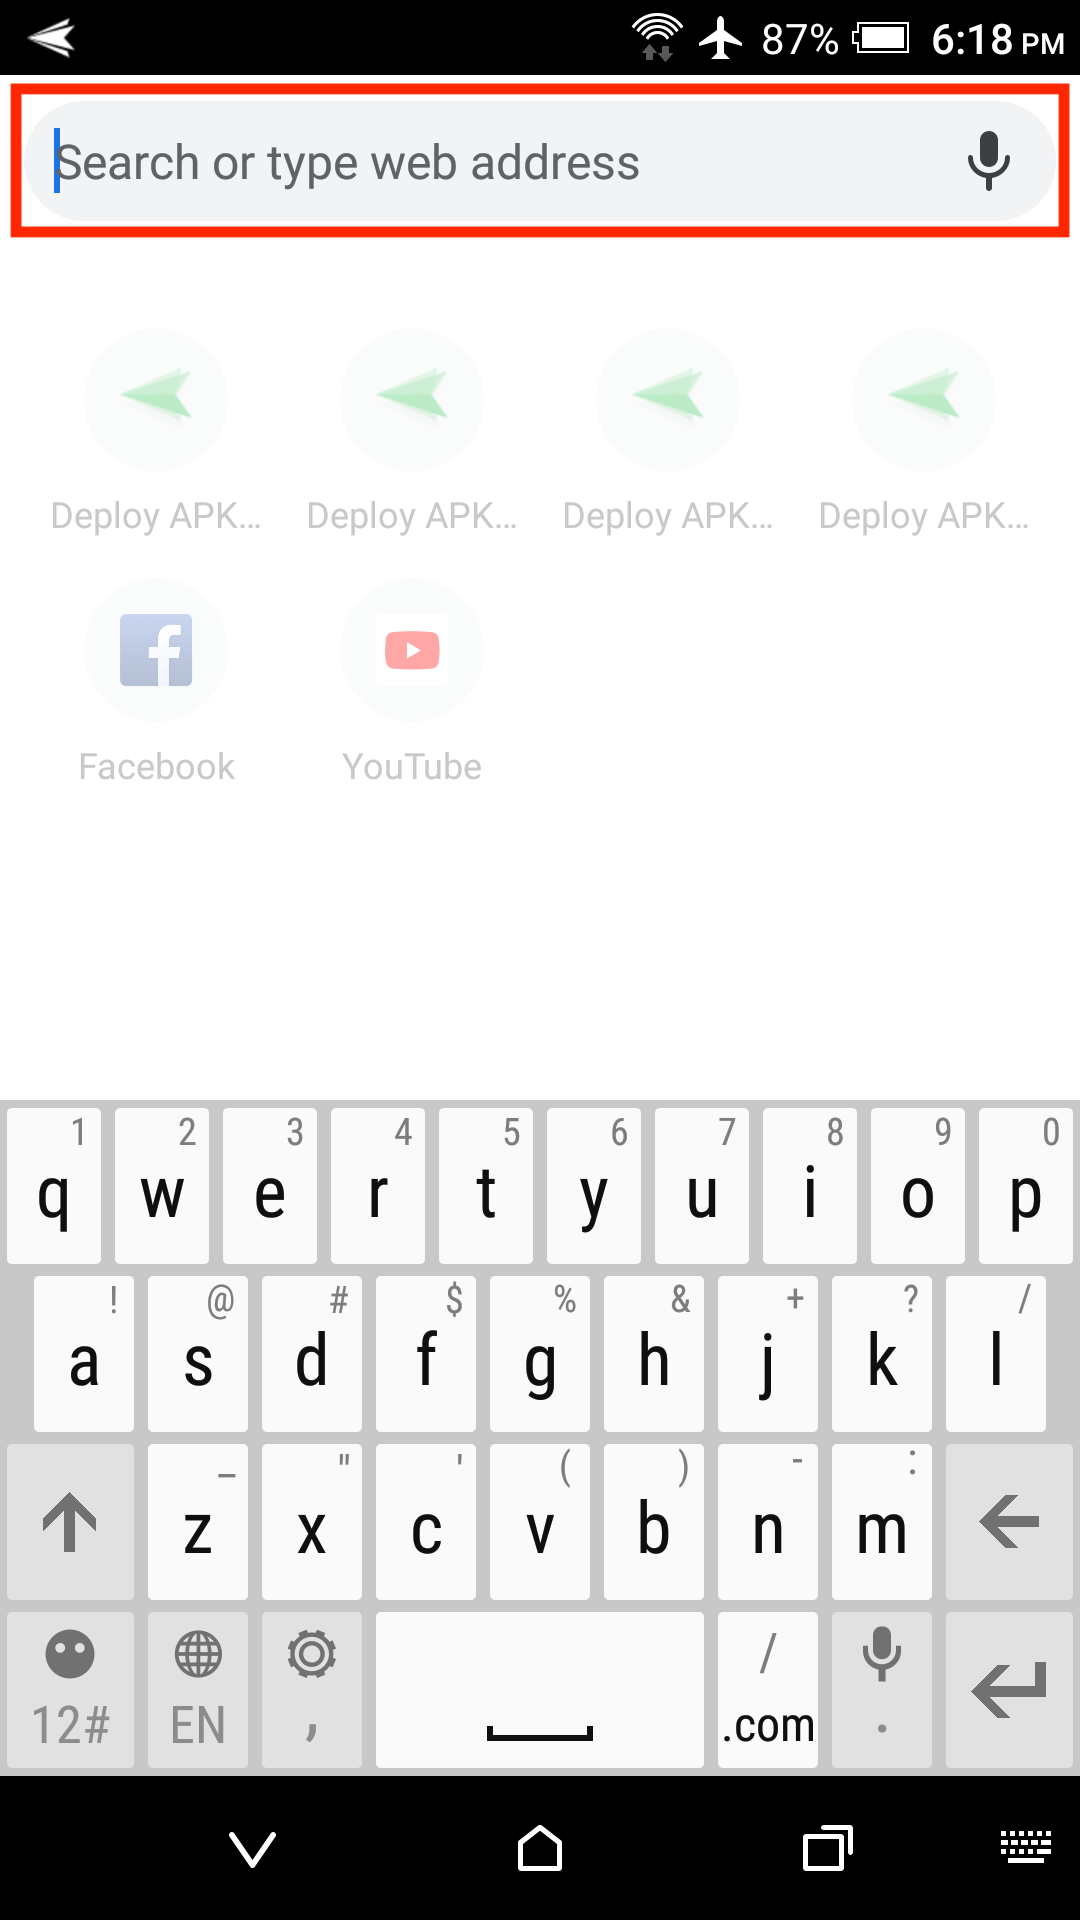
2. If you need to enter any texts on any apps (e.g. Chrome), please tap on the search bar and swipe up the bottom space and the on-screen keyboard will show up.
3. To avoid the keyboard disappearing, you need to set a longer interval (e.g. 30s or 60s).
2. If you need to enter any texts on any apps (e.g. Chrome), please tap on the search bar and swipe up the bottom space and the on-screen keyboard will show up.
3. To avoid the keyboard disappearing, you need to set a longer interval (e.g. 30s or 60s).


Note : 1. If you need to enter any texts on any apps (e.g. Chrome), please tap on the search bar and swipe up the bottom space and the on-screen keyboard will show up.
2. To avoid the keyboard disappearing, you need to set a longer interval (e.g. 30s or 60s).
2. To avoid the keyboard disappearing, you need to set a longer interval (e.g. 30s or 60s).


Note : 1. Due to Android limitations, some apps may restart.
2. For some older devices, if you disable it, you cannot kill the apps running in the background to avoid the lag issue.
2. For some older devices, if you disable it, you cannot kill the apps running in the background to avoid the lag issue.

Note : This may not work on some devices.
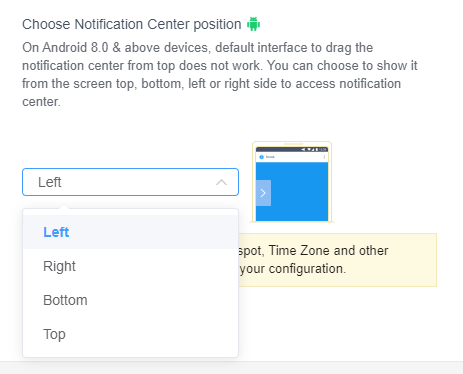
Note : 1. 1. Please note that this function is only applied to devices are in Android 8.0 or above. On Android 8.0 & above devices, the default interface to drag the notification center from the top does not work.
2. The notification center will display Hotspot, Time Zone and other quick setting buttons according to your configuration.
2. The notification center will display Hotspot, Time Zone and other quick setting buttons according to your configuration.
- Step 3Save Your Changes
- Click “Save” to apply the changes across all devices in the selected group.

- Step 4Apply Your Changes
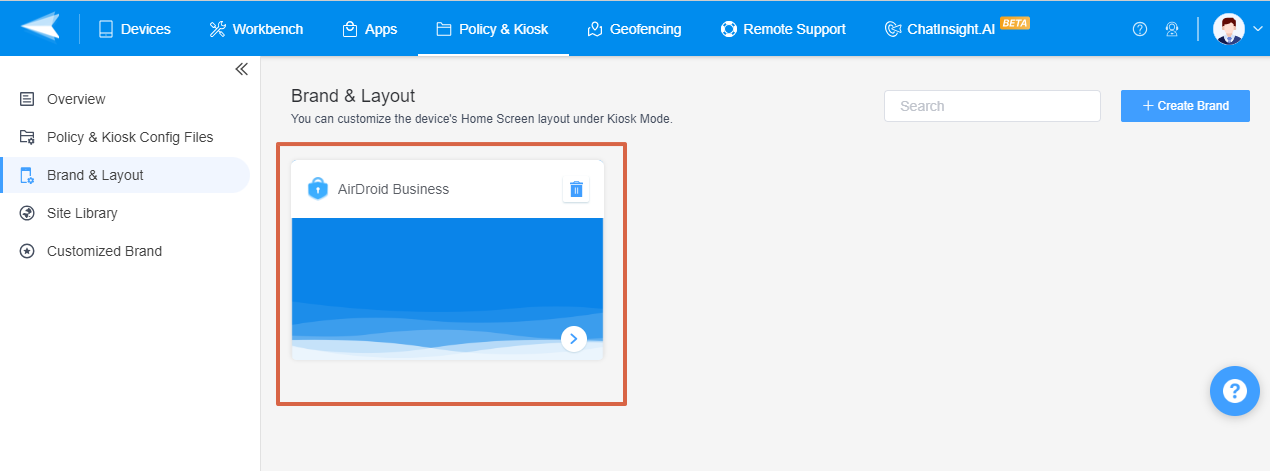
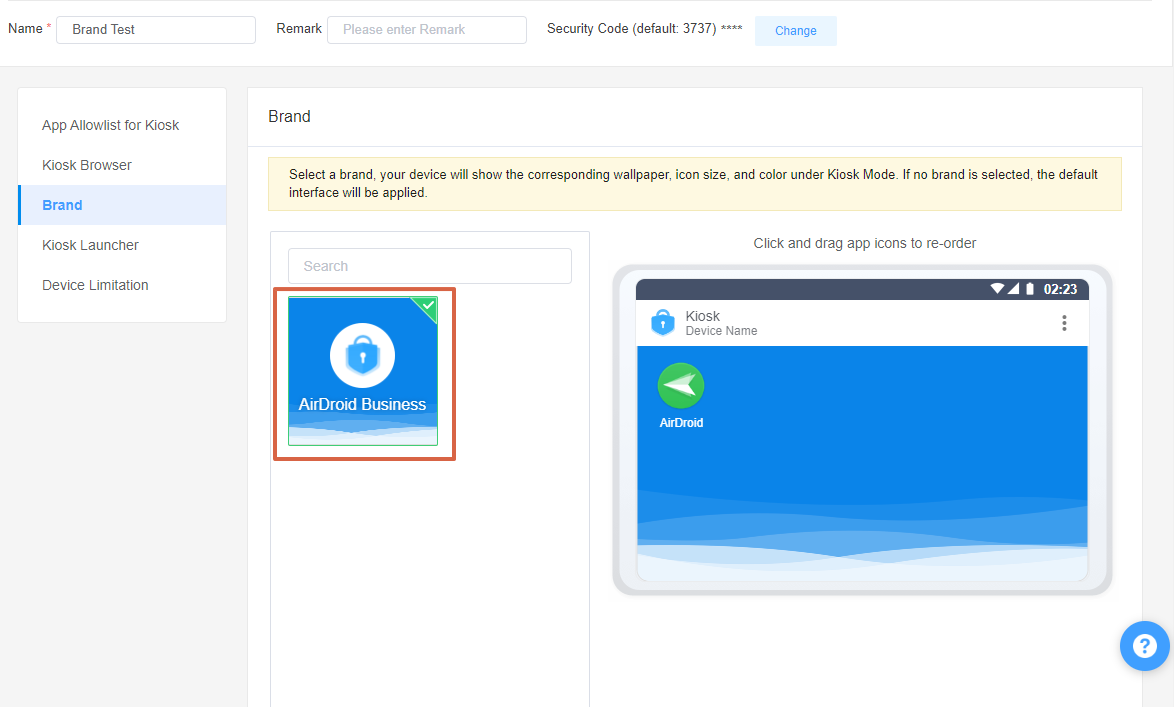
- Please go to Admin Console > Policy & Kiosk > Policy & Kiosk Config File > Any Kiosk-related Config file > Edit > Brand
- Tick the Customized Brand you just created and click the "save" button.
- Ensure that the changes have been applied successfully across the devices.

With these steps, you can effectively use the Kiosk Launcher feature of AirDroid Business to manage your devices.
Video Tutorial: Using Kiosk Launcher for AirDroid Business
Was This Page Helpful?
Still need help? Submit a request >>
Related Articles
- How to use App Allowlist for Kiosk Mode in AirDroid Business?
- How to Set up Kiosk Website Allowlist on AirDroid Business?
- How to set up Kiosk Browser Settings on AirDroid Business?
- How do I Customize the Kiosk Brand within AirDroid Business?
- How to Modify My Brand and Layout in Kiosk Mode of AirDroid Business?
See all articles