

How can I utilize the Geofence Log on AirDroid Business?
Welcome to AirDroid Business. To enhance your learning experience, we have created a YouTube video to help you understand this guide better and faster.
Video Tutorial: How to Check and Export the Geofence Logs on AirDroid Business
Tracking the movements of your company's Android devices within specific geographical boundaries is crucial for maintaining security and operational efficiency.
Geofence Logs of AirDroid Business allow you to efficiently review the geofence-triggered logs by providing you various attributes to sort the logs as you need in a few clicks. It also provides the export function if you need to analyze the logs with any third-party analytic software.
- Step 1Access the Geofence Log
- Choose Geofencing from the top of the page>Select>Geofence Mgmt.>Switch to the Logs tab
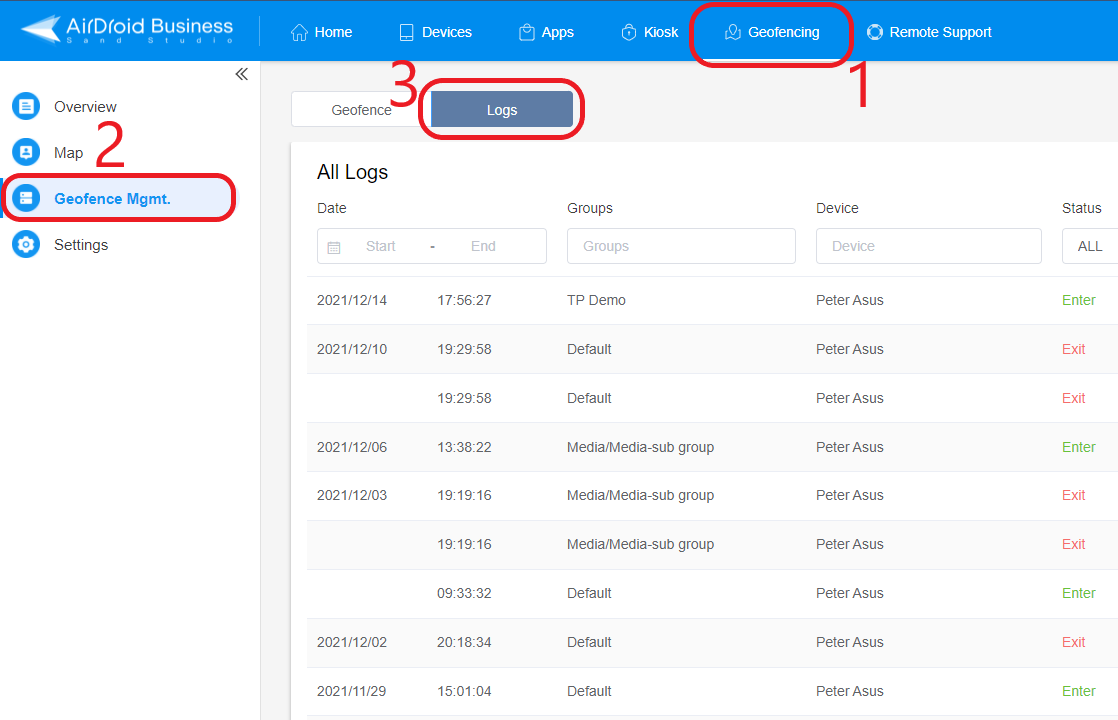
- Step 2Filter the Log Entries
- You can choose or input the attributes to sort the logs as your demand.
- Below is a brief introduction to all the attributes:
- Date: You can limit the Logs to show you only the logs in the certain time period you select.
- Groups: If you have multiple device Groups and numerous devices, sorting the logs by groups can simplify the whole chart and make it easier to review.
- Device: This attribute can help you sort out all logs from one particular device.
- Status: This can divide the logs by how the device triggered the Geofence.
- Geofence: You can select a specific Geofence to see which devices are affected by the Geofence.
- Workflow: If you want to find out what workflow has been triggered, you can insert the workflow name in this column.
- Action: With this attribute, you can see what workflow action has been triggered on which devices and whether the action was successfully applied to the device by the system or not.

- Step 3Export the Log
- If you need to analyze the log data further or share it with others, you can easily export the log as a csv file. Click "↓Export" at the top right of the log, and a .csv file that includes all logs will be downloaded to your device automatically.

By following these steps, you can effectively utilize the Geofence Log on AirDroid Business to monitor and manage your Android devices' movements within geofenced areas.
Still need help? Submit a request >>
Related Articles
You May Also Like
- How do I Choose the Enrollment Method on AirDroid Business?
- Enrollment Preparation: How to use Provisioning Template?
- How to use The Enrollment via Device Owner?
- How to use Android Enterprise Enrollment?
- How to use Zero Touch to enroll your devices with AirDroid Business?