- Options 1: From Site Library
- Step 1: Access Site Library
- Step 2: Add Websites to Allowlist
- Step 3: Set up the Site Icon
- Step 4: Customize Website Allowlist Settings
- Step 5: Confirm and Customize


How to Set up Kiosk Website Allowlist on AirDroid Business?
- Options 1: From Site Library
- Step 1: Access Site Library
- Step 2: Add Websites to Allowlist
- Step 3: Set up the Site Icon
- Step 4: Customize Website Allowlist Settings
- Step 5: Confirm and Customize
The Kiosk Browser feature in AirDroid Business allows administrators to edit Website Allowlist and Browser Settings to customize the browsing environment.
In this article, you will learn how to manage a Website Allowlist. Administrators can control website access on remote devices by customizing the browsing environment and managing the Website Allowlist.
There are two ways to set up a Website Allowlist for your Kiosk:
Options 1: From Site Library
Options 2: From a Kiosk Config Files
Options 1: From Site Library
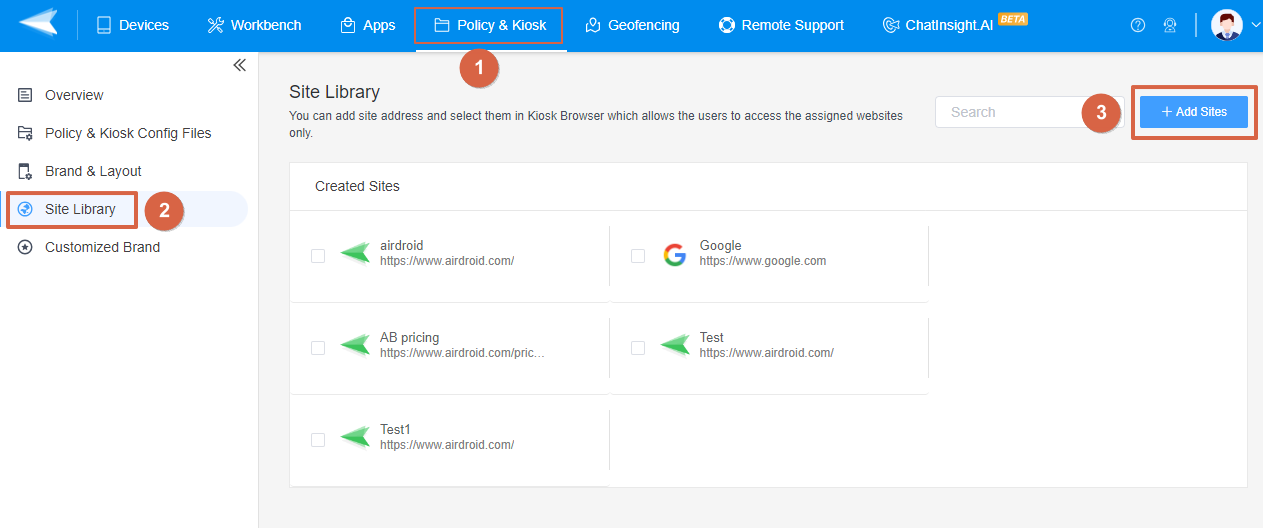
- Step 1Access Site Library
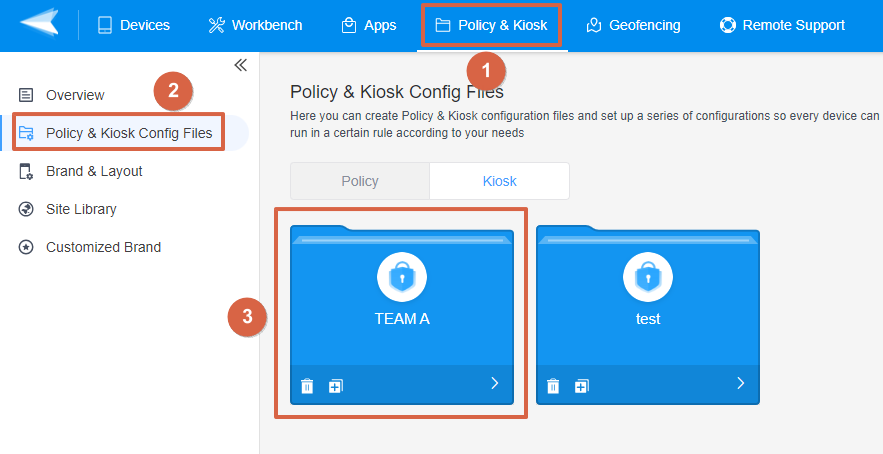
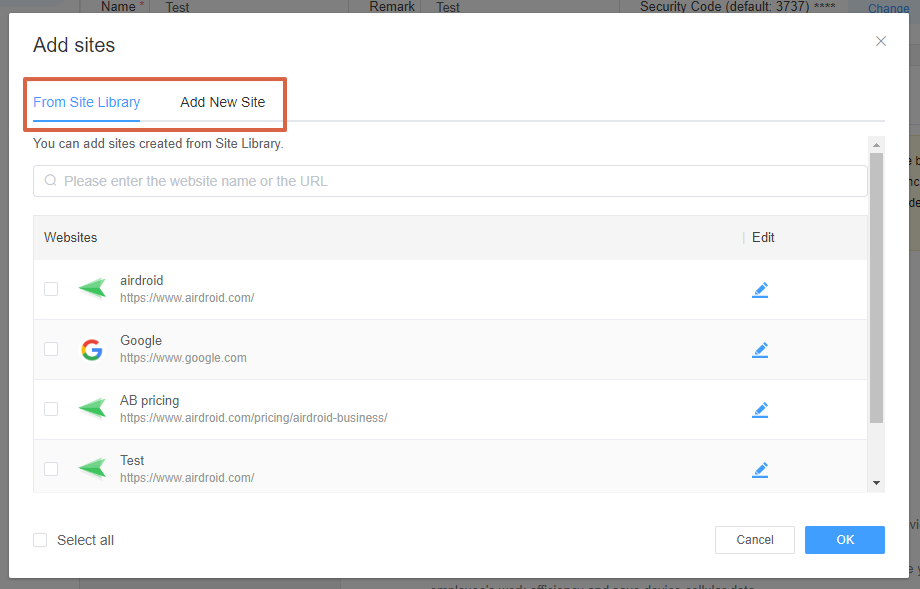
- Go to Admin Console > Policy & Kiosk >Site Library > +Add Sites
- Step 2Add Websites to Allowlist
- Please enter the shortcut name and URL to add to the allowlist. The URL needs to begin with "http://" or "https://"
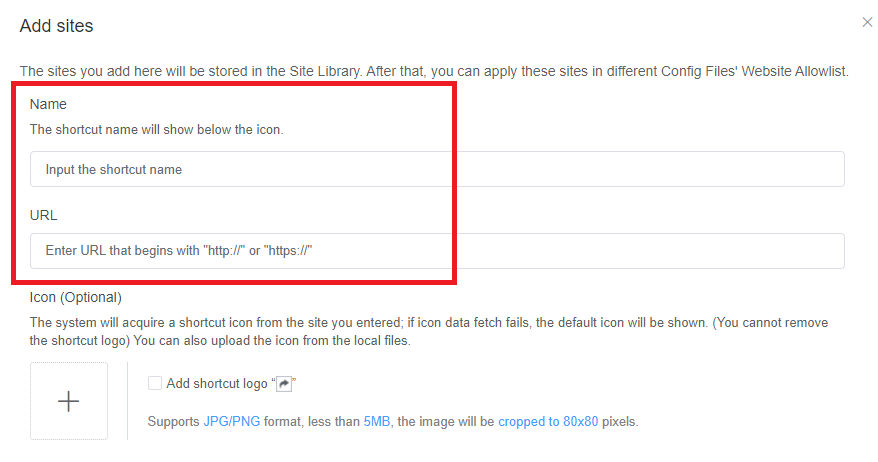
- Step 3Set up the Site Icon
- The Admin Console will automatically detect a shortcut icon from the provided URL. Alternatively, you can click on the +button to upload your customized logo. You can also select Add shortcut logo in Kiosk mode (Optional).
![]()
![]()
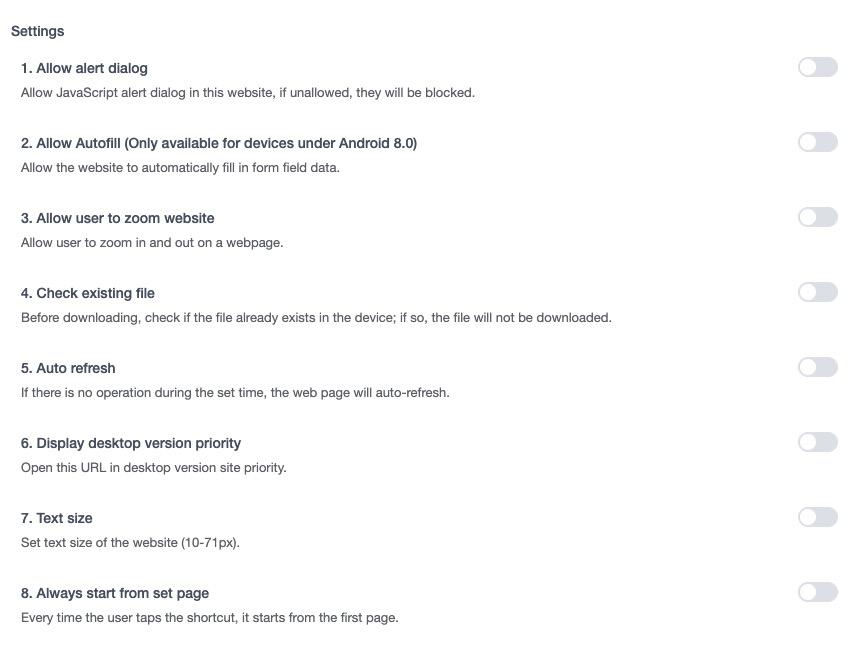
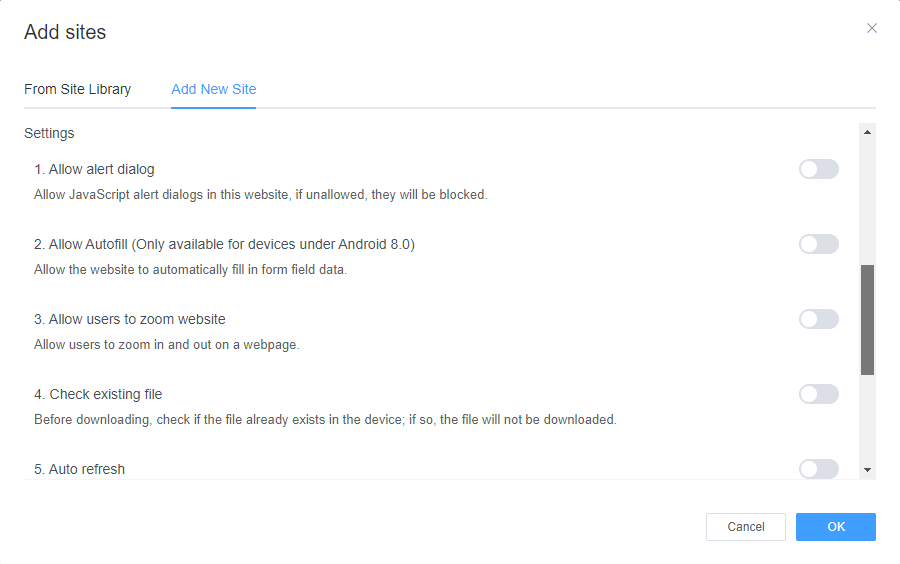
- Step 4Customize Website Allowlist Settings
- Under Settings, you will see the following options and select according to your preference.
- For more guidance, refer to the Website Allowlist Settings instructions at the end of this article.
For more details of App Allowlist procedure, please refer to How to use App Allowlist on AirDroid Business?
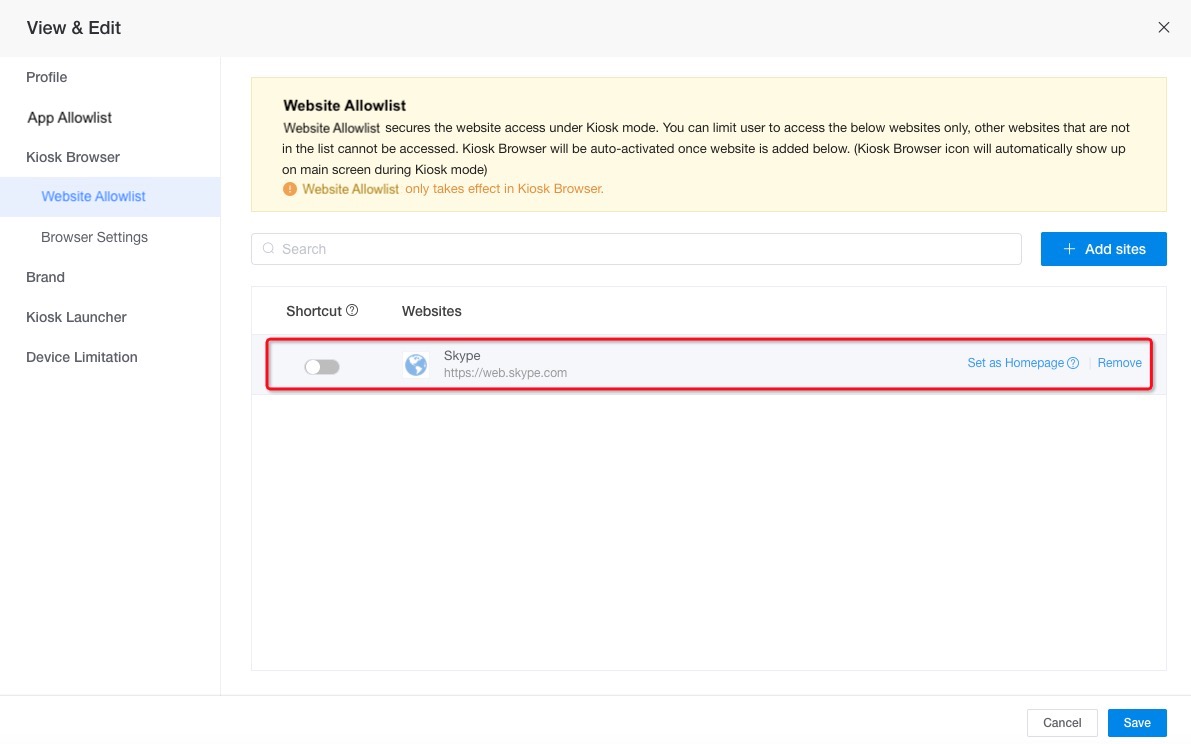
- Step 5Confirm and Customize
- After setting up your allowlisted webpage, click Confirm to create a Website Allowlist. You can also create a Shortcut or Set as Homepage for Kiosk Browser right here.
Options 2: From a Kiosk Config Files
- Step 1Create or Edit Config File
- Go to Admin Console > Policy & Kiosk > Kiosk > you can either +Create Config File or Edit existing Config File
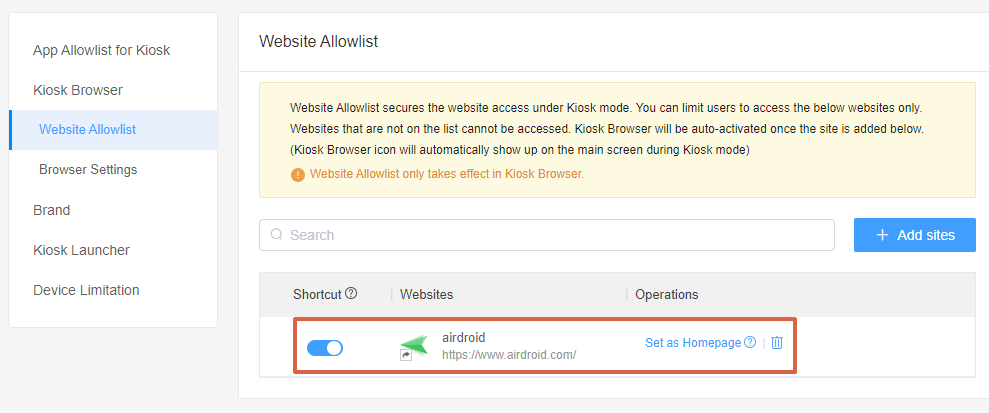
- Step 2Add Websites to Allowlist
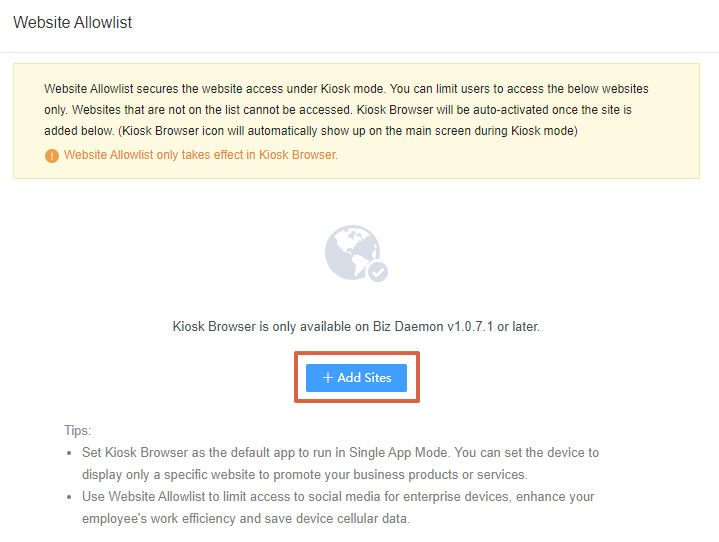
- Kiosk Browser > Website Allowlist > + Add Sites
- Set Kiosk Browser as the default app to run in Single App Mode. You can set the device to display only a specific website to promote your business products or services.
- Use Website Allowlist to limit access to social media for enterprise devices, enhance your employee's work efficiency and save device cellular data.
Tips:
- Step 3Configure Allowlisted Websites
- If you created the allowlist on Option 1, you can select a specific webpage and Confirm. Or click Add New Site and fill in complete the setting accordingly.
- You may refer to Refer to the Website Allowlist Settings instructions for more information.
For more details of App Allowlist procedure, please refer to How to use App Allowlist on AirDroid Business?
- Step 4Confirm and Customize
- After setting up your allowlisted webpage, click Confirm to create a Website Allowlist. You can also create a Shortcut or Set as Homepage for Kiosk Browser in this step.
By following the step-by-step instructions provided in this tutorial, administrators can effectively set up the Kiosk Website Allowlist on AirDroid Business. This feature allows for granular control over website access on managed Android devices, ensuring a secure and tailored browsing experience. Remember to leverage the App Allowlist to enhance security and customize the browsing environment further.
Website Allowlist Settings Instructions
● Allow alert dialog: To access your website properly, we highly recommend you enable this setting.
● Allow Autofill: If you enable this, the browser will automatically fill in the information on the online form. If your website might access sensitive information, it is recommended to disable this.
● Allow user to zoom website: If you disable it, the user cannot zoom in or out on a webpage.
● Check existing file: If you disable it, you can download a file without checking if there is the same file on your file.
● Auto refresh: If you enable it, you can set the frequency and it allows your webpage to refresh automatically within a specific time.
● Display desktop version priority: If you prefer your webpage to access the Desktop view, you can enable it.
● Text size: If you enable it, you can change the website's font size.
● Always start from set page: If the first page of your website is essential, you can enable it to make sure users access your website via the first page.
Video Tutorial: Set up Website Allowlist in Kiosk Mode
Still need help? Submit a request >>
Related Articles
- How to use App Allowlist for Kiosk Mode in AirDroid Business?
- How to set up Kiosk Browser Settings on AirDroid Business?
- How do I Customize the Kiosk Brand within AirDroid Business?
- How to Modify My Brand and Layout in Kiosk Mode of AirDroid Business?
- How to use Kiosk Launcher for AirDroid Business?