Table of Contents


How to Modify My Brand and Layout in Kiosk Mode of AirDroid Business?
Table of Contents[ShowHide]
Maintaining a consistent brand image across all Android devices in your enterprise is crucial for any device administrator. Customizing the brand and layout of your devices in Kiosk Mode is a key step in achieving this goal. This allows you to personalize the interface, including elements such as the logo, wallpaper, and bar settings.
This article provides a step-by-step guide on how to modify your brand and layout in Kiosk Mode:
- Step 1Create or Modify an Existing Brand
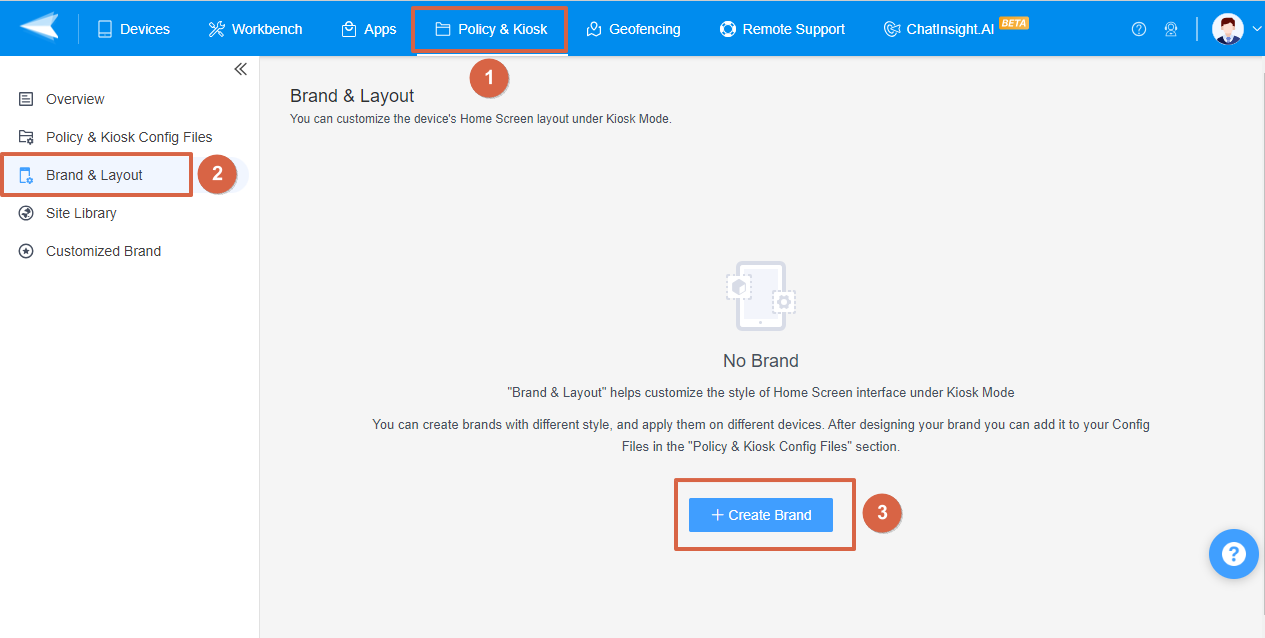
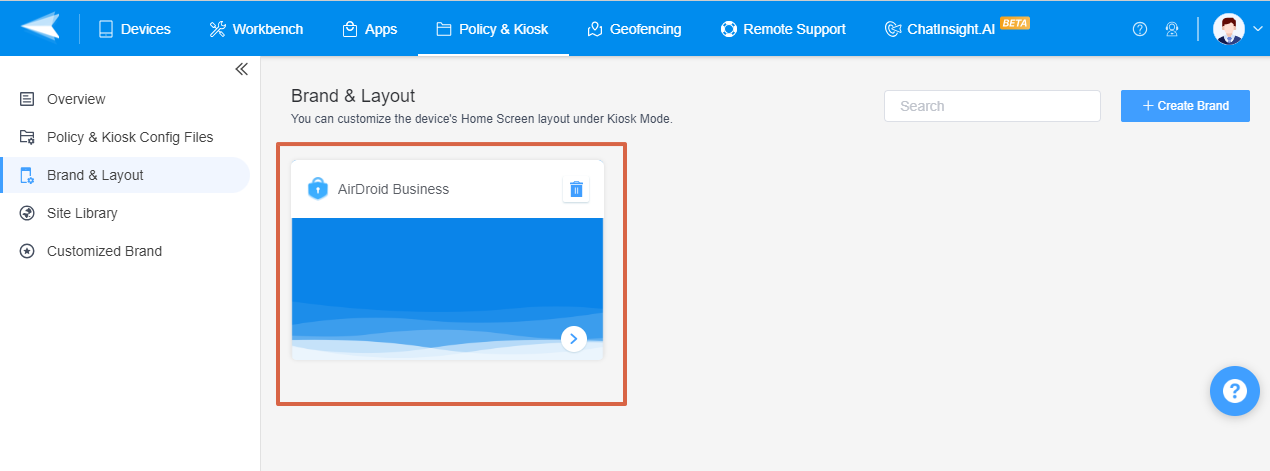
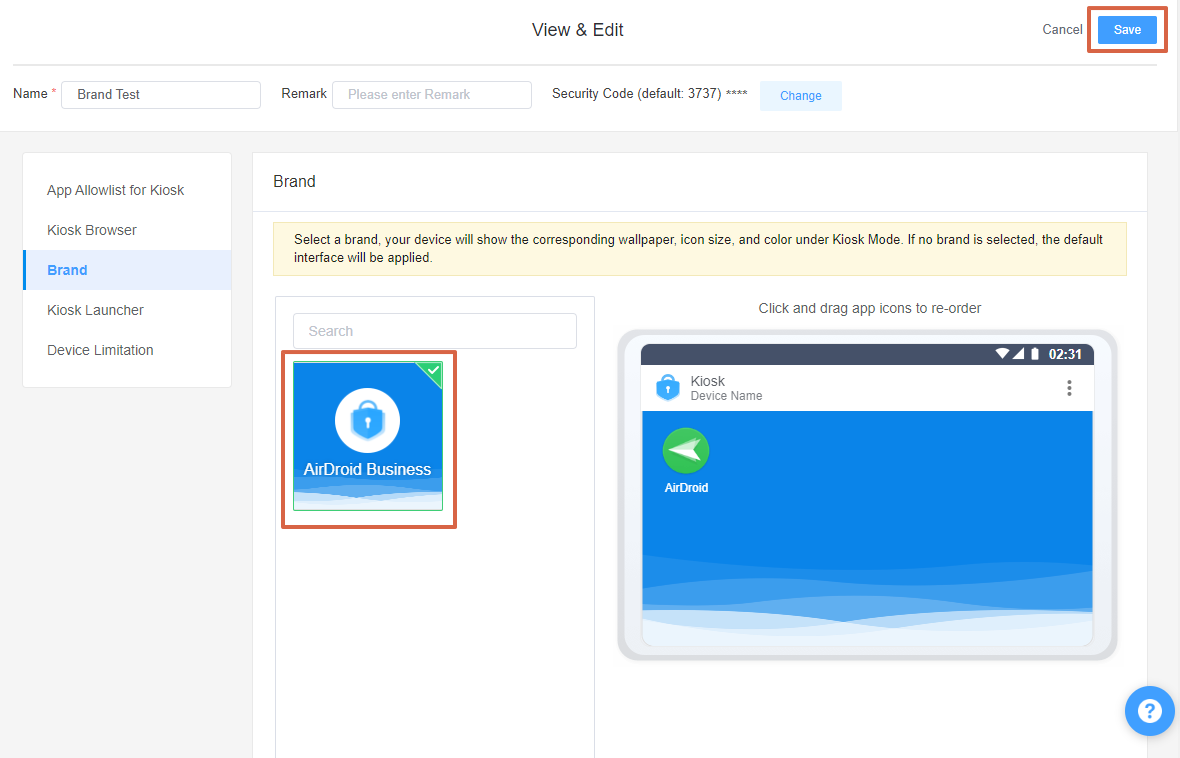
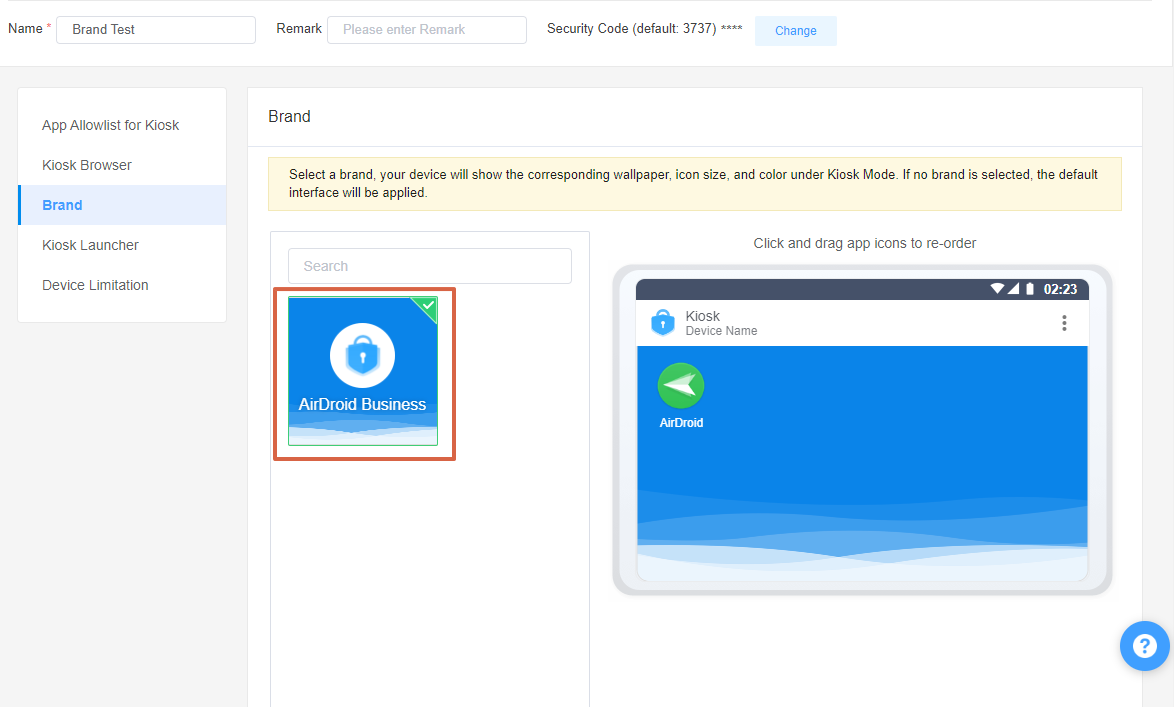
- Go to Admin Console > Policy & Kiosk > Brand & Layout > Click on a existing "Brand & Layout" or "+ Create brand" to edit or create a Brand & Layout for your Configs
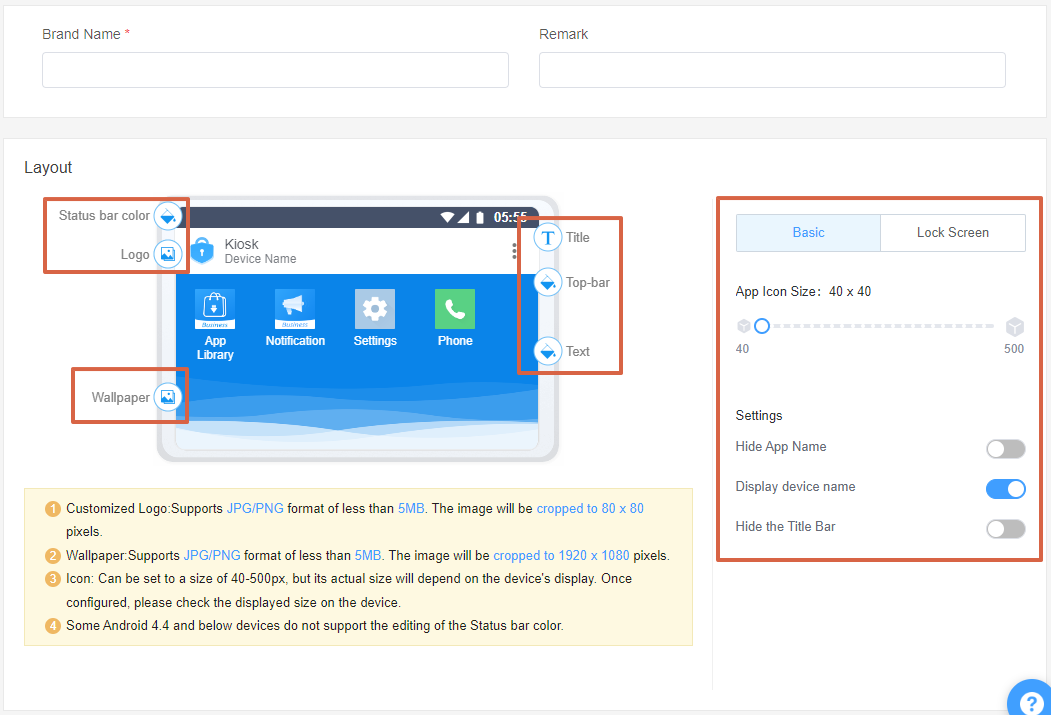
- Step 2Customize Your Brand and Layout
- On this page, you can change your Brand Name, customize the interface of the remote devices, and the size of the icon respectively, and tweak related settings.
- Customizing the interface of your remote devices involves adjusting various elements such as the Status bar color, Logo, Title, Top-bar, Text, and Wallpaper.
- You can tailor the size of the application icons to suit your business needs.
- Additional settings you can modify include options to either allow or disallow "Hide App Name", "Display Device Name", and "Hide the Title Bar".
Note :
While customizing interfaces and icons, please bear in mind the following limitations:
1. Customized Logo: Supports JPG/PNG format of less than 5MB. The image will be cropped to 80 x 80 pixels.
2. Wallpaper: Supports JPG/PNG format of less than 5MB. The image will be cropped to 1920 x 1080 pixels.
3. Icon: This can be set to a size of 40-500px, but its actual size will depend on the device's display. Once configured, please check the displayed size on the device.
4. Status Bar Color: Some Android 4.4 and below devices do not support the editing of the Status bar color.
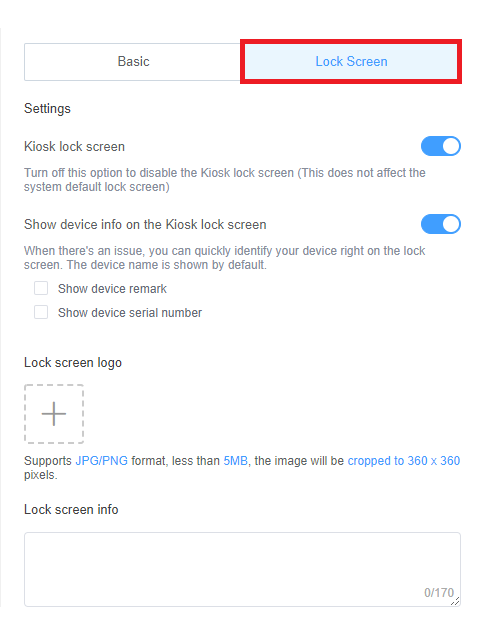
- Step 3Configure Lock Screen Settings
- The "Lock Screen" section allows you to manage your remote devices' lock screen settings.
- Here are the main settings you can adjust:
- 1. Kiosk Lock Screen: This setting allows you to enable or disable the Kiosk lock screen. Please note that disabling this option will not affect the system's default lock screen.
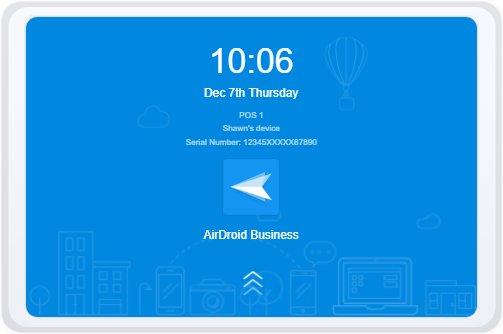
- 2. Show Device Info on the Kiosk Lock Screen: This option lets you choose whether to display device information (including device remark and serial number) on the Kiosk lock screen. Displaying this information can help you quickly identify your device right from the lock screen in case of any issues.
- 3. Lock Screen Logo: Click the plus sign area to upload your logo image. Please note that the image should be in JPG/PNG format and less than 5MB. The image will be resized to 360 x 360 pixels.
- 4. Lock Screen Info: You can input the lock screen information in the provided box.
- The image below illustrates the lock screen settings using AirDroid Business as an example:
- Step 4Save your changes
- Click “Save” to apply the changes across all devices in the selected group.
- Step 5Apply Your Changes
- Please go to Admin Console > Policy & Kiosk > Policy & Kiosk Config File > Any Kiosk-related Config file > Edit > Brand
- Tick the Customized Brand you just create and click the "save" button.
- Ensure that the changes have been applied successfully across the devices.

By following these steps, you can successfully modify your brand and layout in Kiosk Mode. This will not only provide a consistent user experience across all devices but also reinforce your brand identity.
Was This Page Helpful?
Still need help? Submit a request >>
Related Articles
- How to use App Allowlist for Kiosk Mode in AirDroid Business?
- How to Set up Kiosk Website Allowlist on AirDroid Business?
- How to set up Kiosk Browser Settings on AirDroid Business?
- How do I Customize the Kiosk Brand within AirDroid Business?
- How to use Kiosk Launcher for AirDroid Business?
See all articles