[Tutorial] How to Install RSAT on Windows 10 with PowerShell
If you are an IT professional or a system administrator, you know that Remote Server Administration Tools are essential for your job. RSAT enables easy remote management of Windows servers, thus becoming invaluable for several server functions.
In this guide, we will show you how to install RSAT in Windows 10 PowerShell.
Part 1. Introduction to RSAT
First of all, we need to explain what Remote Server Administration Tools are. RSAT is a collection of tools that allows administrators to manage roles and features remotely from a Windows 10 computer. In reality, these tools allow you to quickly manage your company‘s Windows servers without the need to log in to each one separately. In fact, they are even ideal for managing servers that are located in different geographical locations.
Among the tools, you will find modules for managing the Active Directory, Group Policy, DNS, and DHCP among others. But the most convenient thing about them is that they integrate directly into Windows 10. Once you install RSAT in Windows 10 PowerShell, the toolbox will appear within your Administrative Tools.
Part 2. Prerequisites for RSAT Installation
But are there any prerequisites to installing RSAT in Windows 10 PowerShell? The truth is that before you can install RSAT on Windows 10, you must ensure that your system meets these requirements:
- Windows 10 Version Compatibility: Remember that only Windows 10 versions 1809 or later support RSAT installation. If you own a previous version of Windows 10, you need to download them manually from Microsoft’s website.
- Administrative Privileges: Another important pre-requisite is that you must have administrator rights on the machine you will install RSAT. Without these privileges, you cannot modify the system settings needed to install optional Windows features like RSAT.
- Internet Access: To download RSAT, you will need a stable Internet connection.
Part 3. How to Install RSAT on Windows 10
If you meet these requirements, you can simply go on to install RSAT on Windows 10. In reality, there are multiple ways to do that. The first one we will see uses the Windows Settings.
Here is to install RSAT through Settings:
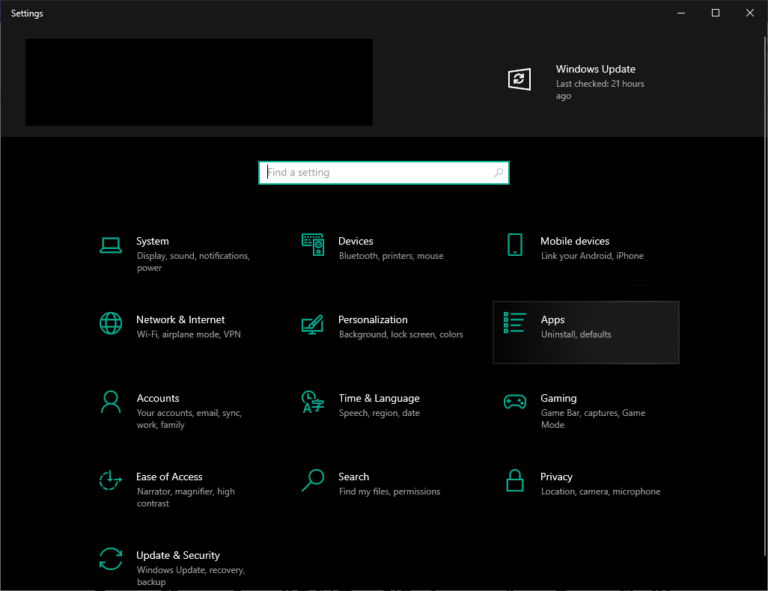
- Step 1.Go to Start > Settings > Apps.
- Step 2.Click the Optional Features option.
- Step 3.Type RSAT in the search bar to find the features you wish to install.
- Step 4.Select the features you want, such as RSAT: Active Directory Domain Services, RSAT: DNS Server Tools, RSAT: DHCP Server Tools, etc. Once you select all of them, click Install.
- Step 5.Wait for the installation to complete.
Part 4. How to Install RSAT on Windows 10 from PowerShell?
The following methods show you how to install RSAT in Windows 10 PowerShell. This method is equally simple and straightforward just like the previous one. However, many IT professionals prefer it.
Here are the steps to install RSAT using PowerShell:
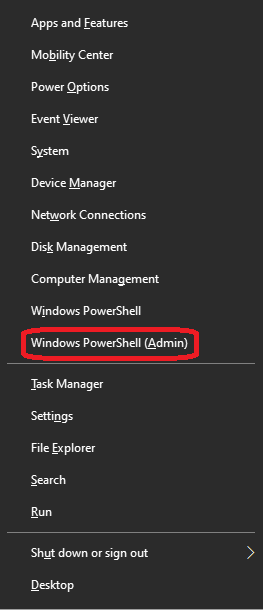
- Step 1.Press Win + X and select the Windows PowerShell (Admin) option from the menu. On the popup windows, select Yes to allow PowerShell to make changes in the system.
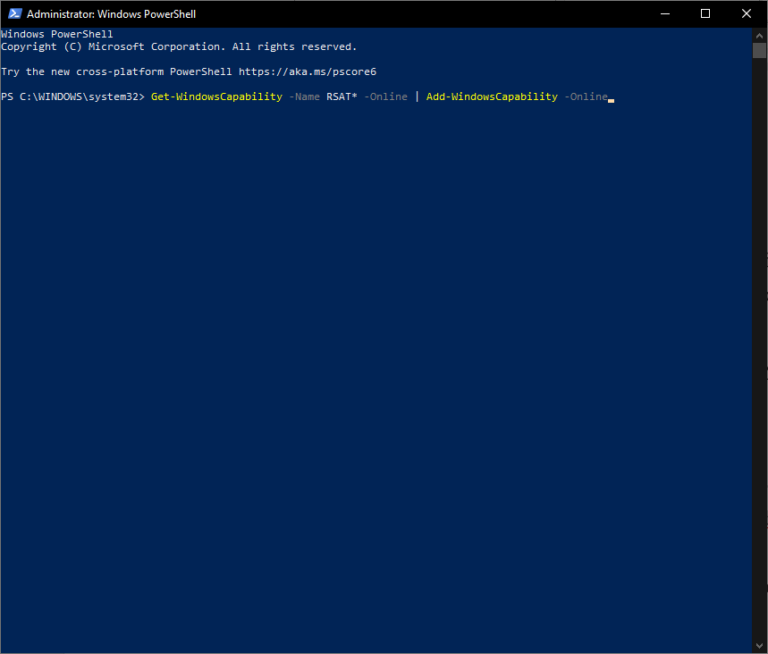
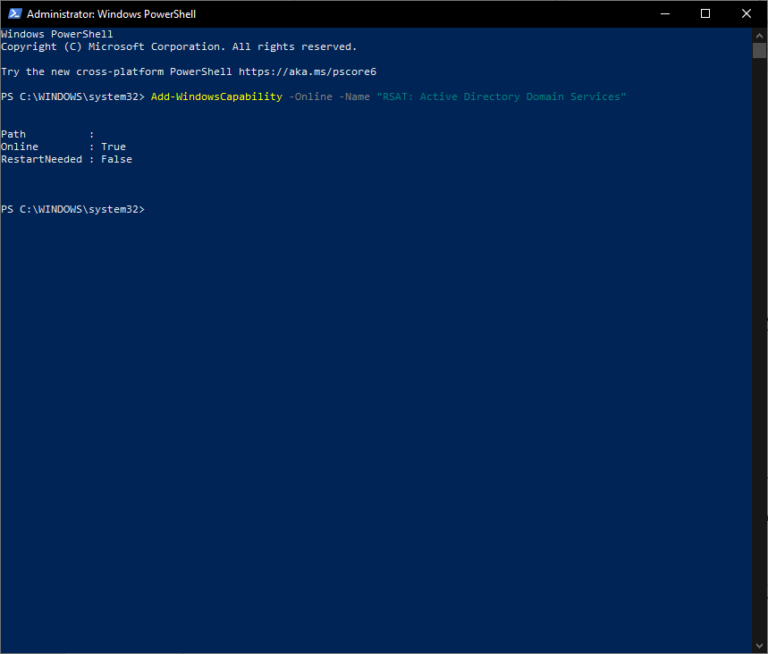
- Step 2.PowerShell is open, run the command: Get-WindowsCapability -Name RSAT* -Online | Add-WindowsCapability -Online.
With this command, the program will check for all RSAT features and install them on your computer. - Step 3.However, if you only need specific RSAT tools, you can install them individually with the command: Add-WindowsCapability -Online -Name Rsat.Tool.Name.
Replace the "Rsat.Tool.Name" with the feature name you wish to install. For example, type "Rsat.Dns.Tools~~~~0.0.1.0" if you wish to install the DNS Server tools. - Step 4.Wait for the installation to complete. Once the process is over, you might need to restart your computer.
Part 5. How to Check if RSAT Is Installed in PowerShell?
After the installation, you can verify that you have successfully installed the RSAT tools. You can complete that both in PowerShell and the Control Panel.
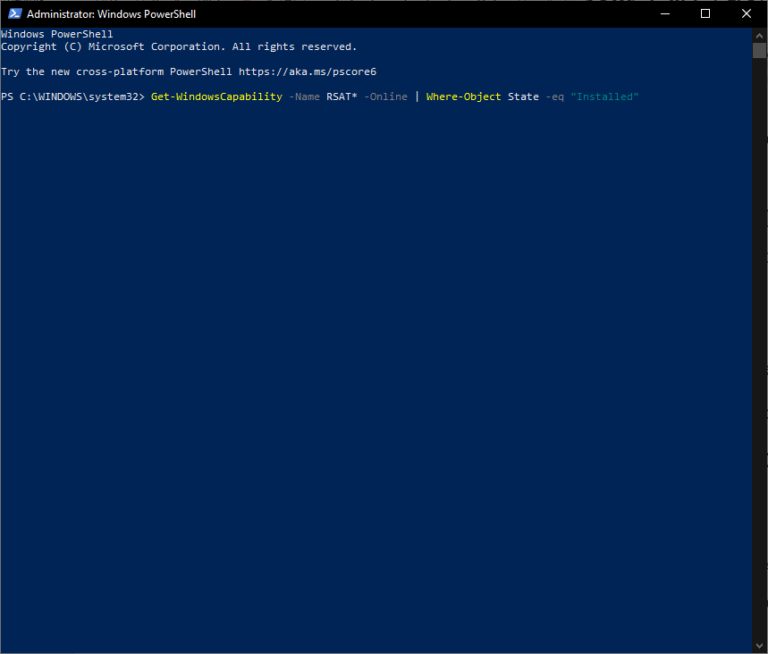
1Check via PowerShell
Verify that the RSAT tools are installed by launching PowerShell. Then, run the command: Get-WindowsCapability -Name RSAT* -Online | Where-Object State -eq "Installed"
This command will list all the RSAT tools that are currently installed on your system. Check that all the tools you need are on this list.
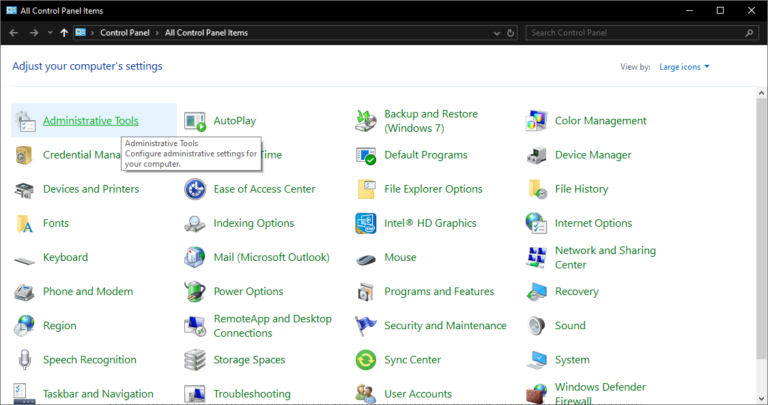
2Check via Control Panel
Another method to check the RSAT installation is to do it via the Control Panel. Go to Control Panel > Administrative Tools and check whether the tools are present in the folder. For example, you need to find tools such as "Active Directory Users and Computers" and "DNS Manager".
Part 6. How to Manager Your PC Remotely
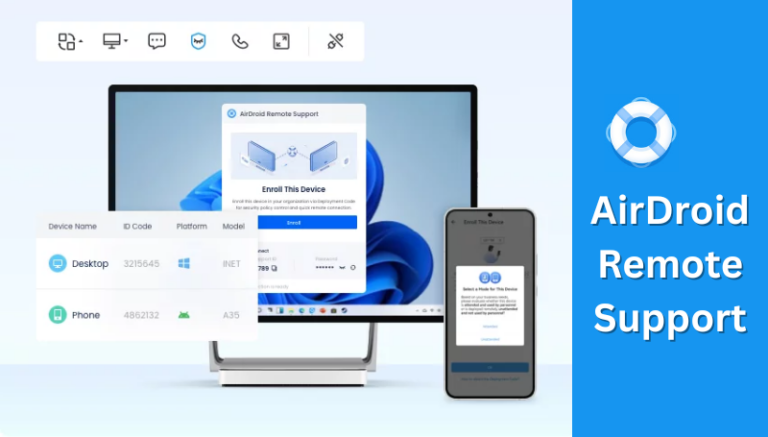
While RSAT is a powerful tool for server administration, it still has its limitations. For full remote desktop management, we recommend that you use AirDroid Remote Support. This tool has been designed to offer you an efficient environment that will streamline your workflow from anywhere.
- Real-Time Screen Sharing: When you need to get remote assistance, you can easily turn on screen sharing to facilitate the process.
- File Transfer: Easily transfer files between your devices through the app’s interfsace.
- Voice Chat and Messaging: The tool has several communication features, such as a built-in chat and voice call.
- Remote Control and Controllable Clipboard and Keyboard: Control the remote PC, the clipboard, and the keyboard to perform all the tasks you need.
- Step 1.Go to the AirDroid Remote Support official website to download the installers for your devices.
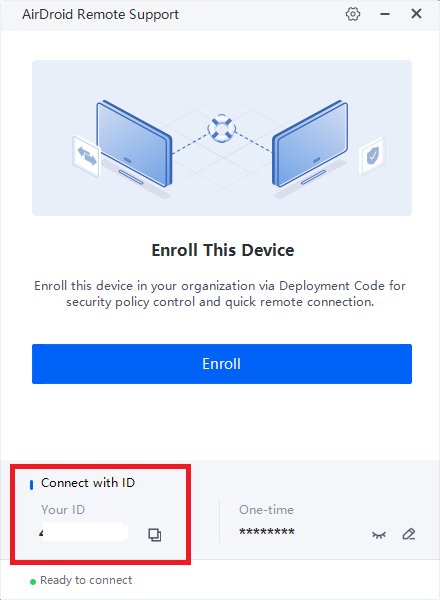
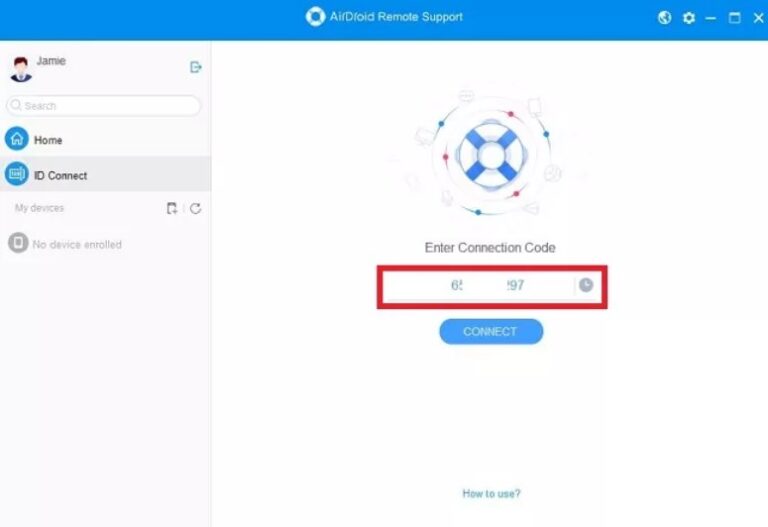
- Step 2.Launch AirDroid Remote Support in the remote device. Locate the 9-digit ID under the Connect with ID section, and note it.
- Step 3.Launch AirDroid Business on the local computer and click the ID Connect option on the sidebar. Type the 9-digit ID and click Connect. Accept the connection from the remote device.
Wrapping Up
Now you know how to install RSAT via Windows 10 PowerShell. However, if you are looking for a more comprehensive remote management solution, AirDroid Remote Support provides an excellent alternative. Try out AirDroid Remote Support today to simplify your remote PC management experience and take full advantage of its outstanding features.


Leave a Reply.