AirDroid Parental Control
AI-powered Content & Web Filter
- 🔞Inappropriate apps, websites and call blocking
- ⚠ Instant Alerts for potential online risks
- 👀Social Apps & Messages content monitor
6 Ways to Block iMessage on iPhone
You can use the blocking feature of iMessage to limit any contact from reaching you via call or text. It will also work on phone, FaceTime, and Mail apps of all your devices with the same Apple ID.
Besides blocking contacts alone, you can also block the app and its notifications, prevent unknown numbers from contacting you, block the app from groups, and much more. These methods of how to block iMessage on iPhone will be thoroughly explored below.
Method 1. Block iMessage from Specific Contacts
Through the settings of your iMessage, iPhone, or Apple devices, you can add specific contacts to a list of numbers you want blocked. Most users are more accustomed to this method when blocking a contact who has been disturbing them. Here is how to use this method through your iPhone settings app.
- Open the Settings app on your iPhone.
- Scroll through the Settings option and select Messages.
- Click on the Blocked Contacts option.
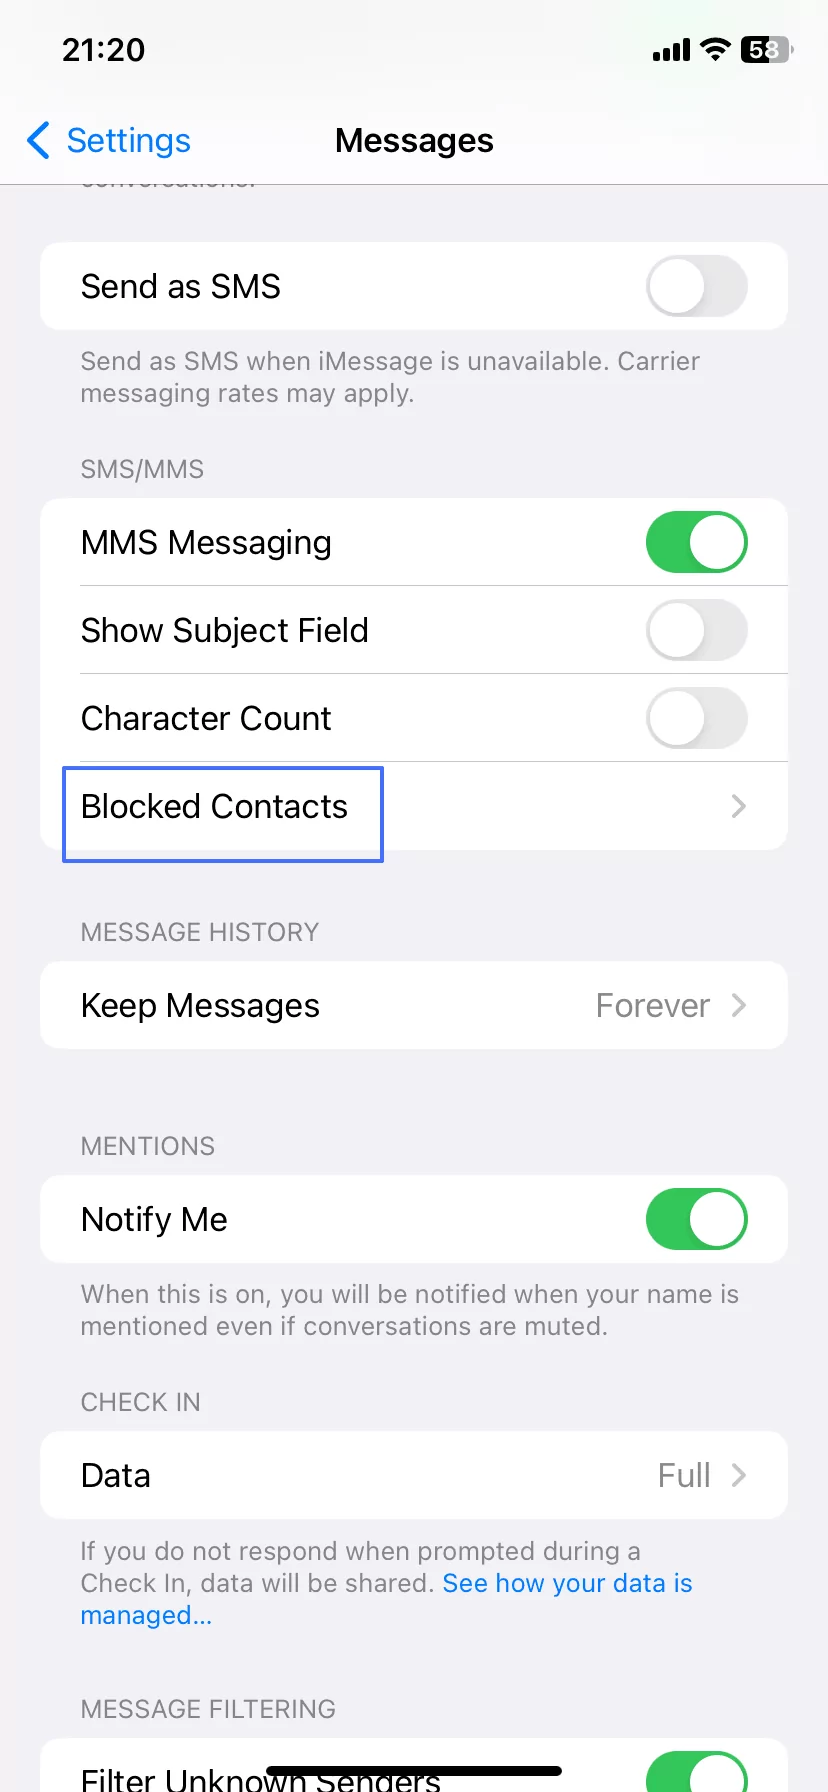

- Depending on your iOS version, select Add New or Block Contact.
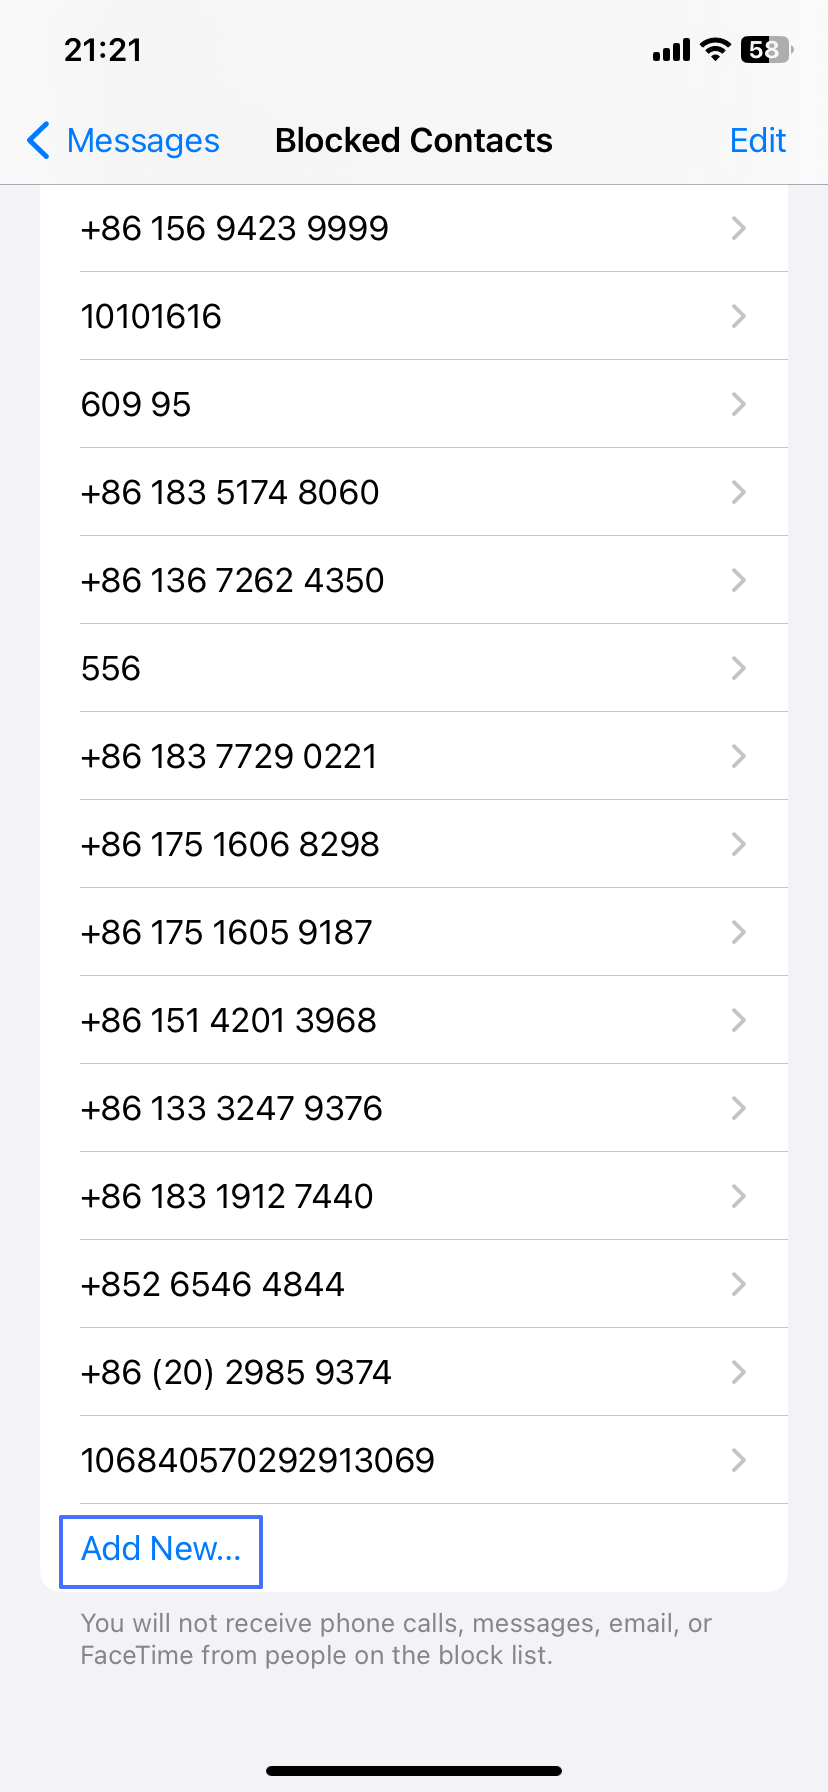
- Input the number or name of the contact you want to block.
- Click on the Block option to add the contact to the block list.
Method 2. Block iMessages from Unknown Sender
When you share your contact with a new person, their first message or call will show as an unknown sender. Likewise, if a person you did not give your contact to, as long as their contact is not saved, reaches you, it will also show that their contact is unknown.
Hence, this method will show you how to sort messages from unknown senders and block communication entirely from unknown senders. Furthermore, it will show you how to use screen time to block unknown contacts and senders.
Prevent Unknown Sender from Texting You Directly
The steps below can sort texts from unknown senders to another folder on iMessage, and you don’t get notified about them.
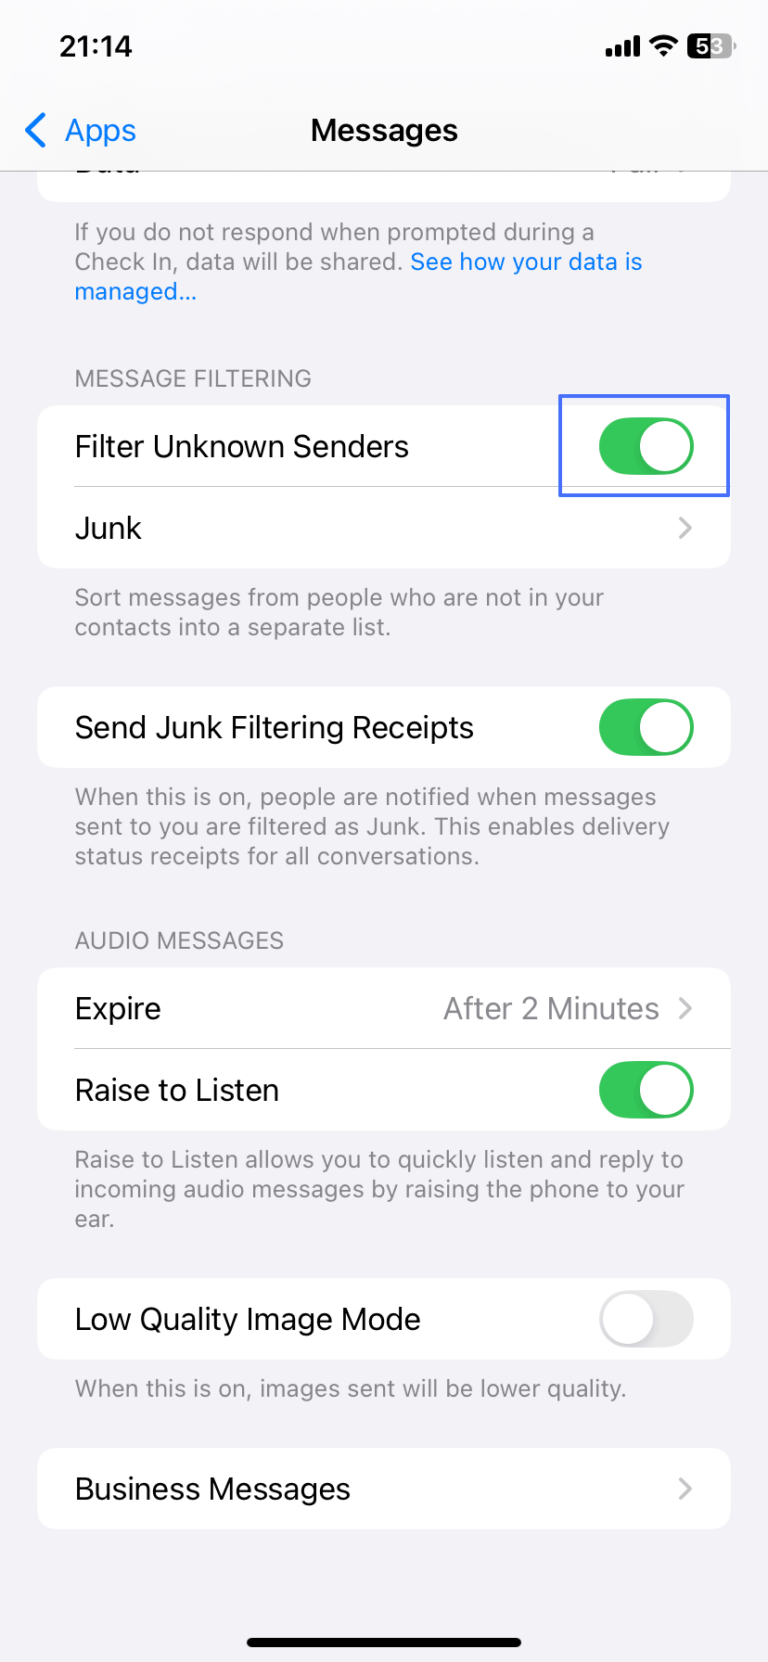
- Open the Settings app on your device.
- Navigate to the Messages option.
- Click on the Filter Unknown Senders option to filter their messages.
Only Communication to Allowed Contacts
Instead of the traditional method of blocking communication with an unknown sender, you can use the Screen Time feature to halt unknown contacts from communicating with you. Below is how to use this feature.
- Open the Settings app on your device.
- Click on Screen Time > Communication Limits.
- Tap on During Screen Time to tick Contacts Only.
- Go back to Screen Time. Tap App Limits to set time limits for yourself. If you don’t want any time limit, you can set the time as 23 hours 59 min.
This way, unknown senders can’t contact you any more.
Method 3. Block iMessage from Group
If you don’t want to see iMessages from Group, you can stop the app from receiving group messages and disallow contacts from adding you to groups. Furthermore, you can block specific contacts from group pages or block specific groups you do not want to receive messages from.
Block iMessage from a Group Conversation
This feature works by removing your contact from the page or removing other group page members.
- Open the Messages app on your device.
- Open the group conversation you want to block.
- Depending on the iOS version, tap on the group name or Details.
- Scroll down and tap Leave This Conversation or Delete and Block This Conversation.
Method 4. Block Usage of iMessage App
The Screen Time feature was introduced for users to create healthy device usage habits. Also, it can be used to set boundaries, such as to block iMessage on iPhone. Hence, this method shows three approaches on how to block iMessage on iPhone using Screen Time.
Set Screen Time of iMessage to a Period
This approach will help you set the specific duration and time you can use your iMessage app. In other words, you can only use the app within the time limit you have set for it.
- Open the Settings app on your device.
- Click on the Screen Time option.
- Click on the Downtime > Scheduled option.
- Select Every or Customize Days to set the start and end time you want to limit it to.
- Complete the process by clicking on Done.
Set Time Limit for iMessage App
This approach will help you set the duration you can use your iMessage app. Once you have exhausted the set duration, the app will be blocked.
- Open the settings app on your device.
- Click on the Screen Time option.
- Click on the App Limits option, then select Add Limit.
- Navigate to Message and select it to set the time limit for it.
- Complete the process by clicking on Add.
Remove iMessage from Always Allowed
This method will exclude iMessage from the list of apps you need to use at all times. Hence, the two time and schedule limit approaches set above will be binding on your message app. That means you will not get iMessage during downtime.
- Open the settings app on your device.
- Click on the Screen Time option.
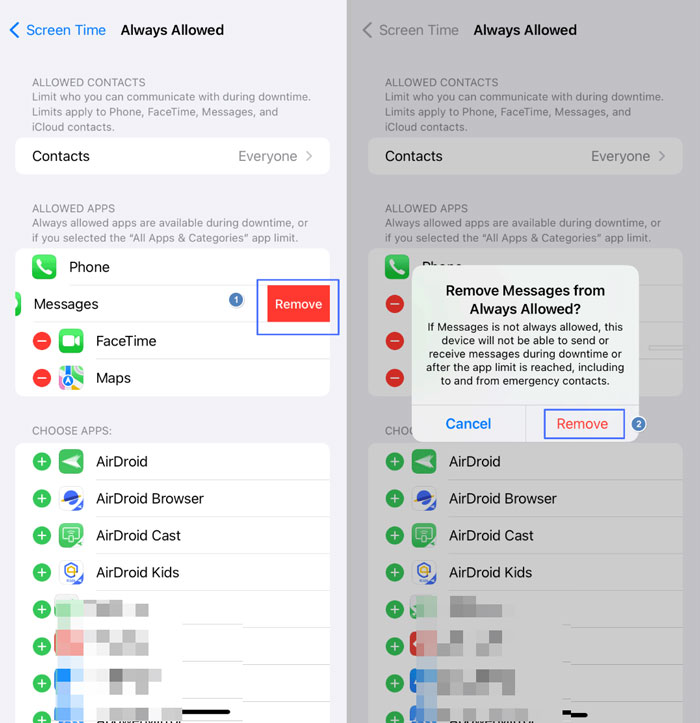
- Click on the Always Allowed option.
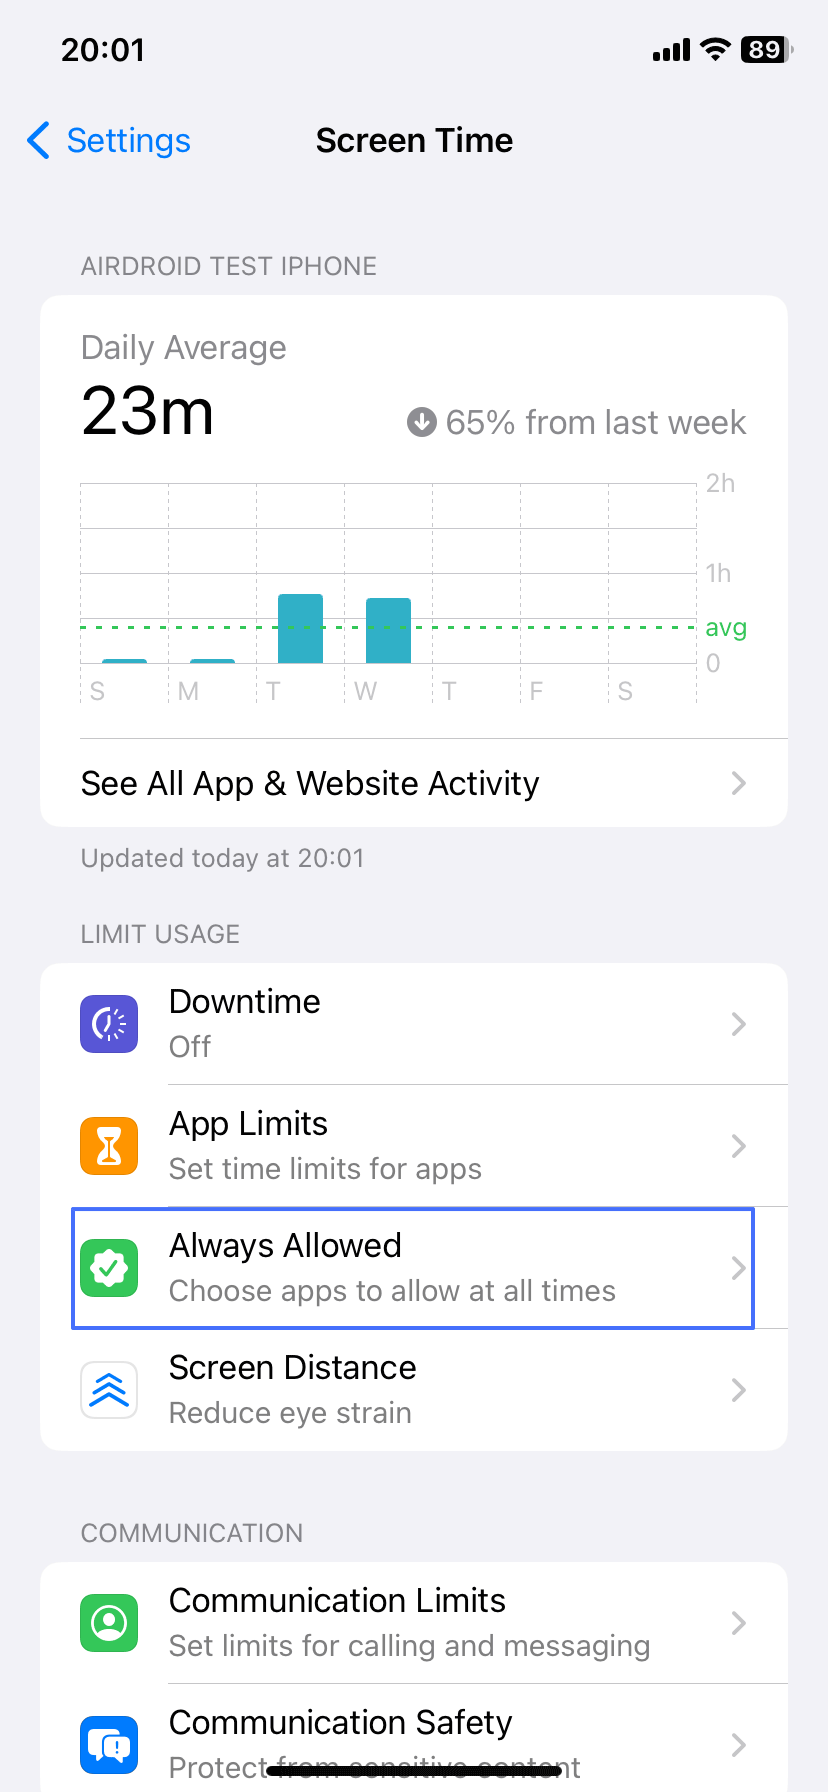
- Navigate to Messages and toggle it off to remove it from the always-allowed list.

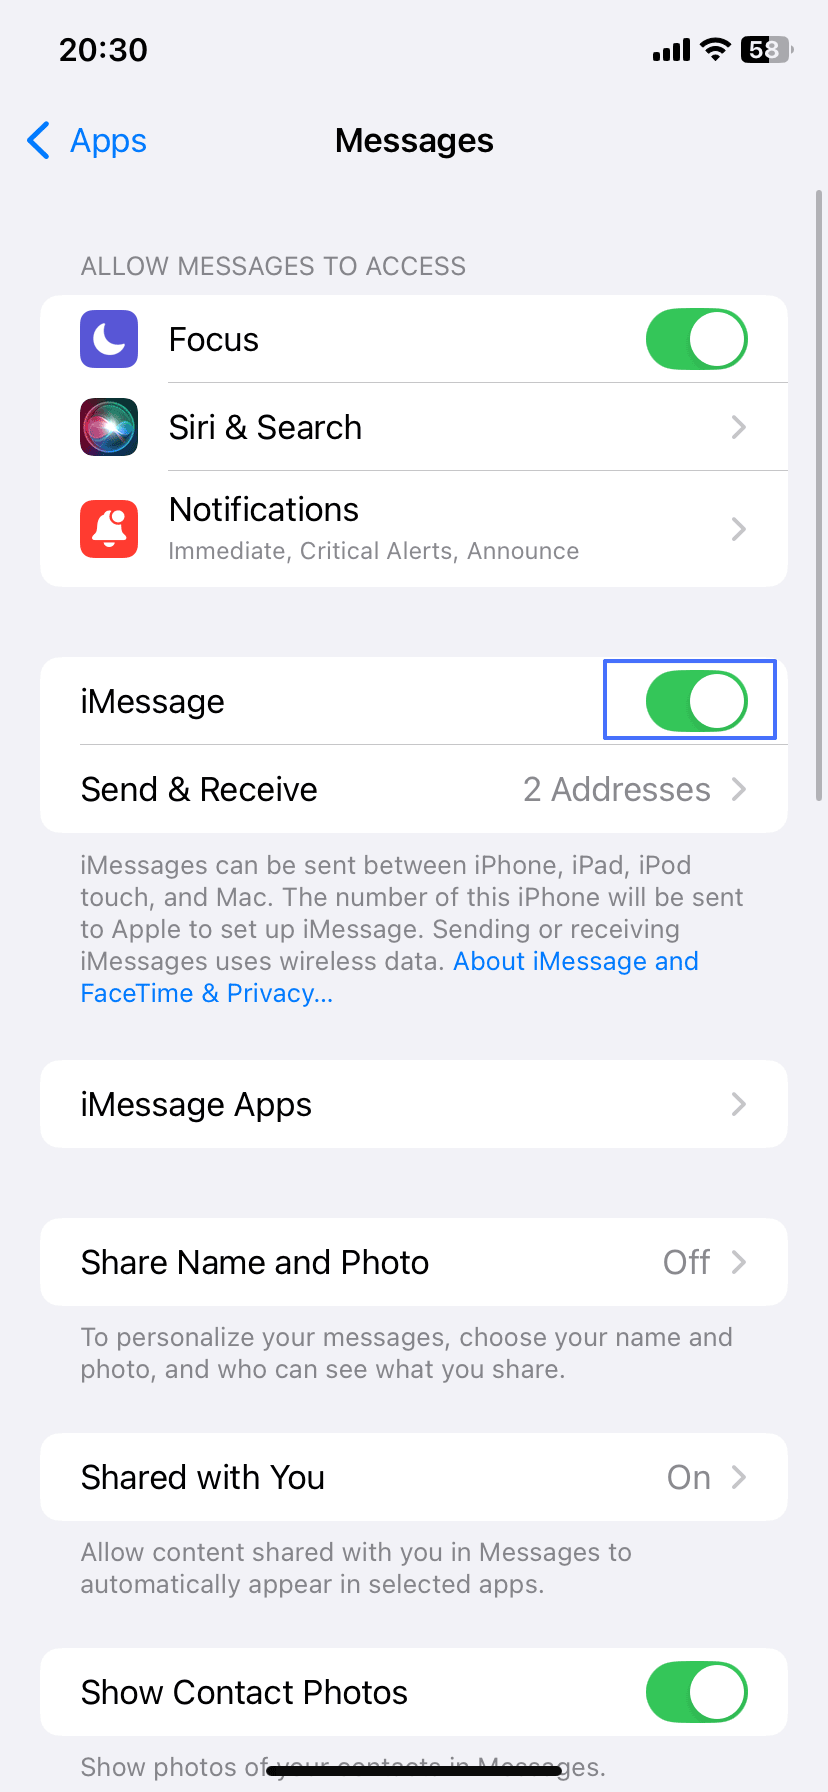
Method 5. Turn Off Syncing iMessage between iPhone and Other Devices
By turning off the syncing feature, you can only receive and respond to text on your iPhone.
- Open the settings app on your device.
- Click on the Messages option.
- Toggle off the swith along with iMessage.
You can also turn off the syncing on the other devices by signing out of iMessage.
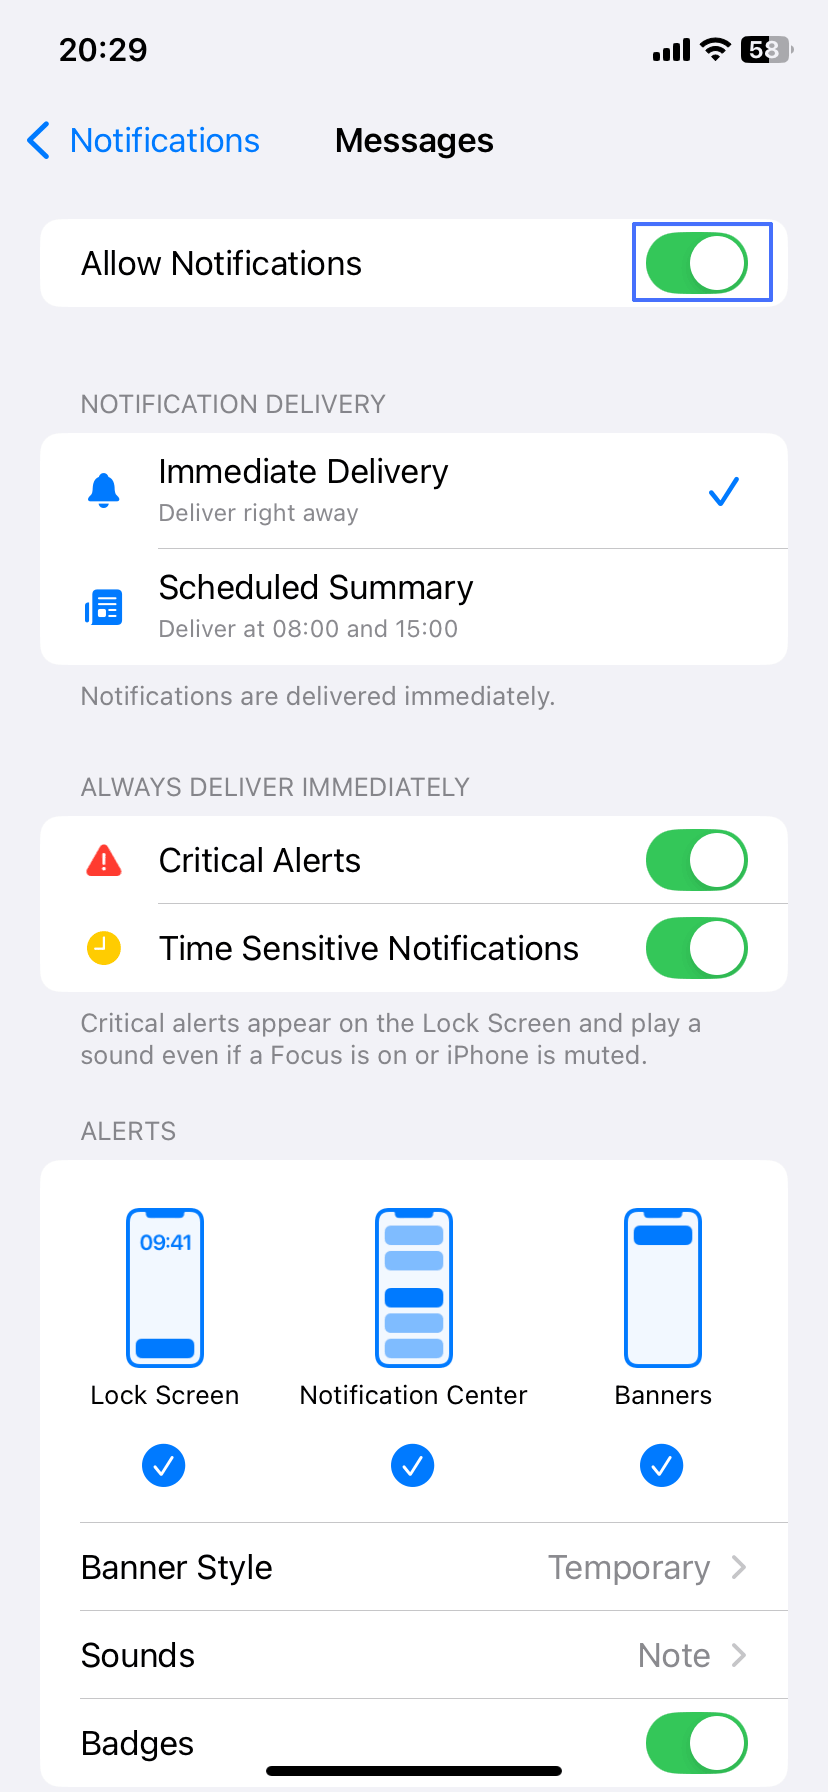
Method 6. Block iMessage Notifications
This method does not affect your ability to receive notifications. However, you will not be alerted when a new text is received via your messaging app. Also, you can customize the notification for specific contacts.
- Open the Settings app on your device.
- Click on the Notifications.
- Scroll down to find the Message app
 .
. - Toggle off the switch along with "Allow Notifications."
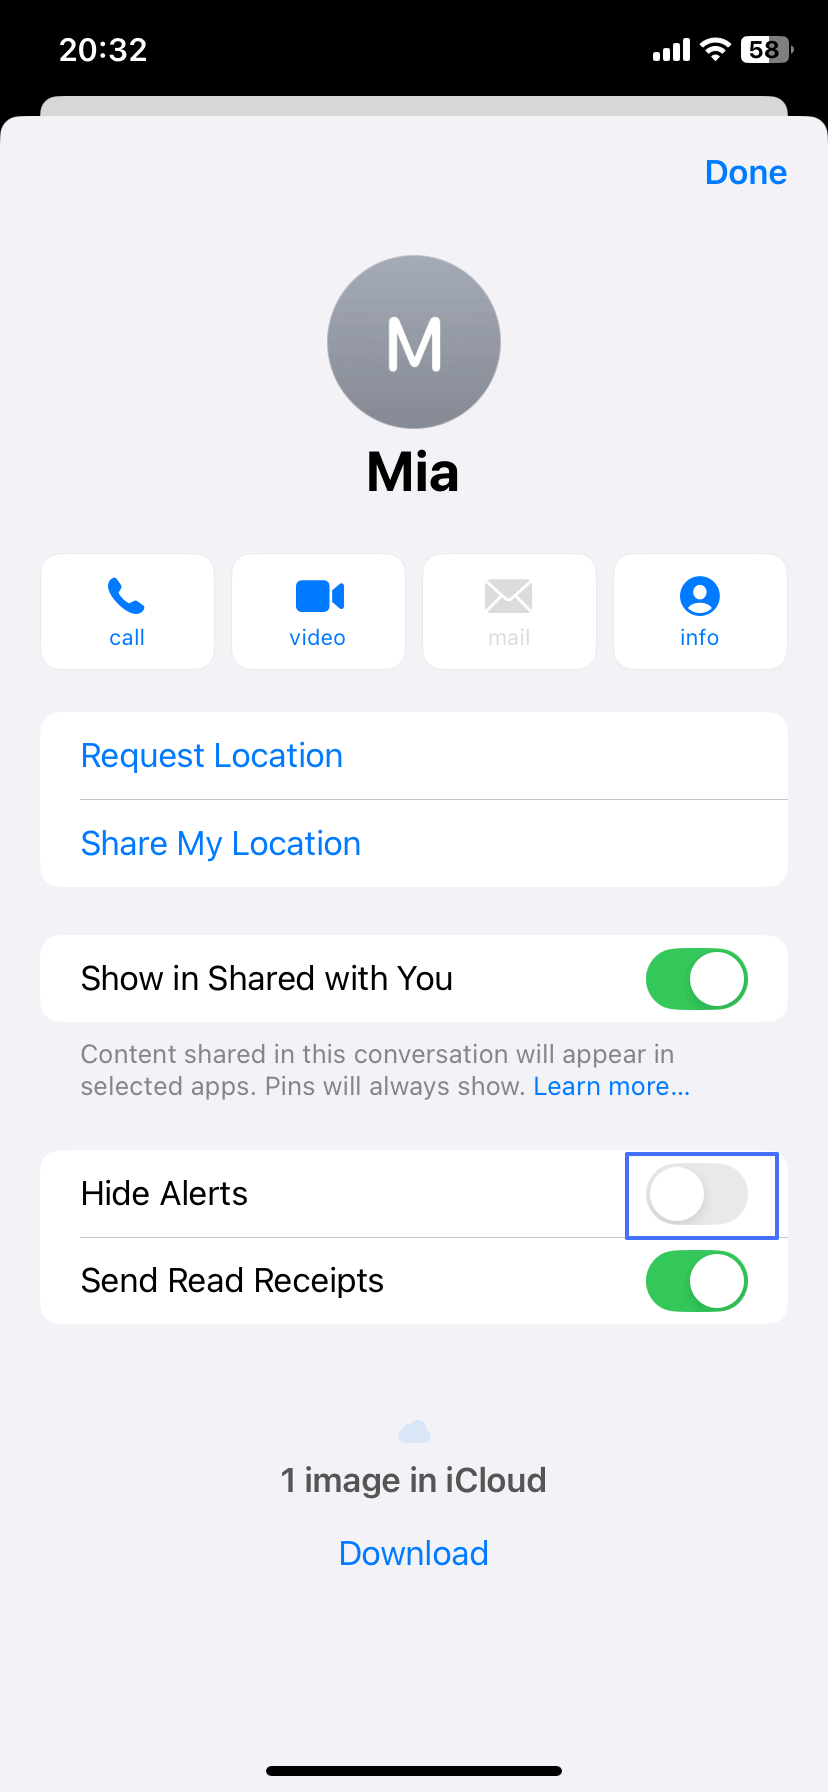
In the Message app, you can open a contact or group profile using the info icon to &ldquo Hide Alerts&rdquo for specific groups or contacts. Alternatively, you can select Show Notifications to prevent notifications for specific contacts instead of toggling off all Notifications for messages in your Settings app.
Can You See the Blocked iMessage on iPhone?
No, you cannot see blocked iMessage on your iPhone. When you block a contact in the Messages app on your iPhone, it effectively prevents any future messages, calls, and FaceTime requests from that person. However, you can still see the messages someone sent you before they were blocked.
Final Thoughts
Several ways are applicable for approaching how to block iMessage on iPhone. The traditional approach of blocking contacts is applicable. However, you can also block the app and its notifications, prevent unknown numbers from contacting you, or block the app from groups.
Alternatively, you can use the screen time feature to a specific time limit or range that you can use the app. Another approach will be to stop synching the iMessage app on your phone with that of your other Apple devices.


Leave a Reply.