What Does SOS Only Mean on iPhone? And How to Fix It?
Does your iPhone also show SOS only? This can be irritating as it can only make emergency calls. Fortunately, this guide will help you understand how to fix "SOS only" and get your iPhone working again. Without further ado, let's dive into this issue deeply, thereby troubleshooting it.
What Does SOS Only Mean on iPhone
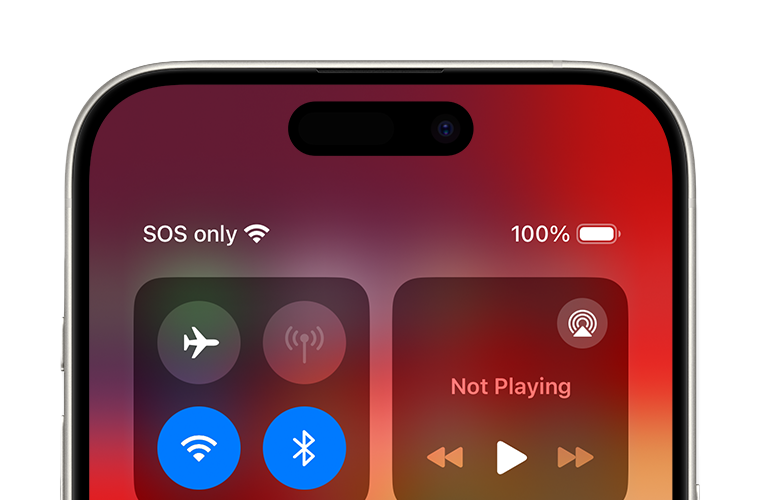
When your iPhone says SOS only, it means your phone isn't connected to your regular cellular or WiFi network and can only make emergency calls. Plus, you are able to text emergency services via satellite if you are using iPhone 14 and 15.
To put it briefly, your iPhone cannot be used normally.
Why Is My iPhone Stuck in SOS Mode
The SOS only error may occur due to many simple reasons. Understanding these causes can help resolve the problem and restore your phone's functionality.
📡Network Provider Errors:
Sometimes, network provider errors and massive outages can cause your iPhone to display SOS only. For example, a significant outage in February 2024 affected many AT&T users, making their iPhones unable to connect normally and showing SOS only instead.
📶No Cellular Connection:
As mentioned above, SOS only means your iPhone is not connected to any network. This can happen in areas with weak coverage or temporary network issues.
📇Invalid SIM:
An invalid or improperly inserted SIM card can prevent your iPhone from connecting to the network, resulting in SOS only mode.
⚙️Incorrect Settings:
Furthermore, issues with your iPhone's settings, such as incorrect network settings or airplane mode being turned on, can also lead to SOS only.
🧳Disabled Data Roaming:
If you are traveling internationally, then your iPhone is stuck in SOS mode due to no data roaming.
🤯Software Bugs:
Occasionally, software glitches or bugs can cause your iPhone to display SOS only.
How to Fix SOS Only on iPhone
You cannot use your device or even place regular calls while your iPhone is stuck in SOS mode until you solve it. Thus, addressing the root cause is crucial. Here are some workable solutions to resolve SOS only based on common causes:
1Ensure You Have Cellular Coverage
If your iPhone displays SOS only, it may be due to poor or no cellular signal. This problem frequently occurs in places with poor reception, like remote sites or structures with high walls. This time, the solution is to move to a better reception area and increase the strength of your signal.
2Turn off Airplane Mode
After ensuring you have cellular coverage, check if your Airplane Mode is enabled. This mode disables all wireless communications, including cellular network access.
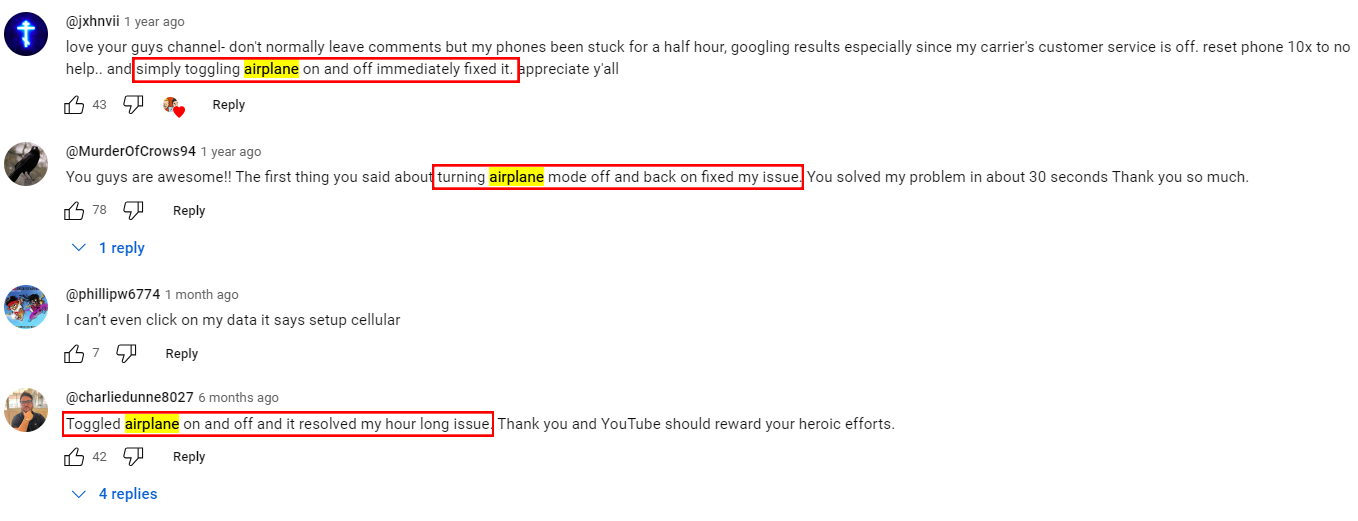
According to many YouTube users' feedback, they solved SOS only by adjusting the Airplane Mode.
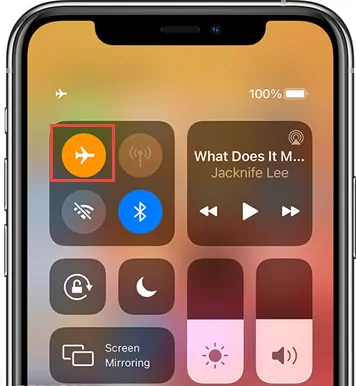
Now, swipe from the top right of your iPhone to open Control Center. Toggle the "Airplane" icon off and back on. You can also turn the Airplane Mode on and then off if you haven't enabled it. This can help restore your phone's connectivity.
3Reboot Your iPhone
A simple reboot of your iPhone can temporarily resolve connectivity problems as it fixes minor issues that may interfere with your network connection and refresh the system.
- Step 1.Just press and hold the "Power" and "Volume Up" buttons simultaneously.
- Step 2.When the slider appears, swipe it to power off.
- Step 3.Wait for the iPhone to turn off, then long-press the "Power" button again to turn it back on.
4Remove and Reinsert the SIM Card
Your iPhone shows SOS only if the SIM card is damaged or incorrectly placed.
Grab an SIM card ejector tool to check if your SIM card is placed correctly and the SIM card tray is well. After that, take the SIM card out of the tray. Then, place it back into the slot, ensuring it is properly aligned with the notch on the tray.
Done! Back on your iPhone to see if you get rid of SOS only mode.
5Reach out to Your Network Provider
SOS Only may occasionally appear on your iPhone due to network problems. As we stated above, a number of customers suffered SOS only on iPhones due to AT&T's service outage.
Therefore, contact your carrier to find out if service interruptions or account problems are interfering with your phone's network connectivity.

How to Prevent iPhone from Going into SOS Only Mode
Having experienced this helpless moment with SOS only, I believe no one wants to go through it again. Whether you have solved the issue or not, here are a few methods to prevent iPhone from going into emergency SOS mode in the future.
1Turn on Data Roaming
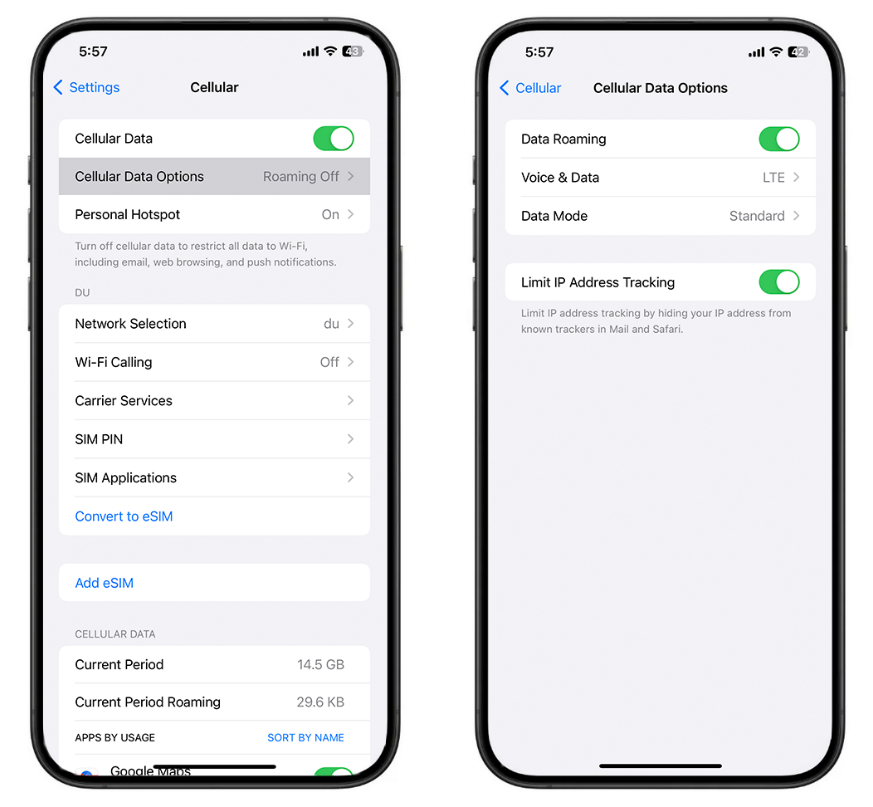
Activating Data Roaming is crucial to avoid SOS Only mode if traveling abroad. This setting allows your iPhone to connect to international networks and use data services outside your home country. Here's how to turn on roaming data:
- Step 1.Tap on "Cellular" in the "Settings" app.
- Step 2.Select "Cellular Data Options".
- Step 3.Slide the "Data Roaming" switch to turn it on.
If you haven't seen the "Data Roaming" option, please turn on your cellular data first.
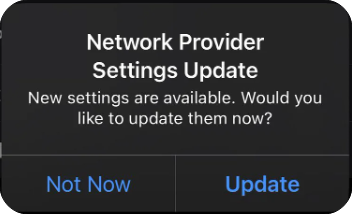
2Update Network Provider Settings
Keeping your network provider settings updated helps prevent your iPhone from getting stuck in SOS mode. Updates from your carrier can improve network connectivity, resolve compatibility issues, and ensure your iPhone works with the latest network technology. To update network provider settings:
- Step 1.Open the "Settings" app.
- Step 2.Go to "General" and then "About."
- Step 3.If any update is present, a prompt will appear. Tap "Update" to install it.
3Update Your iPhone
Most of the time, the updated iOS version includes better network support, performance improvements, and bug fixes. So, keeping your iOS version current ensures your phone works well and avoids connectivity problems. To update your iPhone:
- Step 1.Open the "Settings" app and tap "General."
- Step 2.Select "Software Update."
- Step 3.If an update is available, tap "Update Now." You can also turn on "Automatic Updates."
Summing Up
We understand how fretful you are if your iPhone says SOS only. But keep calm. Turning off Airplane Mode, making sure you have a cellular signal, and more should usually solve the issue. Just follow the above instructions to make your phone return to its normal functionality.
Plus, you can avert such issues by updating your iPhone and modifying settings such as Data Roaming.







Leave a Reply.