How to Force Apn Settings on Android (Without Root)
- Part 1 :Common scenarios for forcing APN setting Android
- Part 2 :How to Manually Force APN Settings (NO ROOT)


- Part 3 :How to Unlock APN Settings on Android When the Add Option is Grayed Out
- Part 4 :How to Resolve Connectivity Issues After Changing APN Settings
- Part 5 :Understanding APN Settings
- Part 6 :Security Considerations When Inputting APN Settings
1 Common scenarios for forcing APN setting Android
Network Issues: If the device is not connecting to the Internet or is experiencing slow data speeds, forcing the APN settings can sometimes resolve these issues.
Incorrect Defaults: Sometimes, the default APN settings provided by the device may not be correct, or they may not work optimally with the user's current service provider.
Travel or International Use: Travelers or those using international SIM cards may need to manually set the APN to connect to local networks in different countries.
Device Compatibility: Some unlocked phones may not automatically configure the APN settings when a new SIM card is inserted, requiring the user to manually force the correct settings.
2 How to Manually Force APN Settings (NO ROOT)
What tools can you use? MDM software can be an ideal option to help.
You just need an MDM admin account and install the supporting app in your controlled device. Now, you can follow these steps to set it up.
- Step 1. Log into the MDM Admin
- Use an email address to sign up for the account. Log in and you will see the management dashboard.
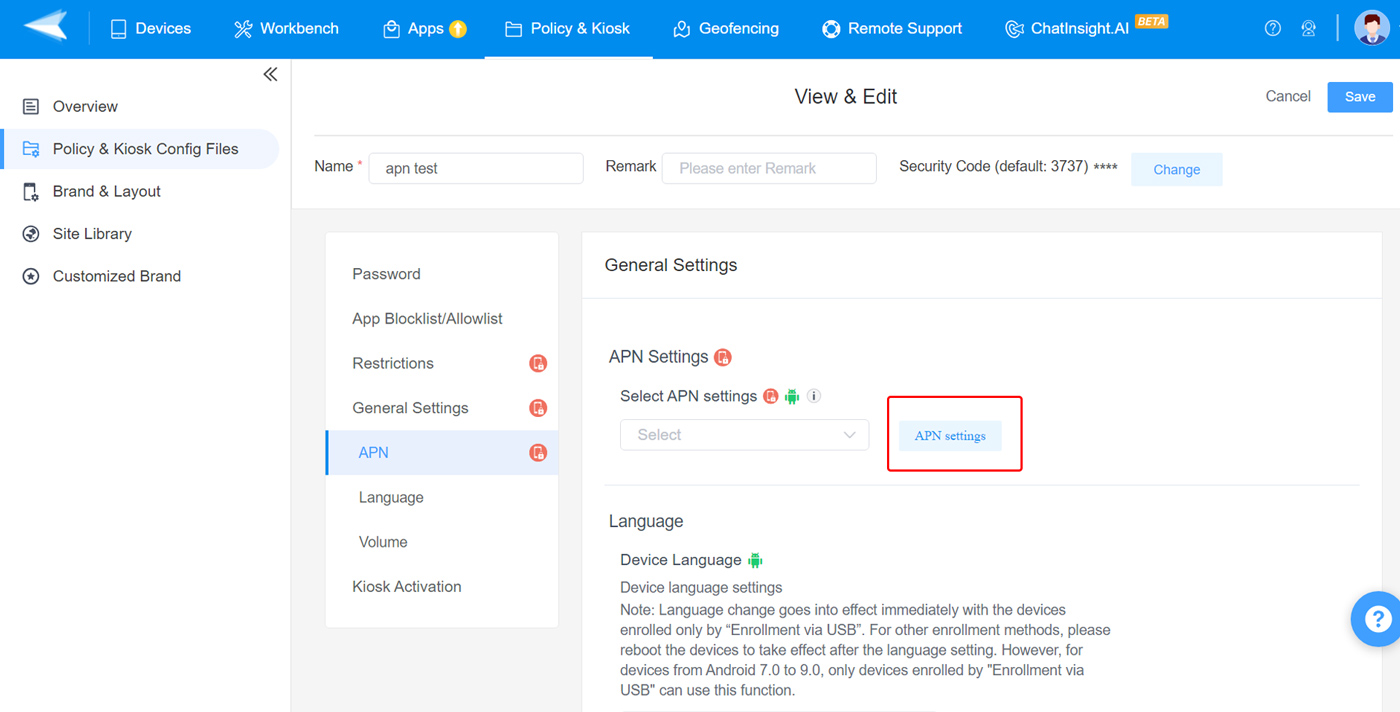
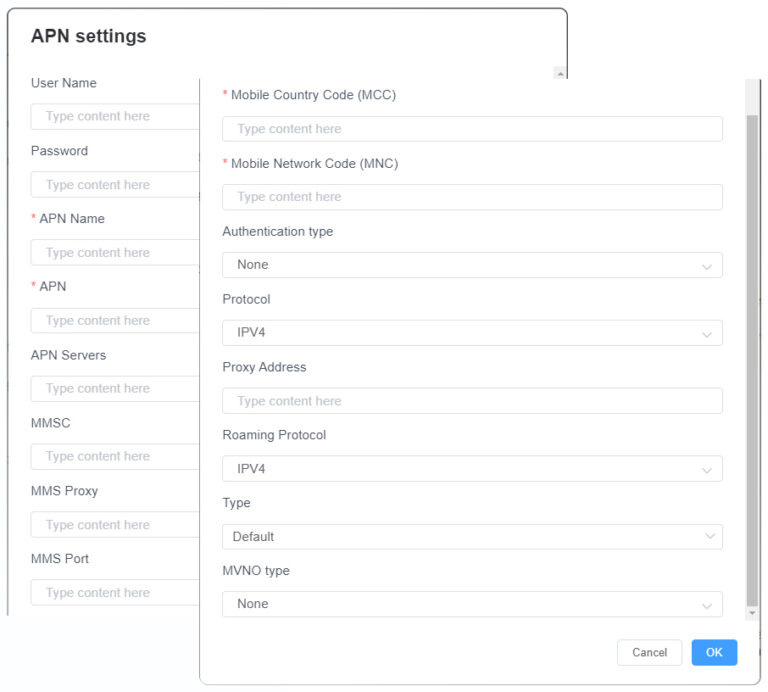
- Step 2. Create a Policy Config File for APN Setting
- This policy file will ensure that your device is comply with the setting and in a mandatory manner.
- Go to 'Policy & Kiosk' > 'Policy' > 'General Settings' > 'APN Settings.'
- Step 3. Enroll and Apply the Policy File to Android Device
- Now, you need to enroll your Android phone or tablet so that the MDM software can manage the APN for your device.
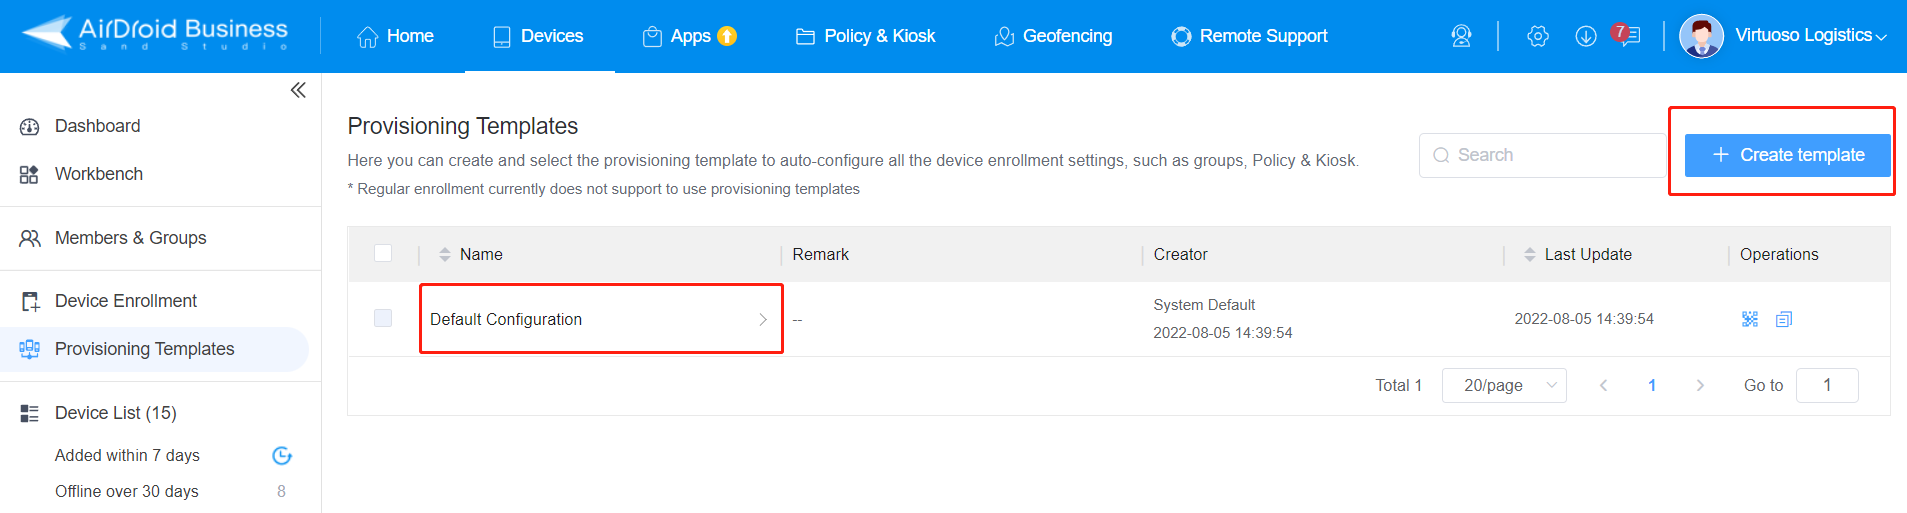
- You can follow this navigation to start enrollment: 'Device' > 'Provisioning Templates' > 'Create template' > 'Enroll the device to Default Group and apply to the following Policy or Kiosk Config File.'
- Choose the policy file you have just created, then save the template.
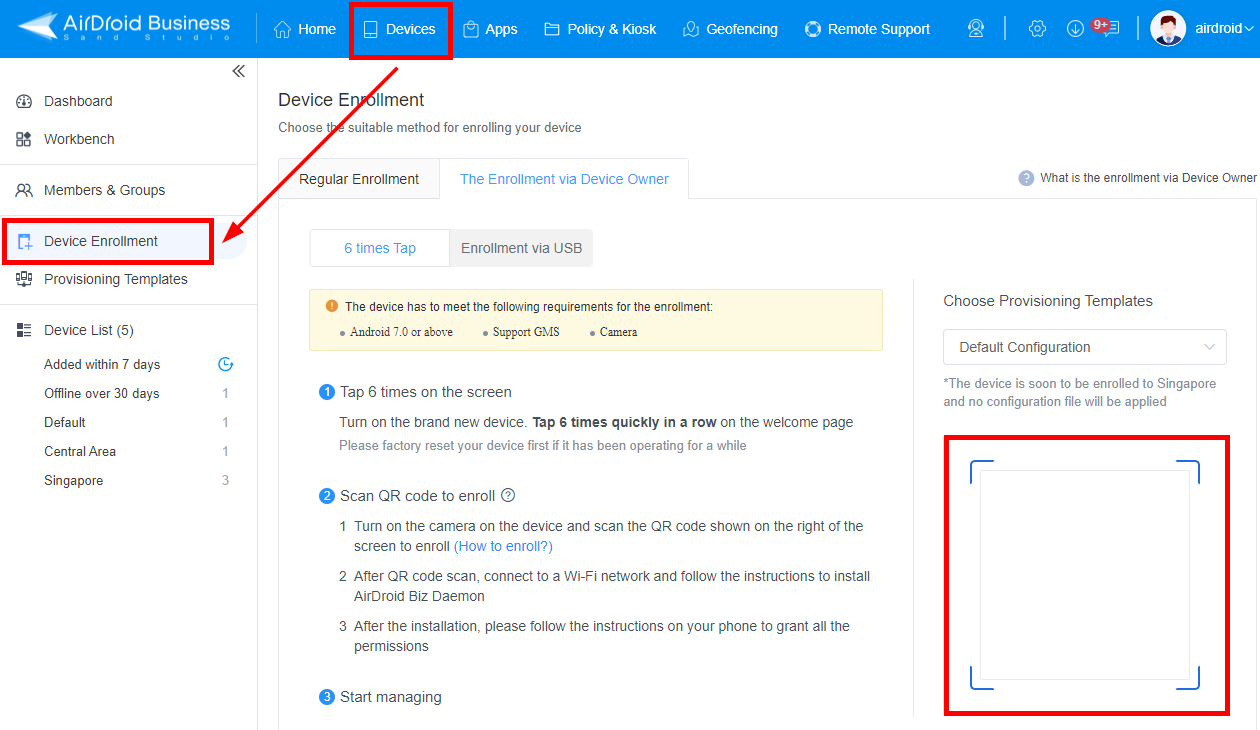
- Then, go to 'Device' > 'Device Enrollment' > 'Device Owner' > '6 times Tap'. And choose the template in the right.
- Open your Android device and scan the code. As you finish the enrollment, the policy will be automatically applied to the device as well as the APN setting.
3 How to Unlock APN Settings on Android When the Add Option is Grayed Out
If the APN settings are grayed out on your Android device, several reasons may cause this. Here’s a look at the common reasons and how to solve them:
- 1. Carrier restrictions: Some mobile carriers restrict changing APN settings, so contact your carrier to confirm if this is the case or to request to have them unlocked, if possible.
- 2. Sim card issues: A faulty SIM card or its placement in the incorrect slot (on a dual SIM device) may be the reason the APN settings are grayed out. Removing and replacing the card or switching slots may solve the problem.
- 3. Software issues: If the operating system isn’t up-to-date or a recent update has bugs, the APN setting might be grayed out. Check for a new update to fix the issue.
- 4. Restart Your Device: A simple restart can fix many software glitches. Preventing editing APN settings may also work after the restart.
- 5. Reset to Default: Some devices offer the option to reset the APN settings to default. This can sometimes remove the greyed-out status, allowing you to edit the settings.
- 6. Device management policy: If you’re an end-user your IT department may have this feature grayed out so it can be managed at their level only, contact them to confirm if this is the case.
4 How to Resolve Connectivity Issues After Changing APN Settings
- 1) Double-Check APN Settings: Verify that all the APN settings are correct and match exactly what your carrier has provided. Even a small mistake can cause connectivity problems.
- 2) Choose the Right APN: If you have multiple APN profiles, ensure that the correct one is selected. Sometimes, devices may not automatically select the new APN profile.
- 3) Test Network Connection: Try to access the internet or send an MMS to test the new settings. If issues persist, you may need to revert to the previous APN settings and contact your carrier for assistance.
- 4) Check for Network Outages: Ensure there are no reported network outages in your area that could be affecting connectivity.
5 Understanding APN Settings
If you're a completely beginner, learn the components of APN settings in this part.
| APN | The actual name of the access point; this is the most critical part of the APN setting. This is provided by the mobile carrier and must be entered correctly for the device to access the internet. |
| Proxy | This is an optional field that specifies the IP address of a proxy server that the mobile data must go through before reaching the internet. It can be used to route traffic or for the carrier to control access to the network. |
| Port | If a proxy is used, the port specifies the gateway through which the traffic should be sent to the proxy server. |
| Username & Password | Some networks require authentication, and these fields are used to enter the credentials provided by the carrier. |
| MMSC | This is the URL for the server that handles MMS messages. It is only necessary if you plan to send and receive MMS. |
| MCC & MNC | These are numeric codes that uniquely identify a mobile subscriber's home country and mobile network. These are usually set automatically by the SIM card. |
| Authentication Type | This specifies the authentication method used by the APN, such as PAP (Password Authentication Protocol) or CHAP (Challenge Handshake Authentication Protocol). |
| APN Type | This field defines the type of service that the APN is configured to provide, such as default (internet data), mms (for MMS messaging), supl (for assisted GPS), and others. |
6 Security Considerations When Inputting APN Settings
When inputting APN settings on your Android device, it's important to consider security to protect your data and maintain the integrity of your mobile device. Here are some key security considerations:
Source of APN Settings
Ensure that the APN settings you are inputting come from a trusted source, typically your mobile carrier or their official website. Using incorrect or unverified APN settings can potentially lead to security vulnerabilities or data leakage.
Public Wi-Fi Risks
Avoid modifying APN settings while connected to public Wi-Fi networks, as these networks are more susceptible to interception and malicious activity. It's safer to make such changes on a secure, private connection or while using your mobile data.
Sharing Sensitive Information
Be cautious if the APN settings require a username and password. Transmitting such sensitive information over insecure channels can expose your credentials to interception. Always ensure that any transmission of sensitive data is secure.
Downloading APN Configuration Files
Some carriers may offer the option to download and install APN configuration files directly to your device. Only download these files from the official carrier website or authorized sources to avoid installing malicious configurations.
Device Security Measures
Maintain overall device security by using a strong lock screen password, keeping your device's operating system up to date, and installing security software if available. A secure device is less likely to be compromised when changing APN settings.


Leave a Reply.