
How to Enable Remote Desktop (RDP) with Powershell

Filed to: Quick Guides

Follow the steps below to enable Remote Desktop (RDP) in Windows using Powershell.
Step 1
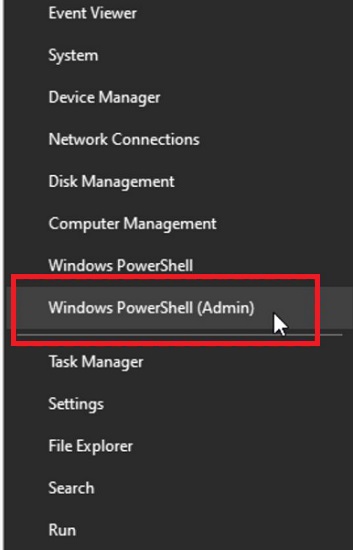
Launch PowerShell
Press and hold "Win+X" in your keyboard and click on Windows PowerShell (Admin) in the window that opens.
Step 2
Enable RDP
Type the following command in PowerShell and press "Enter" in your keyboard to enable RDP:
Set-ItemProperty -Path 'HKLM:\System\CurrentControlSet\Control\Terminal Server' -name "fDenyTSConnections" -value 0

Step 3
Allow the Windows Firewall
The RDP connection process may be blocked by the Windows Firewall, when this happens you can type the following command and press "Enter" in your keyboard :
Enable-NetFirewallRule -DisplayGroup "Remote Desktop"

Get a Start with AirDroid Remote Support Now


Leave a Reply.