

How to Use OEMConfig Policy to Restrict the Samsung Device
Table of Contents[ShowHide]
OEMConfig is a customizable configuration that can be applied to devices of various brands, enabling them to operate according to your requirements.
Note : 1. This feature supports only devices with Android 9.0 and above.
2. OEMConfig requires the corresponding OEM app to be installed on the device to take effect.
2. OEMConfig requires the corresponding OEM app to be installed on the device to take effect.
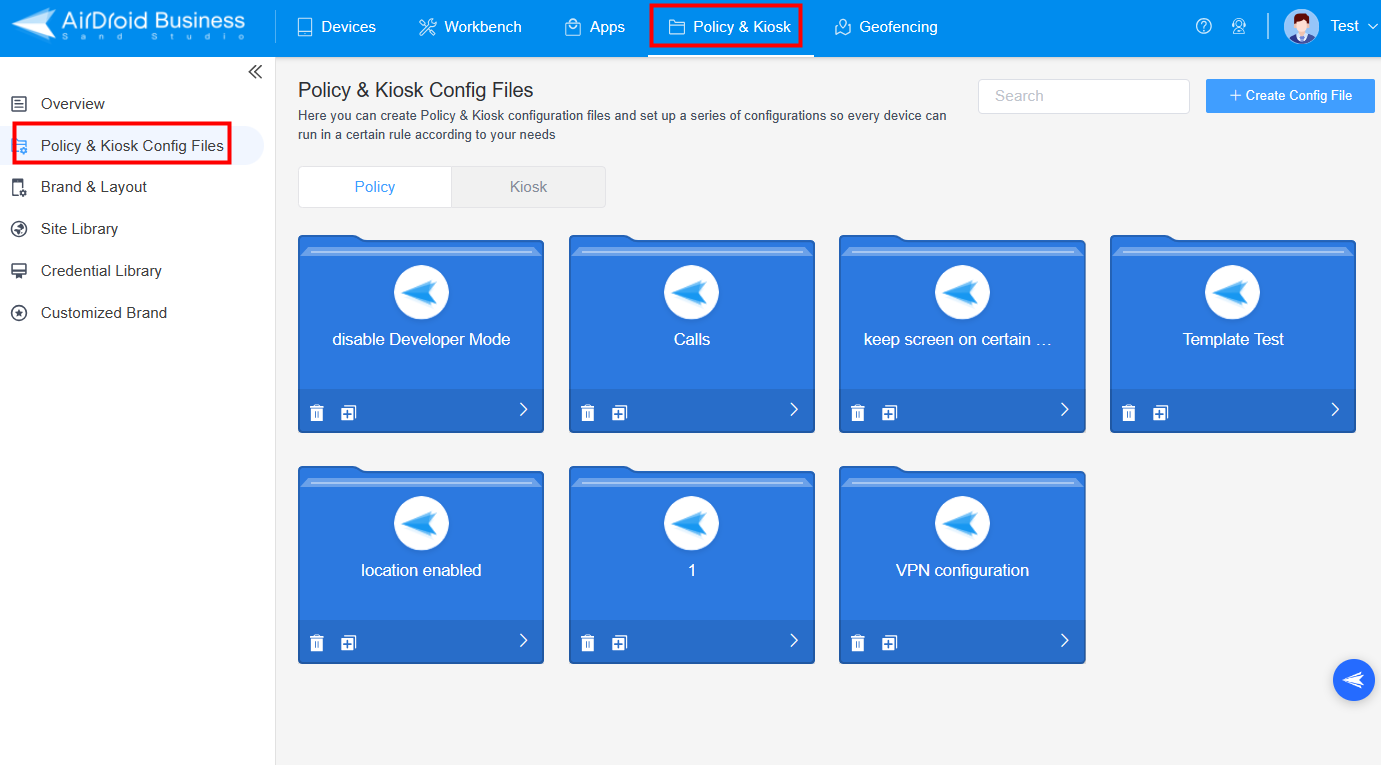
- Step 1Access Policy Setting
- Log into Admin Console, navigate to the "Policy and Kiosk" Section on the dashboard, and click "Policy and Kiosk Config Files".

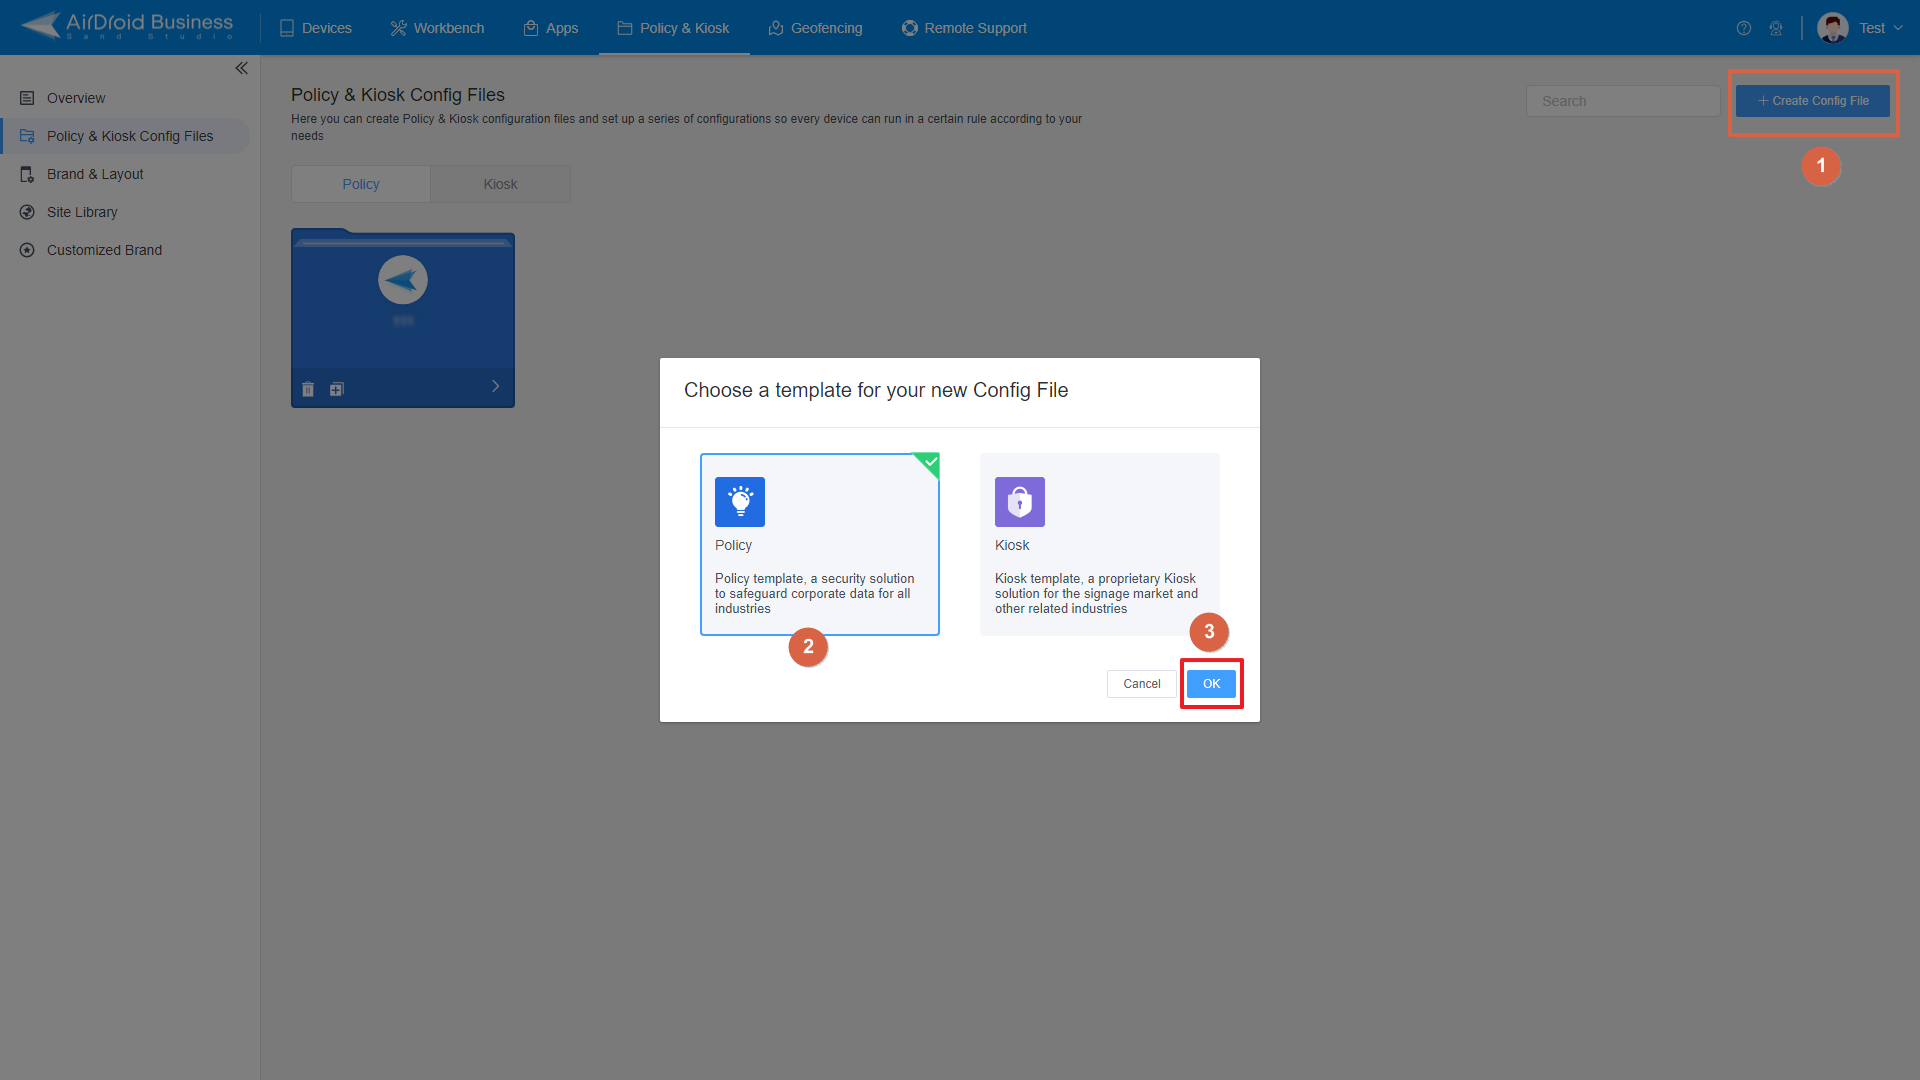
- Step 2Create or Edit a Policy
- In this section, you have the option to either create a new policy or modify an existing one.
- ● To create a new policy, click on "+Create Config File", choose "Policy" and then click "OK" on the pop-up.

- ● To modify an existing Policy, switch to the "Policy" tab, select the Policy File you want to modify.
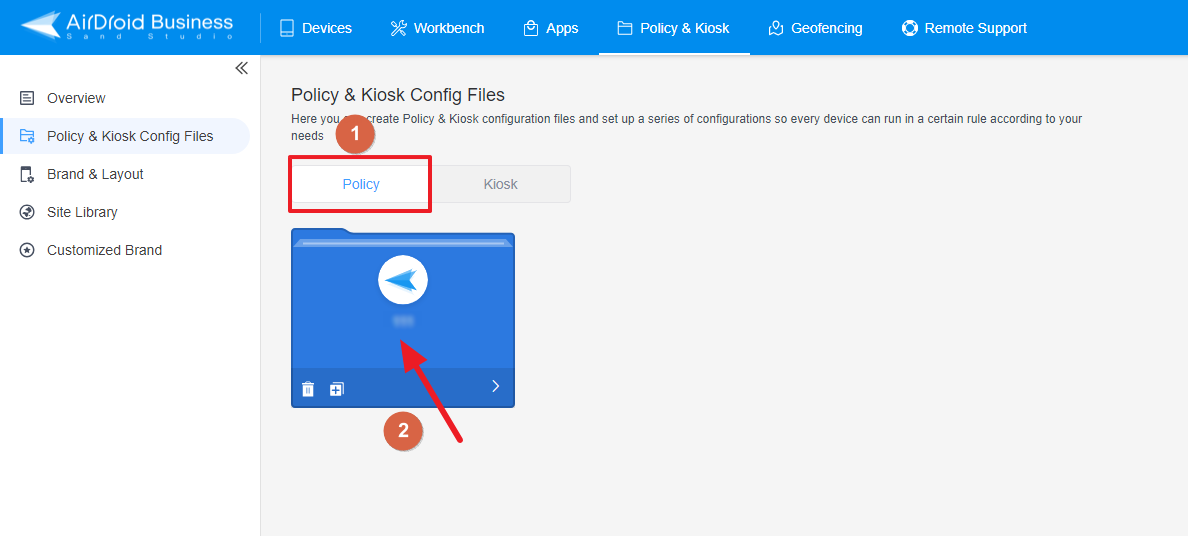

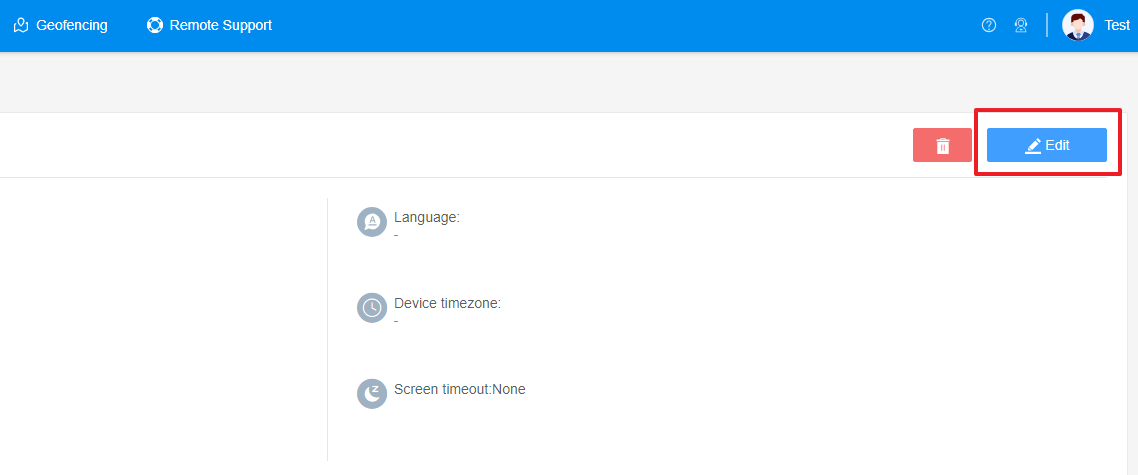
- Click on the "Edit" Button in the top right corner. On the following page, you can set all kinds of limitations and settings for your config file.

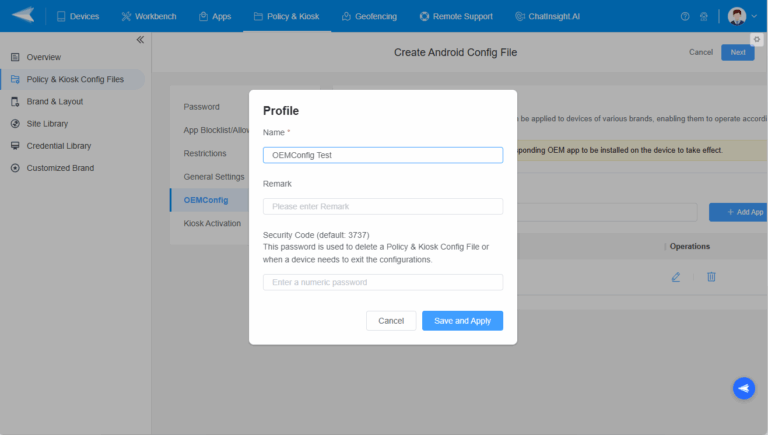
- Step 3Access the "OEMConfig" Policy Section
- Click on [OEMConfig].
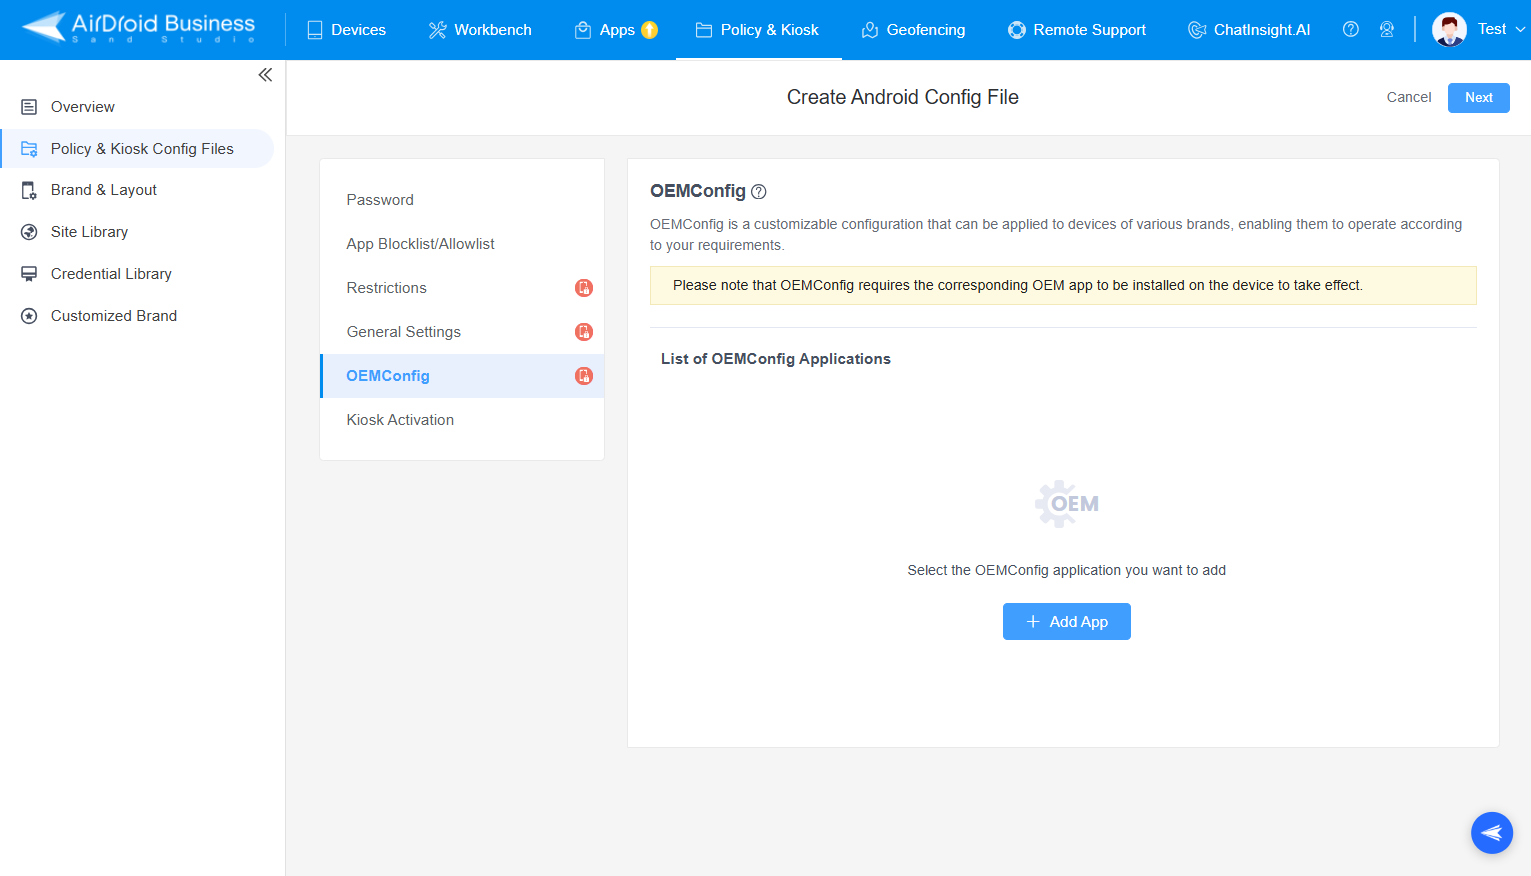

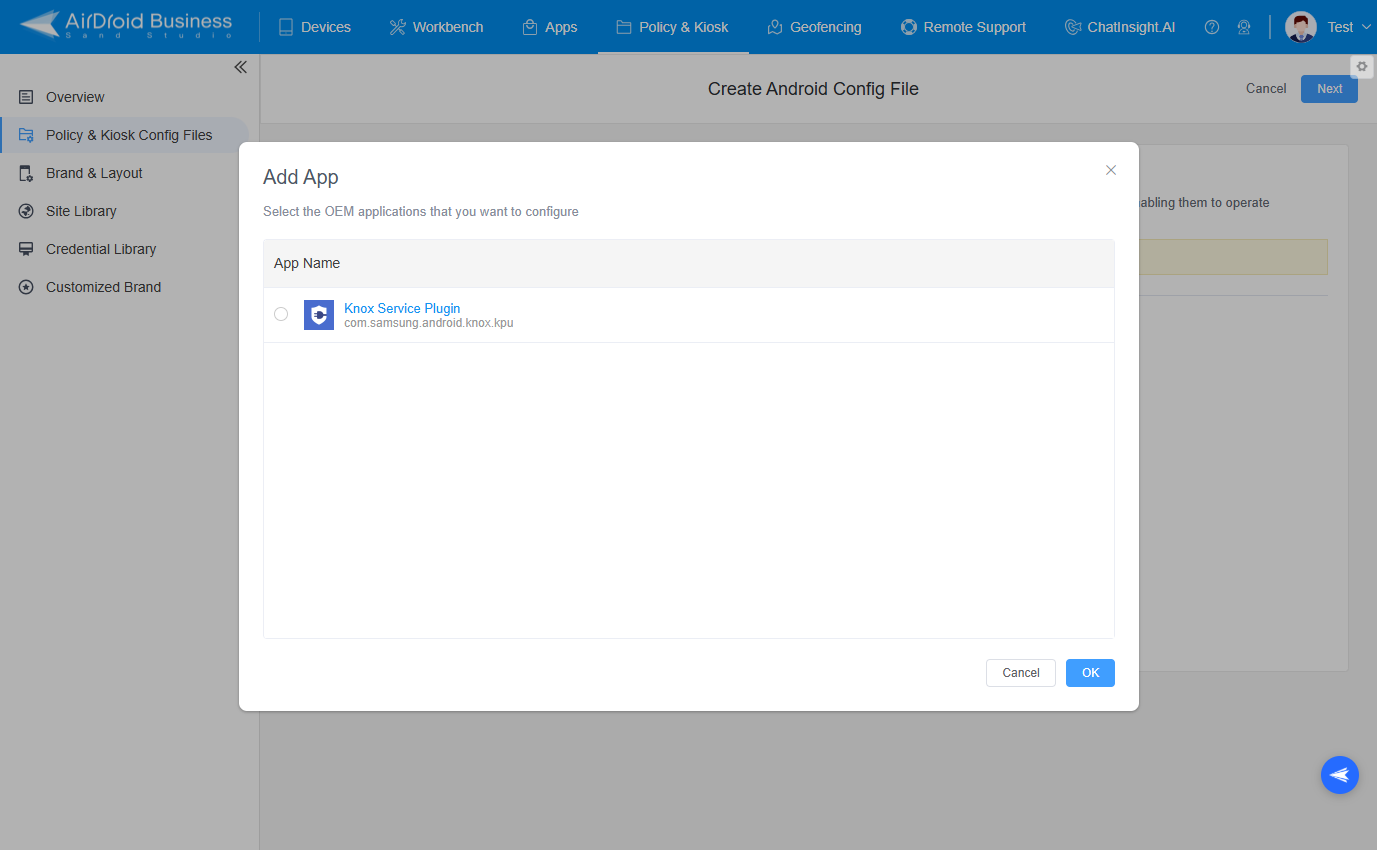
- Step 4Add App
- Click [Add App] button to select the Knox Service Plugin (KSP) Application,then click "OK" to confirm.

- Step 5Set Up Some Policies
- You will see the Application Settings interface. Here you can set up some policies, such as:
- Basic: Profile name(version), Knox License key, Debug Mode.
- Separated Apps Policies: Policies for separated apps.
- Device-wide Policies: Applicable to all users on the device.
- Work Profile Policies: Applicable to the work profile user.
- Advanced Wi-Fi Configurations (Premium): Controls for advanced Wi-Fi settings.
- Allowed Apps for Reading Private Keys Configurations (Premium): Controls for allowed apps.
- Allowed USB Devices for Applications Configurations: Controls for USB access.
- APN Configurations: Policies for Access Point Name settings.
- Certificates (Premium): Policies for certificate configurations.
- Certificate Provisioning Configurations: Policies for certificate provisioning.
- Device Account Policy Configurations: Controls for device accounts.
- Device and Settings Customization Profile (Premium): Customization controls.
- Device Key Mapping to Launch Application Configurations: Key mapping controls.
- DeX Customization Profile (Premium): DeX customization controls.
- Firewall Configuration Profile: Controls for firewall settings.
- Manual Proxy Configuration: Policies for global proxy settings.
- NPA Data Points Profile (Premium): Controls for Network Platform Analytics.
- Peripheral Configuration: Controls for peripheral profiles.
- Proxy Auto-config (PAC): Policies for PAC-based proxy settings.
- Permission Controls: Controls for permission profiles.
- RCP Data Sync Profile Configurations (Premium): Controls for RCP data sync.
- UCM Plugin Configurations (Premium): Configurations for UCM plugins.
- VPN Profiles (Premium): Configuration settings for VPN profiles.
- Wi-Fi Configurations: Controls for Wi-Fi settings.
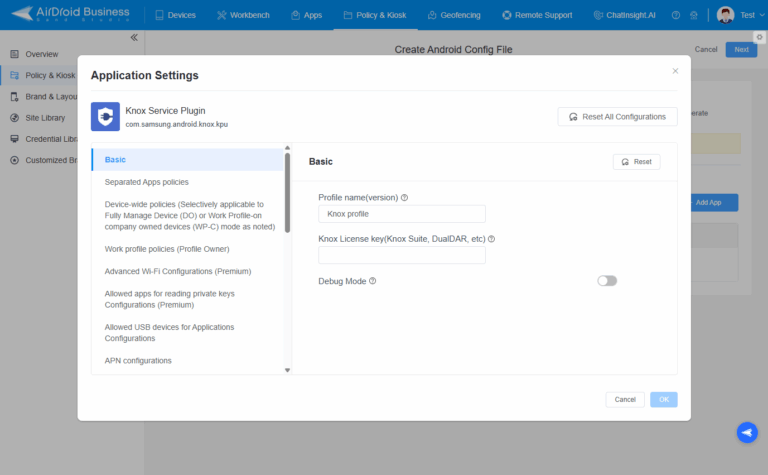


- After setting up the KSP Policy, click the "Next" button on the top right corner, and enter the name (and the security code if needed) in the pop-up. Click the [Save and Apply] button to save the profile.

KSP Configuration
- Step 6Save and Apply the Policy
- After setting up the this Policy, click "Save" button on the top right corner.


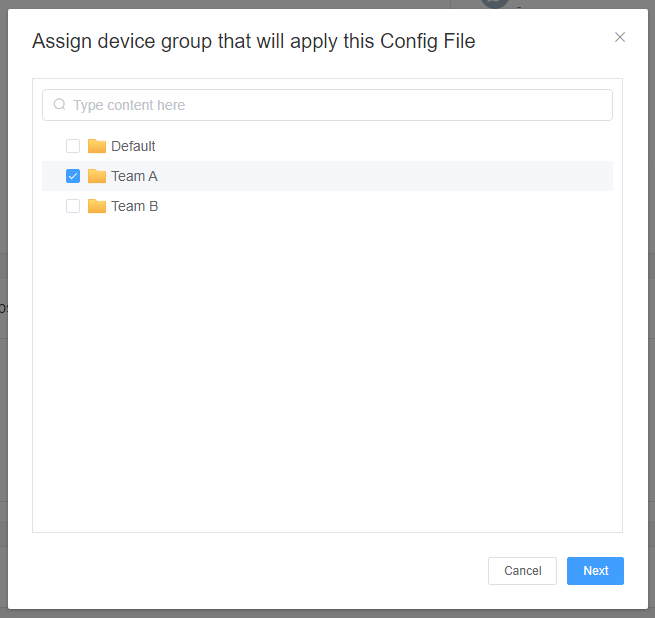
- Then, return to the Policy Management section, select the policy you created or edited, find the [Apply Config File to the following devices/groups] and click [+Add]. Choose the devices or groups you want to apply the policy to and confirm.
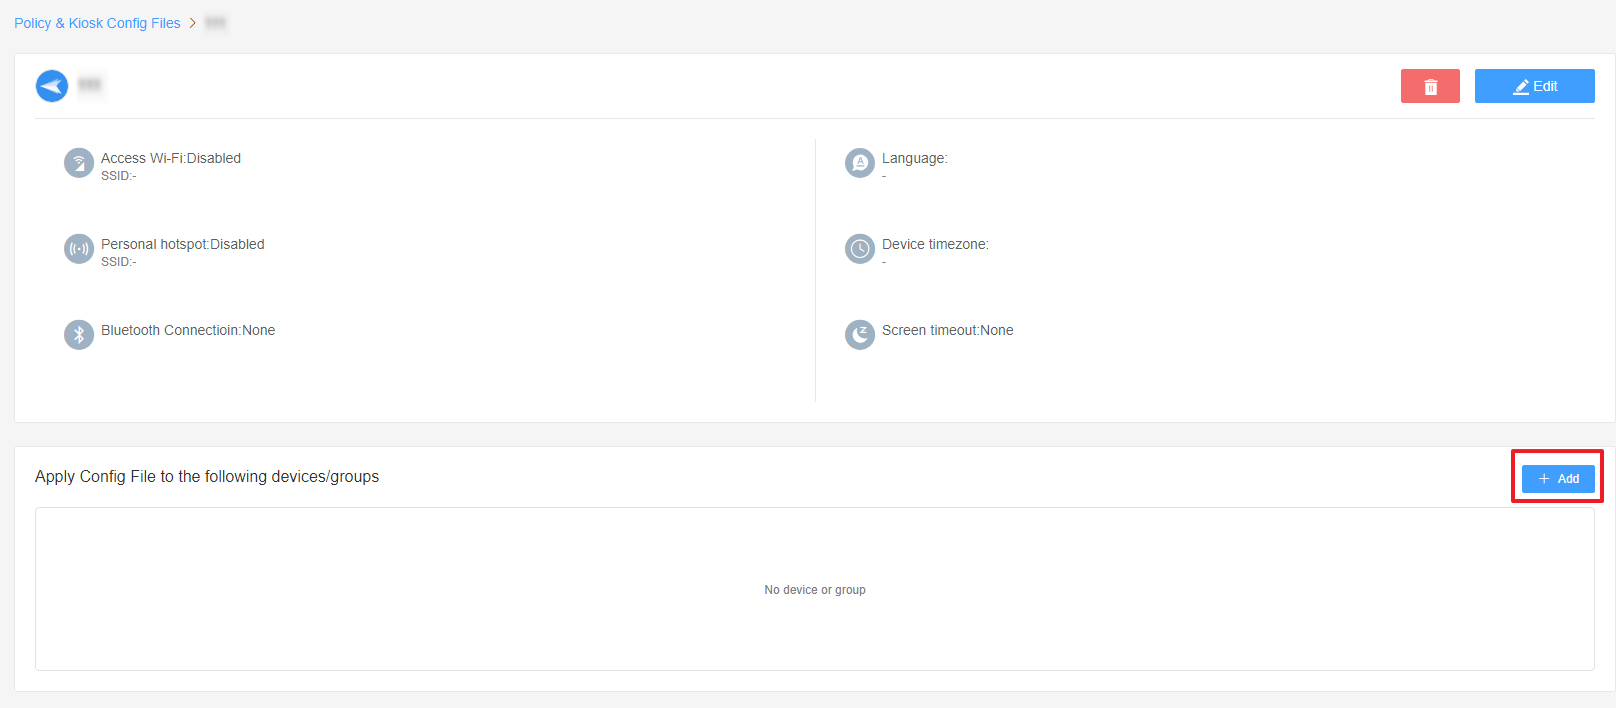


- When the status in the list turns to "Applied successfully", the policy settings have been successfully applied to the target devices.


Was This Page Helpful?
Still need help? Submit a request >>
Related Articles
- How to implement App Blocklist/ App Allowlist on AirDroid Business?
- How can I control camera access using Camera and Lockscreen Camera Settings in AirDroid Business?
- How can I set up password rules with Android Password Policy in AirDroid Business?
- How do I manage Microphone Permissions in AirDroid Business?
- How can I ensure data security with Mandatory Storage Encryption in AirDroid Business?
See all articles
You May Also Like
- How to use App Allowlist for Kiosk Mode in AirDroid Business?
- How to Set up Kiosk Website Allowlist on AirDroid Business?
- How to set up Kiosk Browser Settings on AirDroid Business?
- How do I Customize the Kiosk Brand within AirDroid Business?
- How to Modify My Brand and Layout in Kiosk Mode of AirDroid Business?
See all articles