

How to Use the Calls Policy of AirDroid Business to Manage SIM Card Binding, Allowed Numbers, and Contacts?
Managing calls and contacts is integral to maintaining mobile communication's security, compliance, and efficiency. It provides the necessary tools to safeguard sensitive information and ensure that mobile devices are used in accordance with organizational policies and industry regulations.
In this tutorial, we will guide you through the process of using the Call Policy feature of AirDroid Business to manage SIM Card Binding, Allowed Numbers, and Contacts.
- Step 1Access Policy Setting
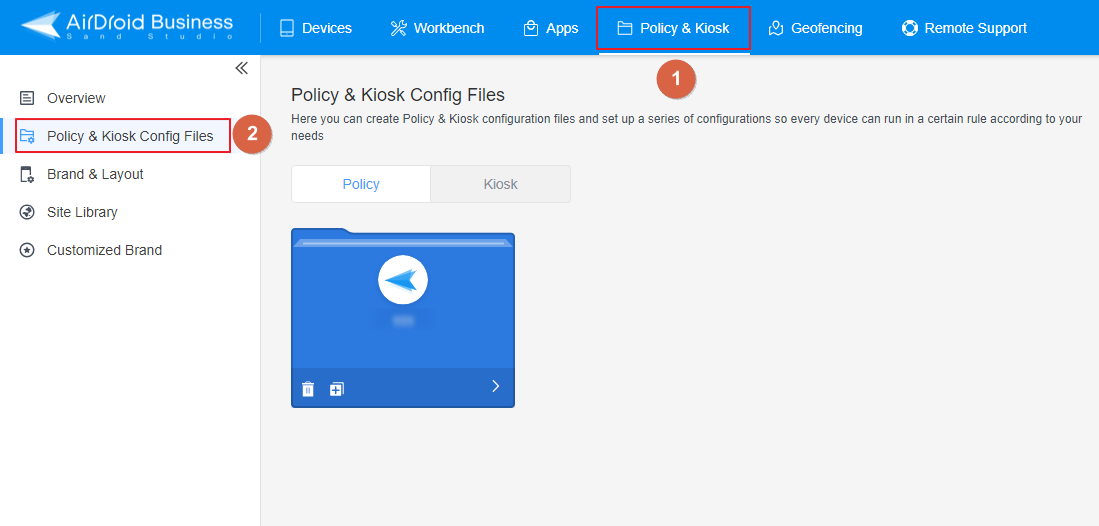
- Log into Admin Console, navigate to the "Policy & Kiosk" Section on the dashboard, and click "Policy & Kiosk Config Files".
- Step 2Create or Edit a Policy
- In this section, you have the option to either create a new policy or modify an existing one.
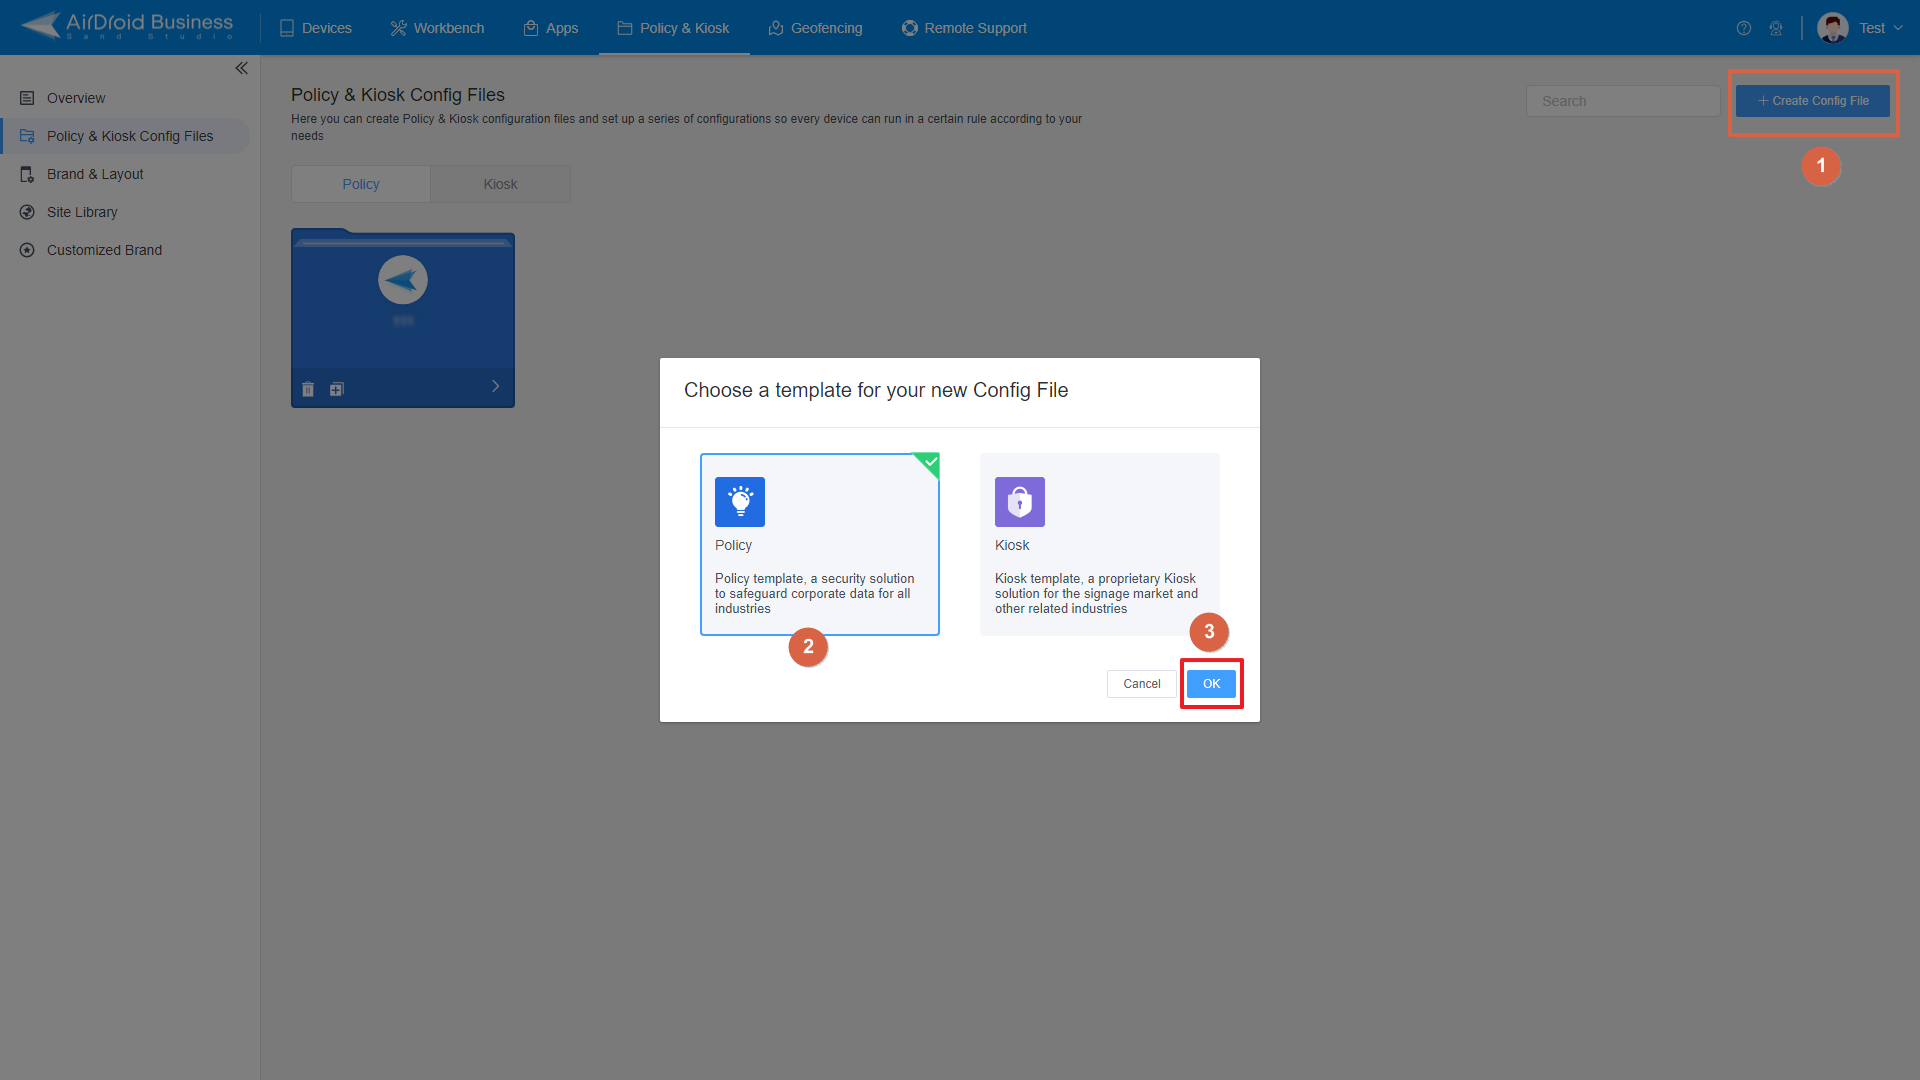
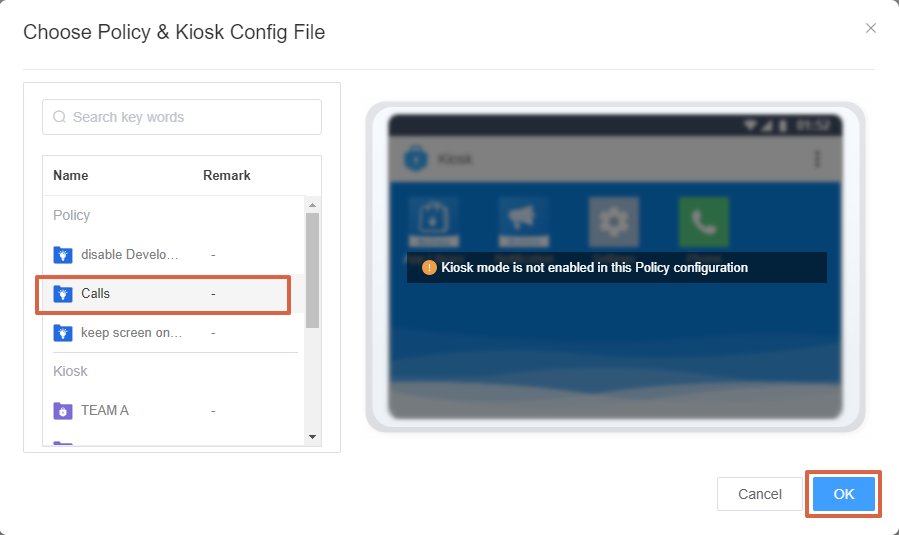
- ● To create a new policy, click on "+Create Config File", choose "Policy" and then click "OK" on the pop-up.
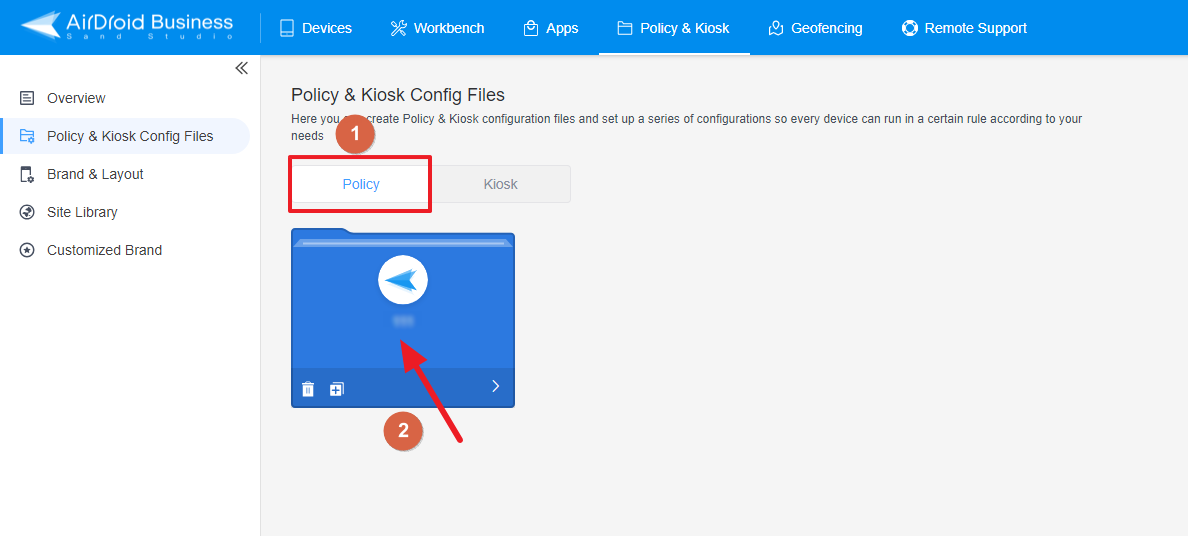
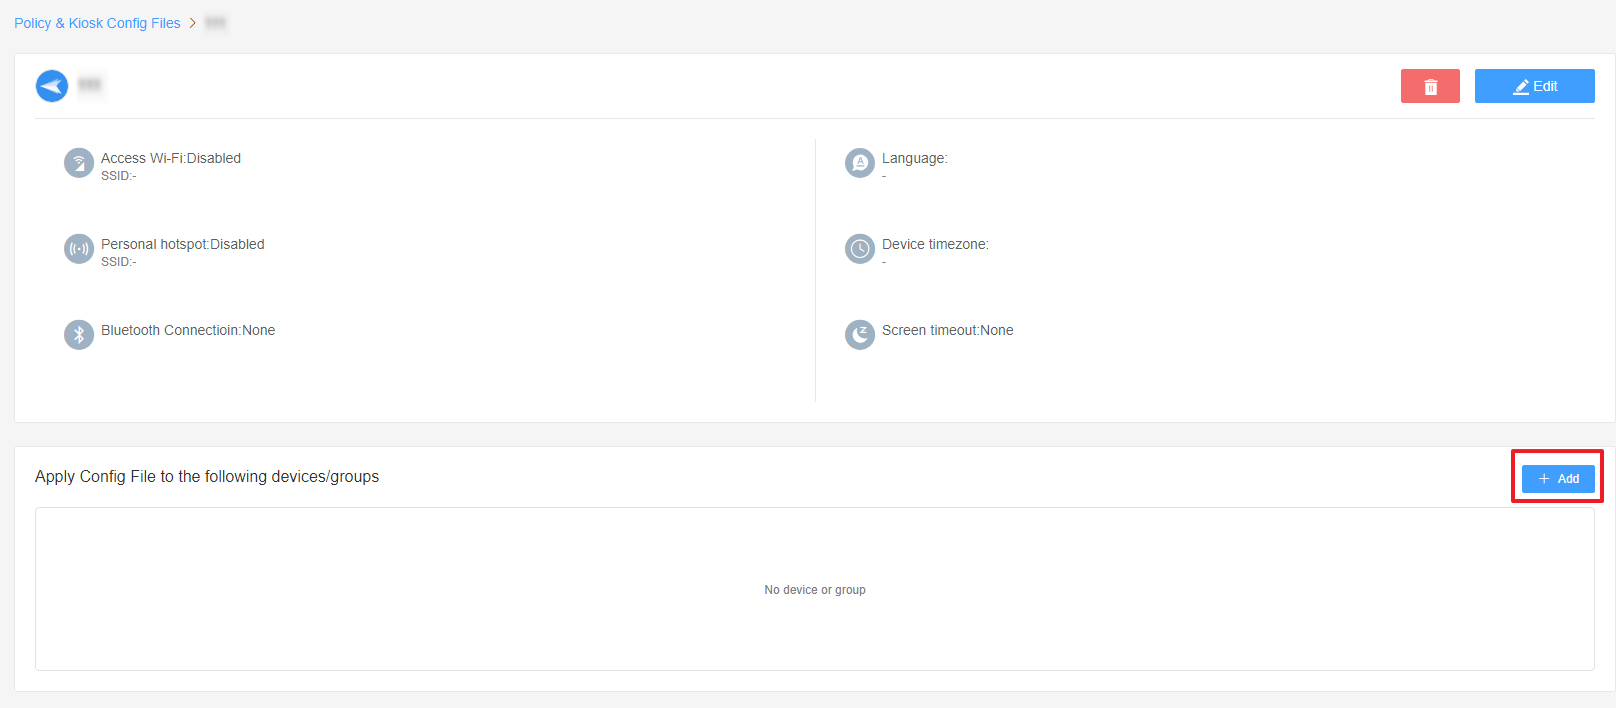
- ● To modify an existing Policy, switch to the "Policy" tab, select the Policy File you want to modify.
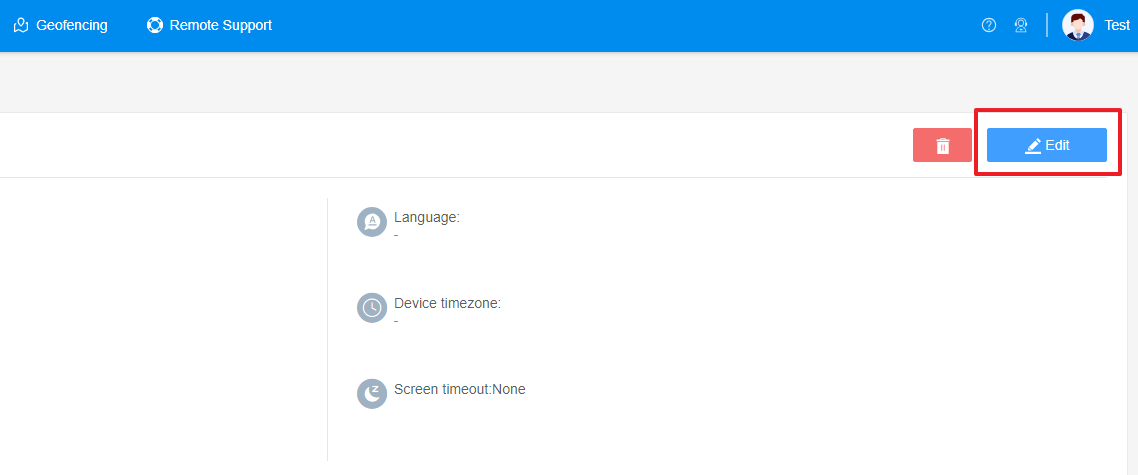
- Click on the "Edit" Button in the top right corner. On the following page, you can set all kinds of limitations and settings for your config file.
- Step 3Access the "Call" Policy Section
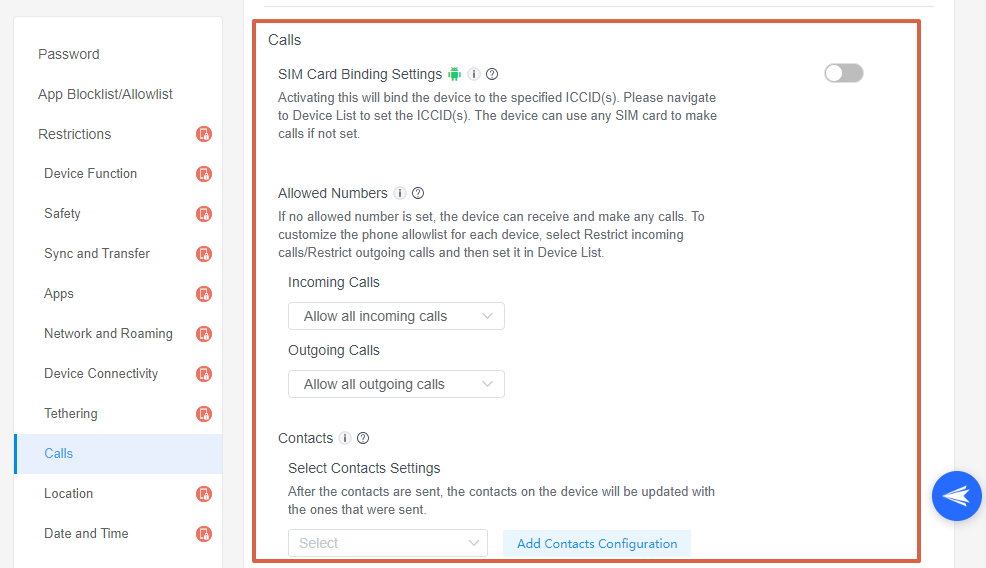
- Click on [Restrictions], and find the "Calls" section. Here, you can configure the "Calls" Policy.
- Step 4Set up the Calls Policy
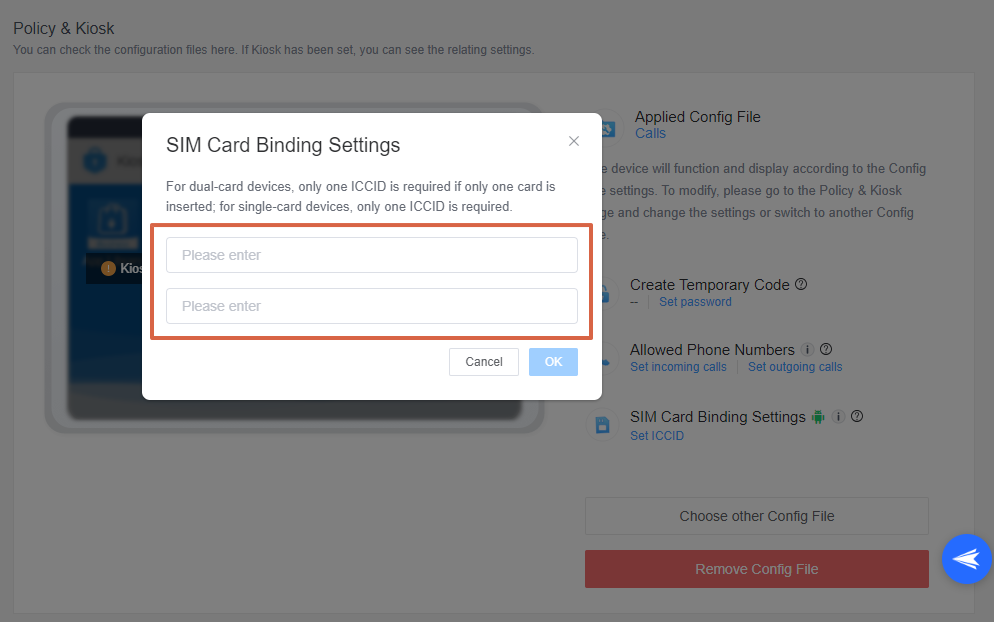
1SIM Card Binding Settings
- The SIM Card Binding Settings feature in AirDroid Business allows administrators to bind a device to specific ICCID(s). This implies that the device is restricted to use the specified SIM card(s) for making calls.
- ● To bind the device to the specified ICCID(s), please activate this option and save the policy setting. Then navigate to Device List to set the ICCID(s). The ICCID can only be assigned to individual devices after applying the configuration file.
- ● If this option is not activated, the device can use any SIM card to make calls.
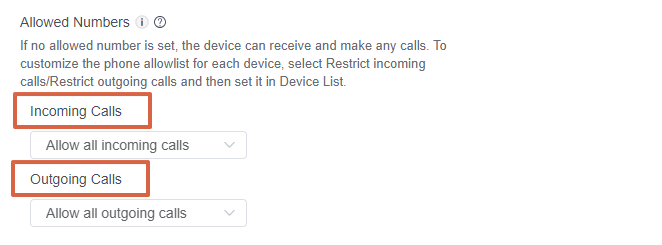
2Allowed Numbers
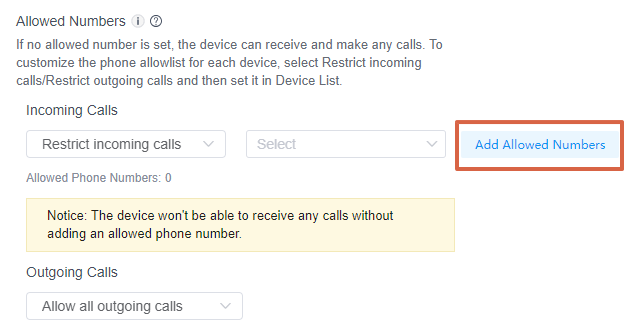
- The Allowed Numbers feature is a setting that allows administrators to customize the phone allowlist for each device. This means that the administrator can specify which phone numbers are permitted for making and receiving calls on a particular device. If no allowed number is set, the device can receive and make any calls without restrictions.
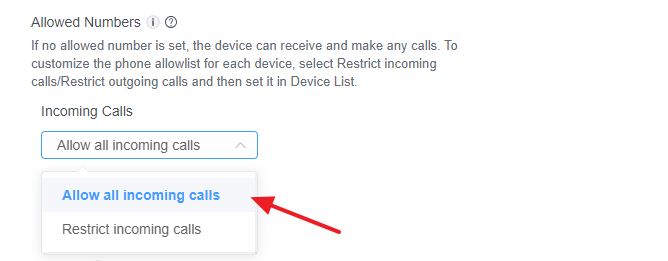
Incoming Calls
- ● To allow all incoming calls, you can choose the option "Allow All Incoming Calls" by clicking the drop-down box.
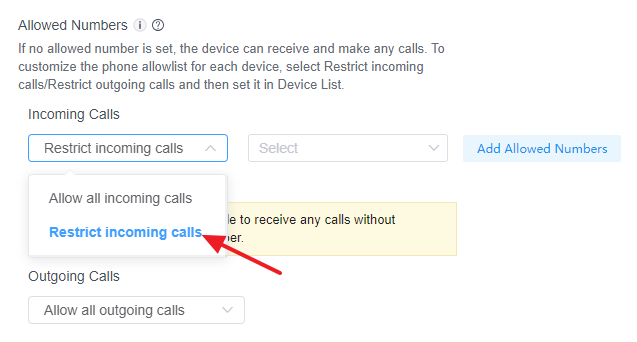
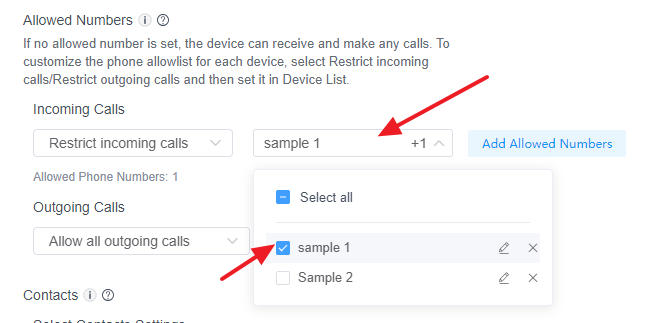
- ● To restrict incoming calls, you can choose the option "Restrict Incoming Calls" by clicking the drop-down box.
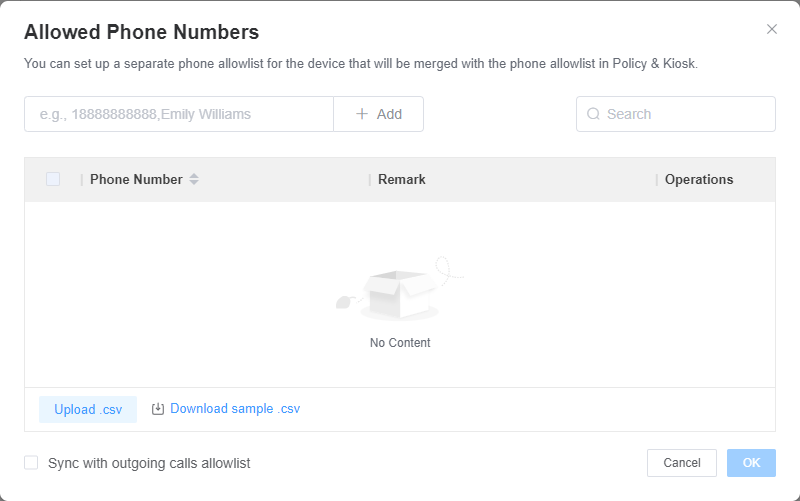
- Next, you need to add the allowed numbers by clicking the [Add Allowed Numbers] button.
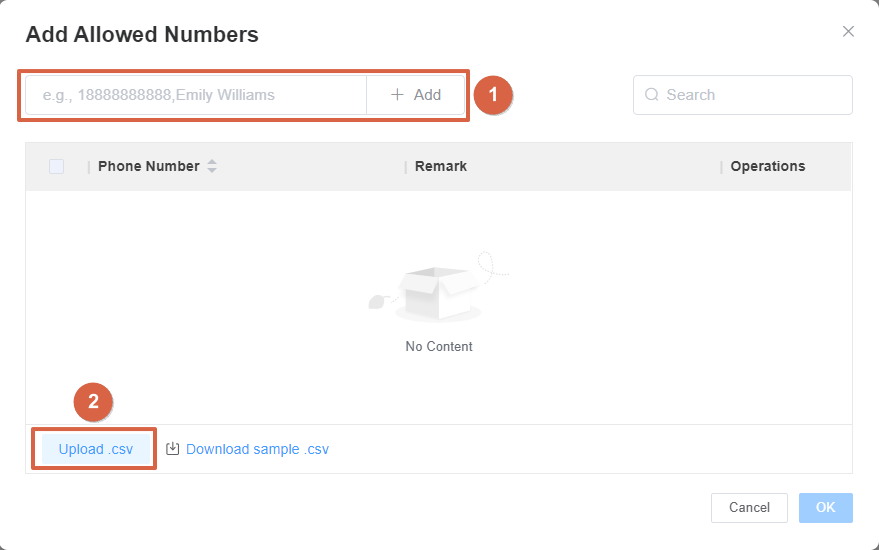
- There are two ways to add numbers.
- Method 1: Directly enter the numbers and click the [+Add] button.
- Method 2: Upload a .csv file containing the allowed numbers. (If you do not know how to edit the .csv file, you can download the sample and learn.)
- Click "OK" and give a name to save this setting.
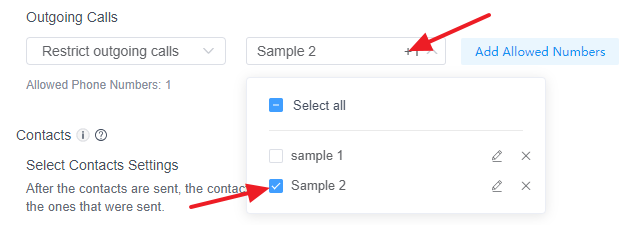
- Then, click the drop-down box to select the Allowed Phone Numbers.
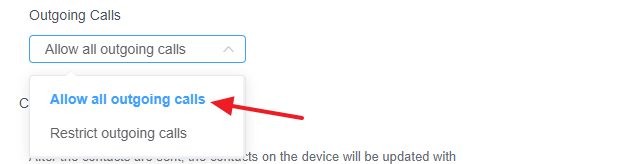
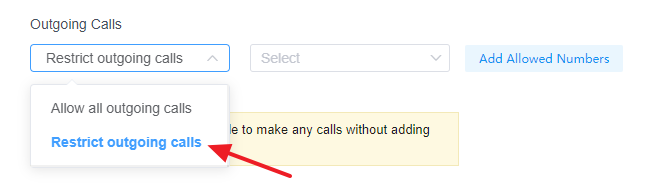
Outgoing Calls
- ● To allow all outcoming calls, you can choose the option "Allow All Outcoming Calls" by clicking the drop-down box.
- ● To restrict outcoming calls, you can choose the option "Restrict Outcoming Calls" by clicking the drop-down box.
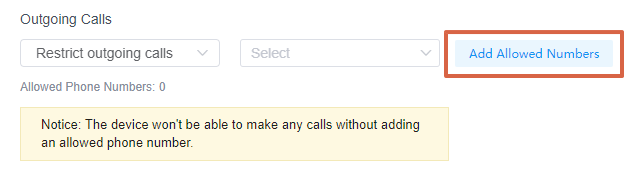
- Next, you need to add the allowed numbers. Please follow the steps to add the allowed numbers mentioned before.
3Contacts Settings
- The Contacts Settings feature allows administrators to manage the contact list on the devices they oversee.
They can select a device and upload a list of contacts. Once these contacts are sent, the contact list on the device will be updated to match the sent list. This feature can be especially useful for businesses that need to manage and update contact lists on multiple devices remotely. - 1. Built a new contact list
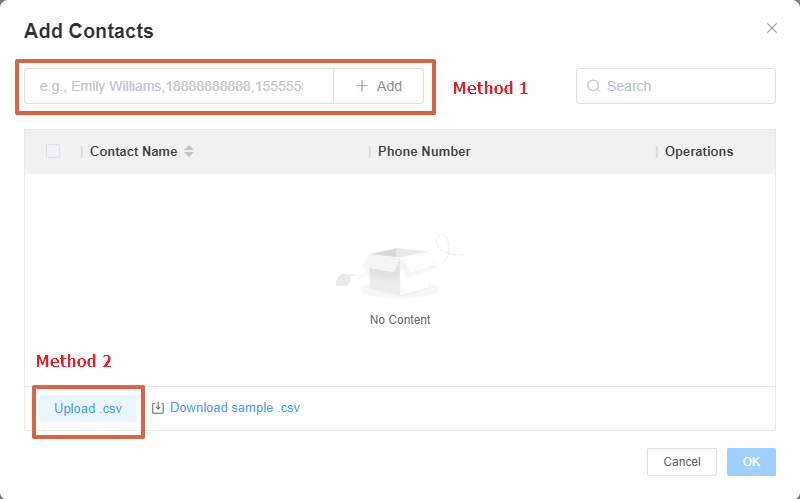
- Click the [Add Contacts Configuration] button to configure the contact list.
- Also, there are two ways to add numbers.
- Method 1: Directly enter the contacts and click the [+Add] button.
- Method 2: Upload a .csv file containing the contacts. (If you do not know how to edit the .csv file, you can download the sample and learn.)
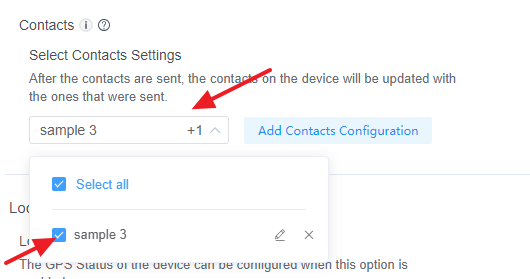
- 2. Save the contact list.
- 3. Click the drop-down box to choose the contact list you want to update.

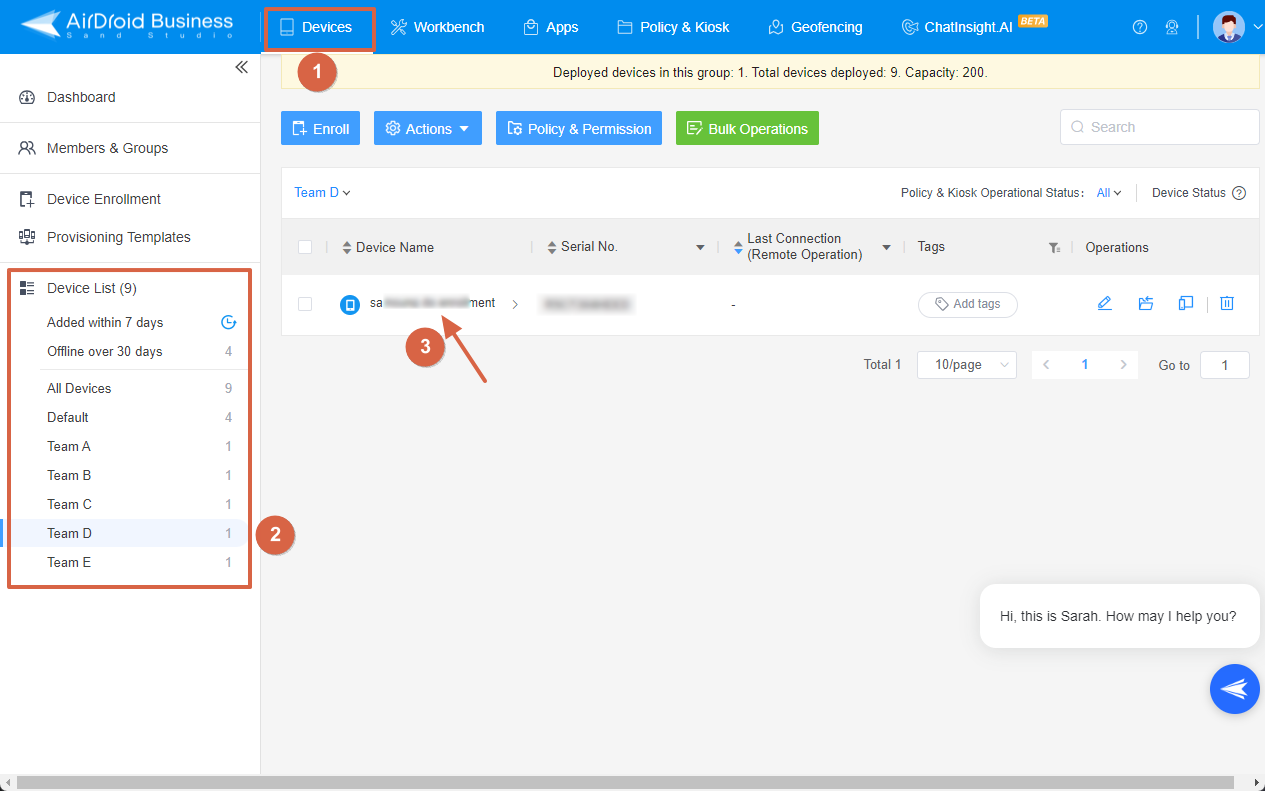
1. Navigate to the 'Device List'.
2. Choose the device you want to bind to a specific ICCID.

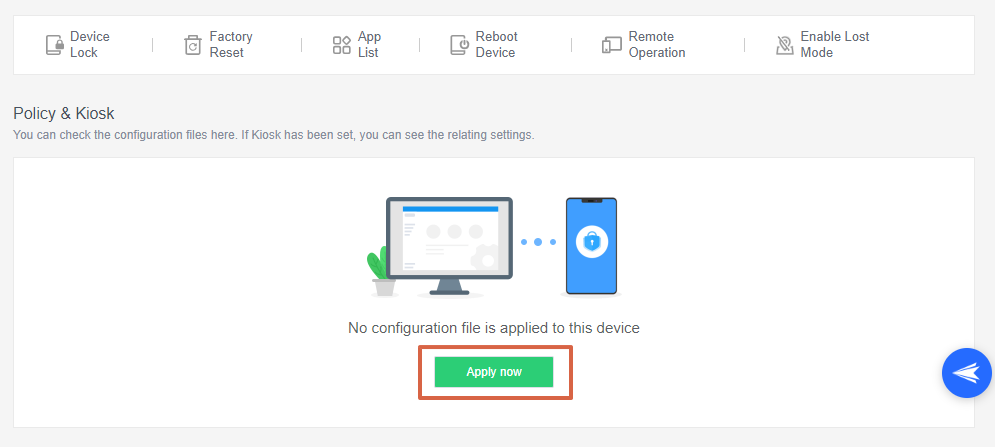
3. Apply this policy configuration file.
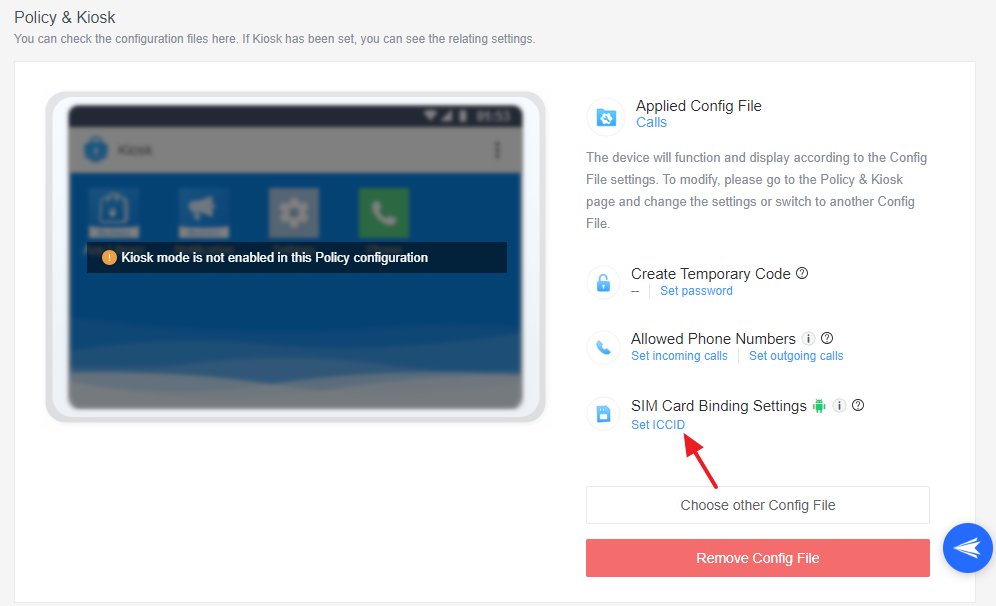
4. Enter the desired ICCID(s) in the provided field.
5. Click [OK] to save your changes.

1. The devices with Android 10.0 and above need Device Owner permission to take effect.
2. Devices enrolled through Android Enterprise or Zero Touch are not supported.
3. Requires phone permission granted to the device's Biz Daemon.
1. Devices enrolled through Android Enterprise or Zero Touch are not supported.
2. The feature is only effective when the device is granted permissions for Phone and Call Log.
3. Certain devices with Android 10.0 and above require the Device Owner permission for this feature.

To customize the phone allowlist for each device, select Restrict incoming calls/Restrict outgoing calls and then set it in Device List.
1. Navigate to the 'Device List'.
2. Select the device you want to set allowed numbers for.
3. Apply this policy configuration file.

4. Choose 'Set Incoming Calls' or 'Set Outcoming Calls".
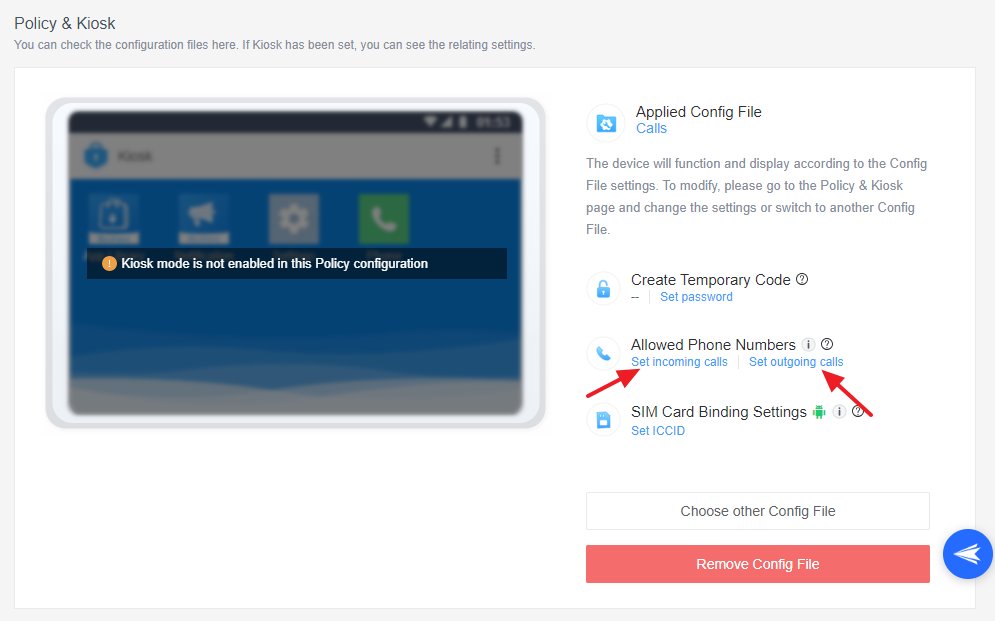
5. Enter the phone numbers or upload the .csv file with the phone numbers you want to allow in the provided field and save your changes.

1. Devices enrolled through Android Enterprise or Zero Touch are not supported.
2. Requires contacts permission granted to the device's Biz Daemon.
3. Allowed Numbers and Contacts do not share contact lists. You have to upload twice if you want the numbers to be allowed and also shown on the Contact of the devices.


By following these steps, you can effectively manage call policies for your devices using AirDroid Business. This will allow you to maintain control over call settings and ensure that your devices are used according to your business requirements.
Still need help? Submit a request >>
Related Articles
- How to Use OEMConfig Policy to Restrict the Samsung Device
- How to implement App Blocklist/ App Allowlist on AirDroid Business?
- How can I control camera access using Camera and Lockscreen Camera Settings in AirDroid Business?
- How can I set up password rules with Android Password Policy in AirDroid Business?
- How do I manage Microphone Permissions in AirDroid Business?
You May Also Like
- How to use App Allowlist for Kiosk Mode in AirDroid Business?
- How to Set up Kiosk Website Allowlist on AirDroid Business?
- How to set up Kiosk Browser Settings on AirDroid Business?
- How do I Customize the Kiosk Brand within AirDroid Business?
- How to Modify My Brand and Layout in Kiosk Mode of AirDroid Business?