

How to Utilize the Alerts & Workflows Feature on AirDroid Business?
In this tutorial, we'll guide you through the process of using the Alerts & Workflows feature in AirDroid Business. This feature allows the system to notify you and perform designated actions when anomalies occur on a device, freeing you from constant manual monitoring.
Before setting up an alert, please note the following:
- Email delivery of notifications may be delayed depending on your email service provider.
- A higher frequency of device status checks will consume more power and data on the device.
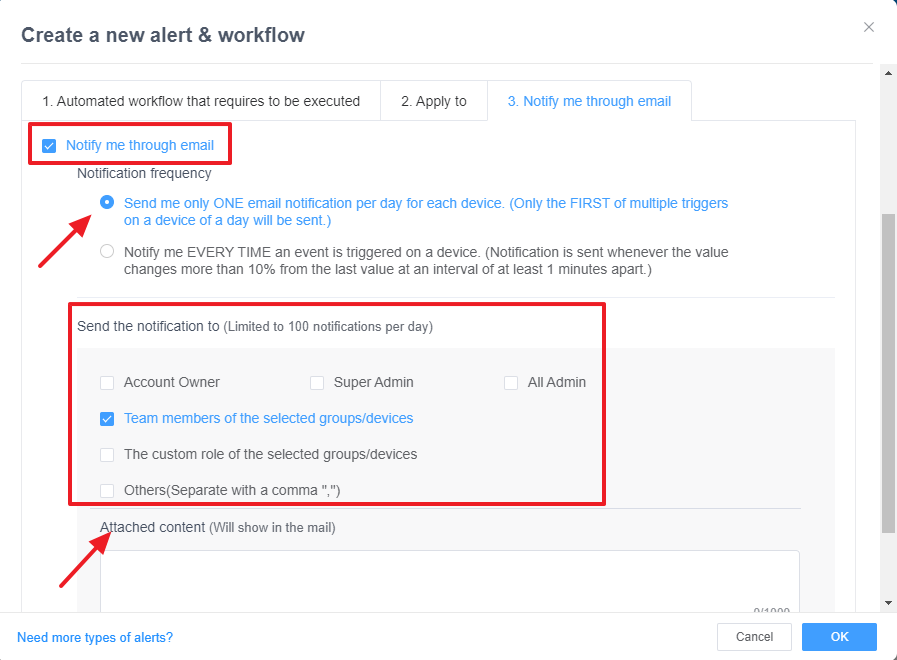
- The notification frequency can be set to one notification per day or one notification for every event.
- The limit for notifications is 100 per day.
- The notification receiver can be a non-member of the admin console.
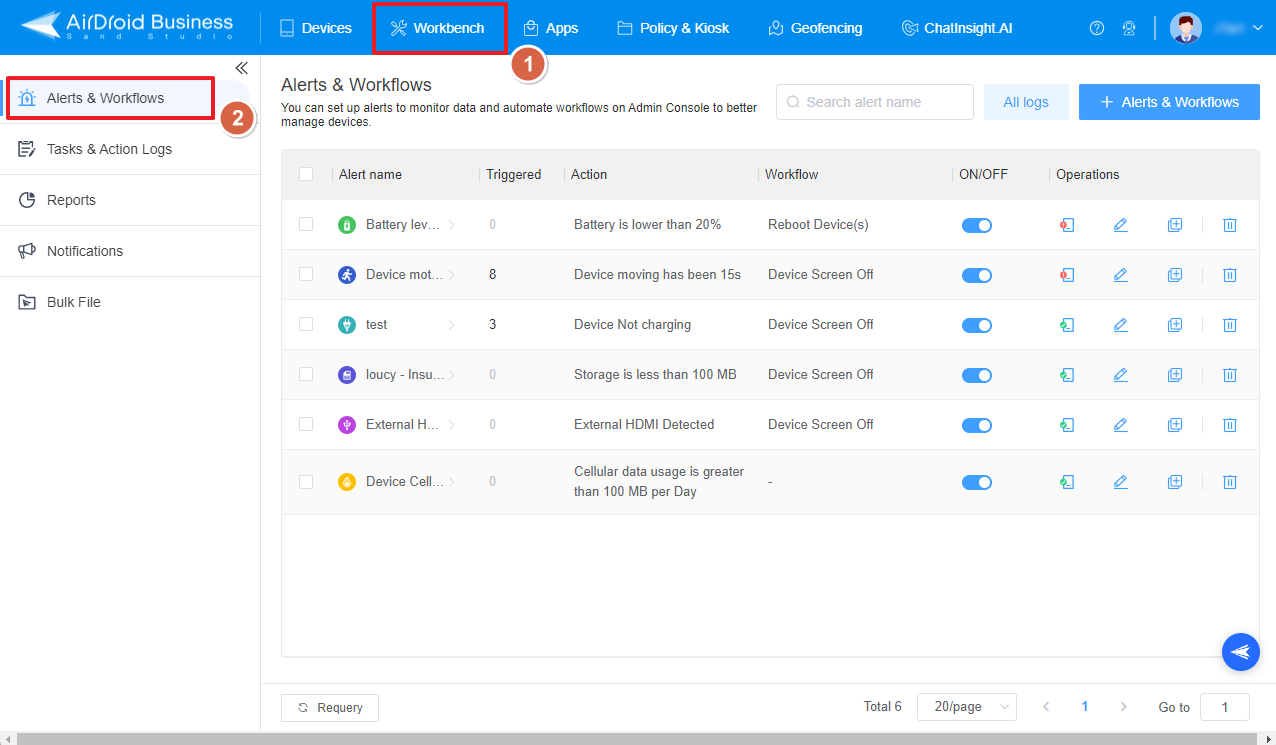
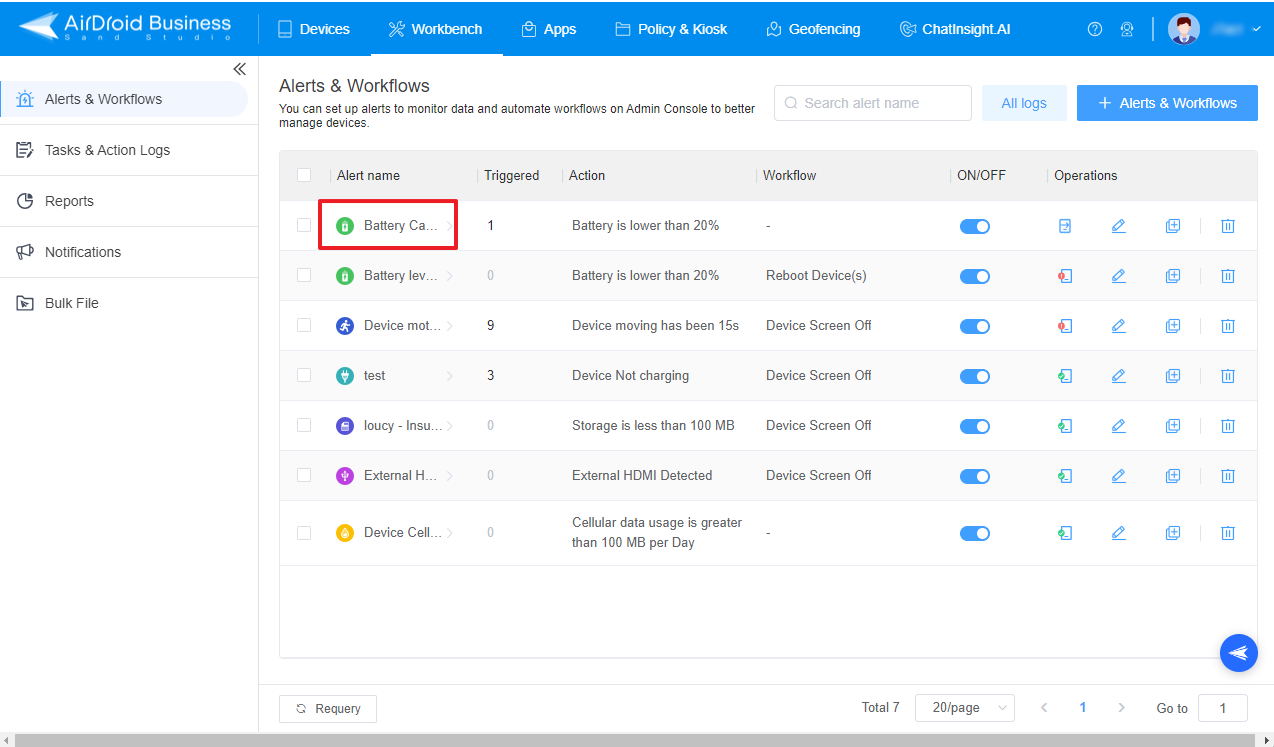
- Step 1Access Alerts & Workflows
- Choose Workbench and switch to Alerts & Workflows.

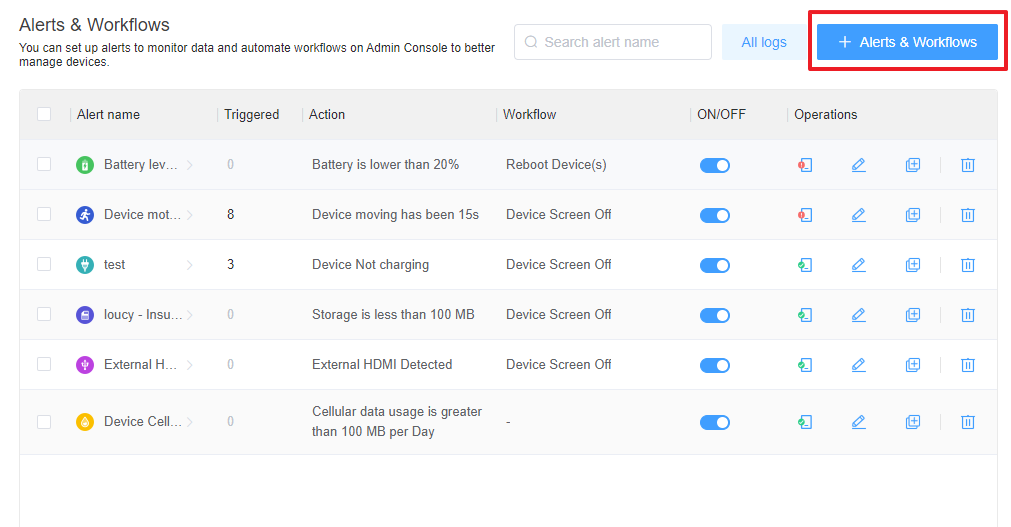
- Step 3Create an Alert
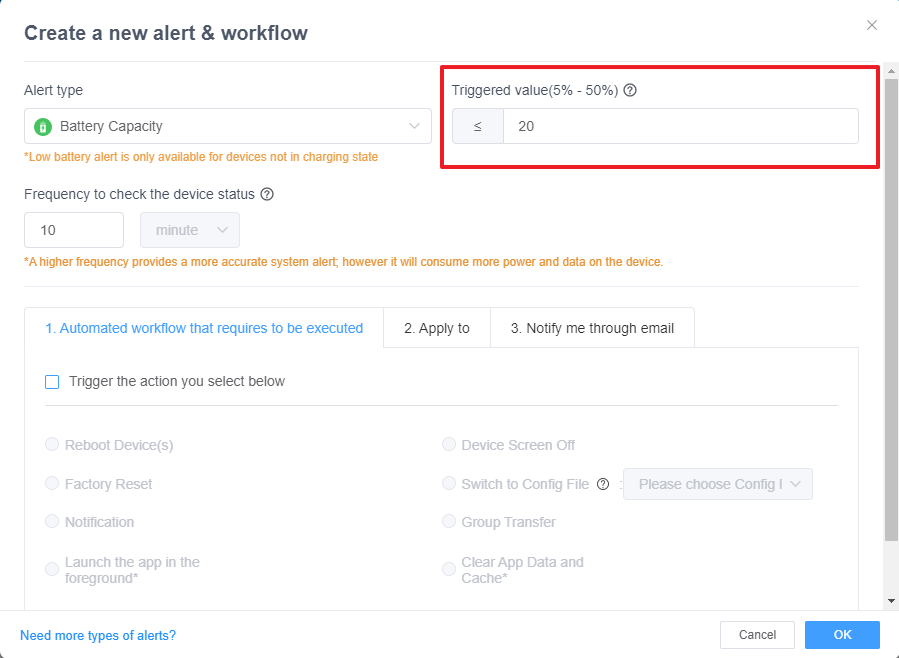
- Click on +Alerts & Workflows, choose the alert type, and insert the conditions for the alerts to align with your demands.
 /li>
/li>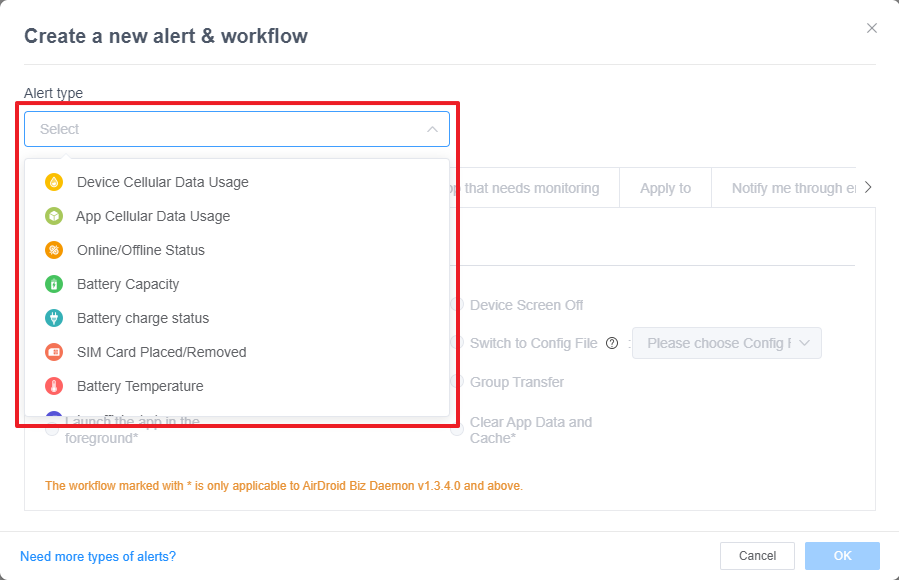


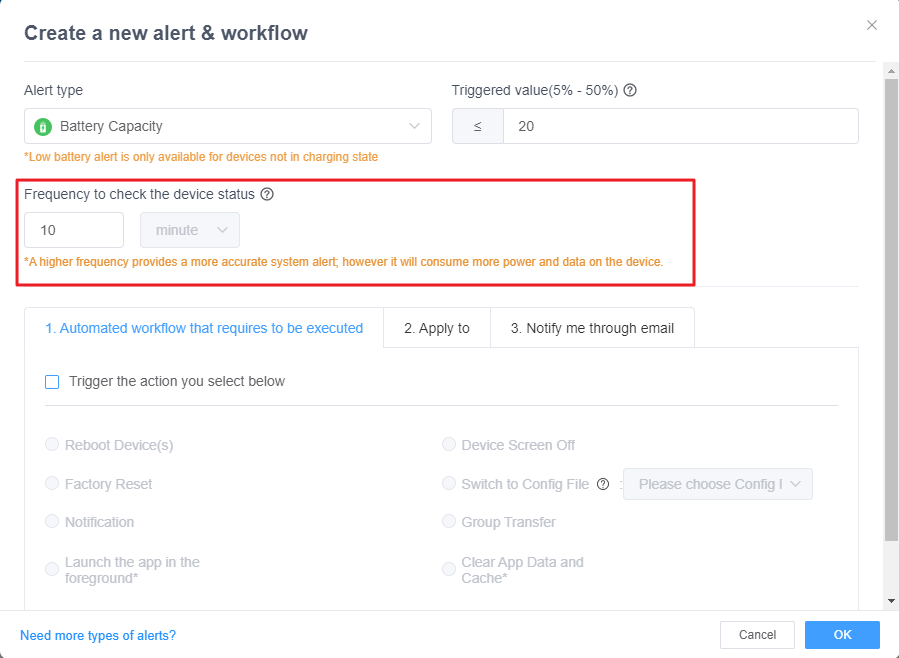
AirDroid Business offers more than 13 customized triggers for setting up your Android alert notifications. They include:
● Device Cellular Data Usage
● App Cellular Data Usage
● Online/Offline Status
● Battery Capacity
● Battery charge status
● SIM Card Placed/Removed
● Battery Temperature
● Insufficient storage
● App Running Status
● Biz Daemon Permission
● Device motion status
● Kiosk
● Screen lock
These alerts can be customized to meet the specific needs of your business, helping you monitor and manage your devices effectively.
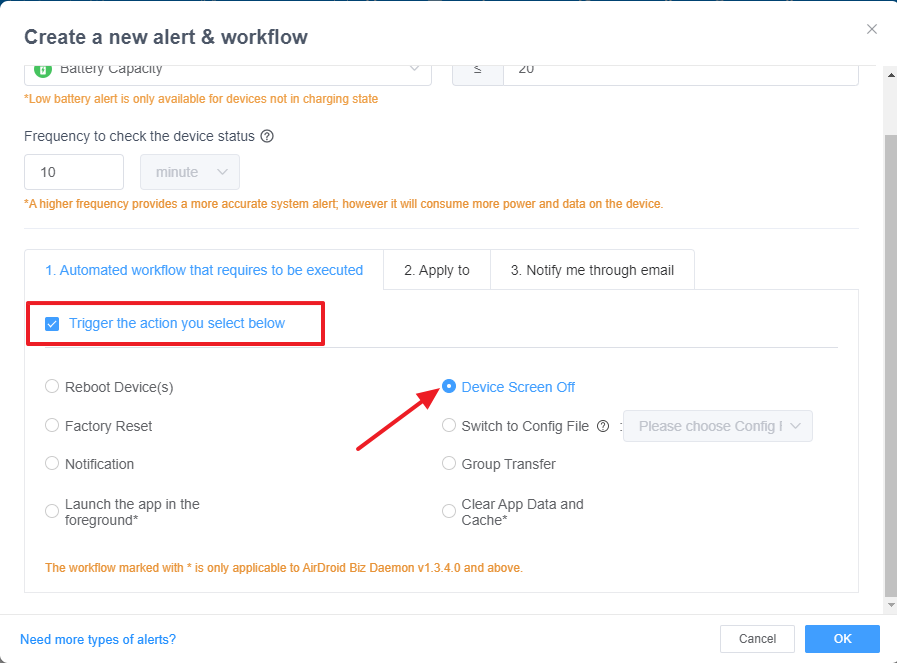
- Step 3Set Up a Workflow
- (Optional) You can choose "Trigger the following action" to set up a workflow for the Alert.

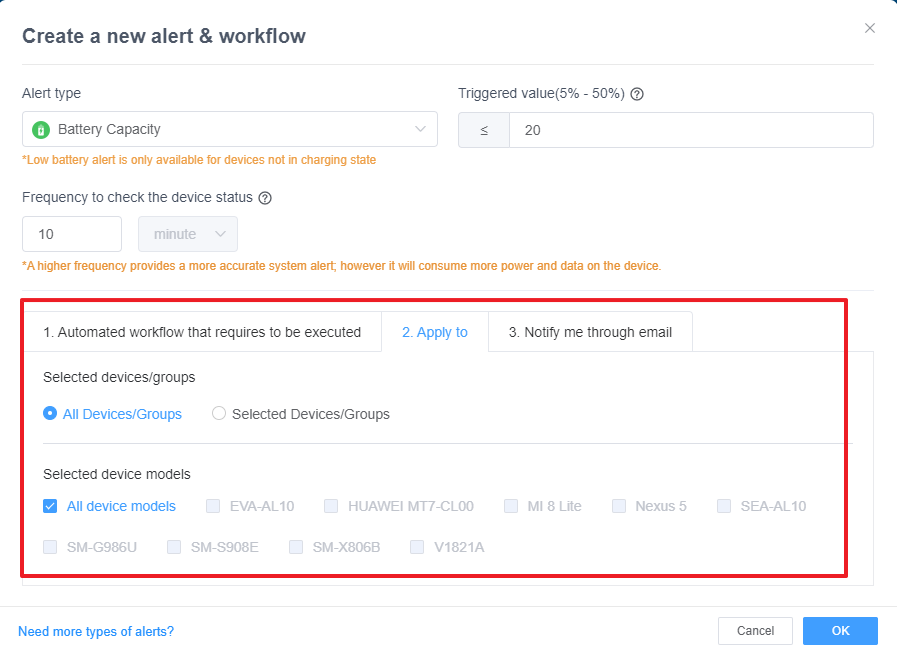
- Step 4Choose Devices/Groups and the Device Models
- Switch to the tab [Apply to] and select the devices/groups and the device models you wish to apply this alert to.

- Step 5Set Up Email Notifications
- Switch to the tab [Notify me through email], check the box, and then set up the Notification frequency. select the roles to receive this email and set up the attachment content.

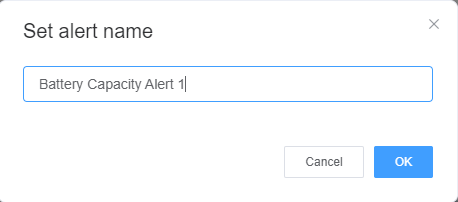
- Step 6Save the Alerts & Workflow
- Click "OK" and insert the alert name to save this alerts & workflow.

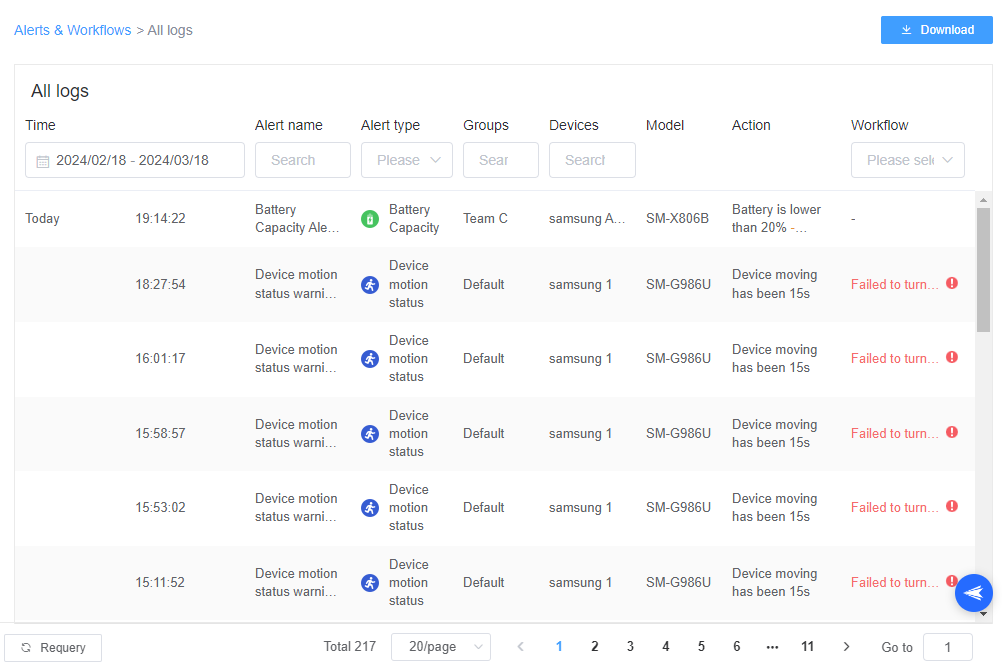
- Step 7Check the Log of Alerts
- After setting up an alert, you can check the log of alerts by clicking on "All logs".


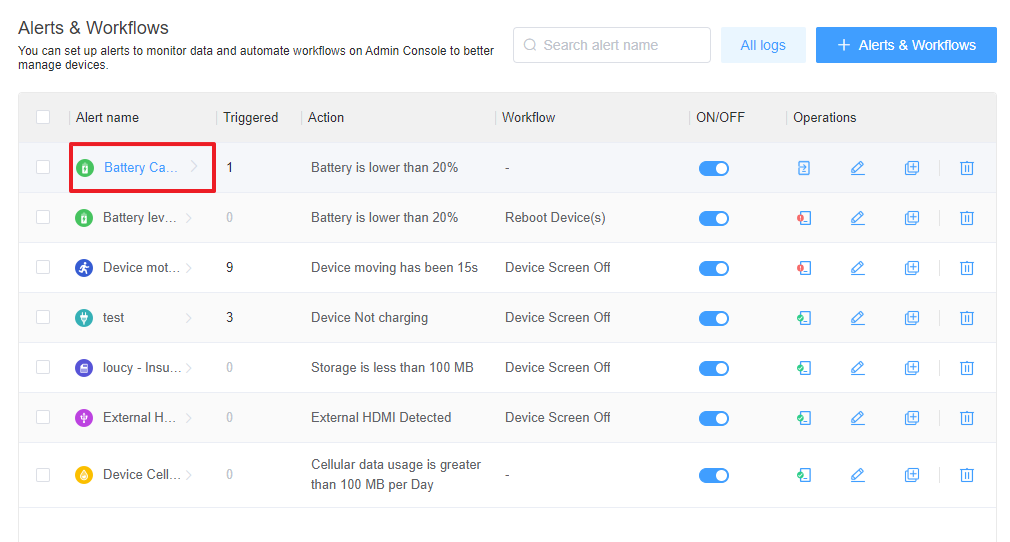
- Step 8Check the Log of a Single Alert
- You can also click on the Alert name to check the log of a single alert.


By following these steps, you can effectively use the Alerts & Workflows feature in AirDroid Business. This feature allows you to maintain control over device status and ensures that you are notified of any anomalies, helping you manage your devices more efficiently.
Still need help? Submit a request >>
Related Articles
- How to Create and Manage Device Groups on AirDroid Business?
- How to invite and manage account members on AirDroid Business?
- How to create a custom role on AirDroid Business?
- How to manage the devices in the Device List?
- How to Use “Batch Operations” to Improve Device Management Efficiency?
You May Also Like
- What features are available for Remote Access on AirDroid Business?
- How to remote access a device via Admin Console on AirDroid Business?
- How to Manage Devices on AirDroid Business Desktop Client?
- How do I use the View Mode on AirDroid Business?
- How to use Black Screen Mode to maintain the remote device during Remote Control?