

Enroll your Devices with Regular Enrollment
We have created a YouTube video to help you understand this guide better and faster.
Video Tutorial: How to Use Regular Enrollment to Enroll your Android device
Besides The Enrollment via Device Owner and Android Enterprise Enrollment, AirDroid Business also support Regular Enrollment method for devices meet any of the following criteria:
2. Some devices, such as Android TV boxes, do not have a camera and do not support USB debugging mode.
3. Devices that do not support 6 Times Tap and ADB command.
Since Regular Enrollment does not acquire the Device Owner permission for your device, some of the Policy configurations will not be available for your devices. You can also check this document on Policy configurations that are available for devices that enrolling via Regular Enrollment.
Go to Regular Enrollment page
Please go to Admin Console > Devices > Device Enrollment > Regular Enrollment.
There are two methods for you to enroll in the device. Please follow the instructions to enroll your device to AirDroid Business.
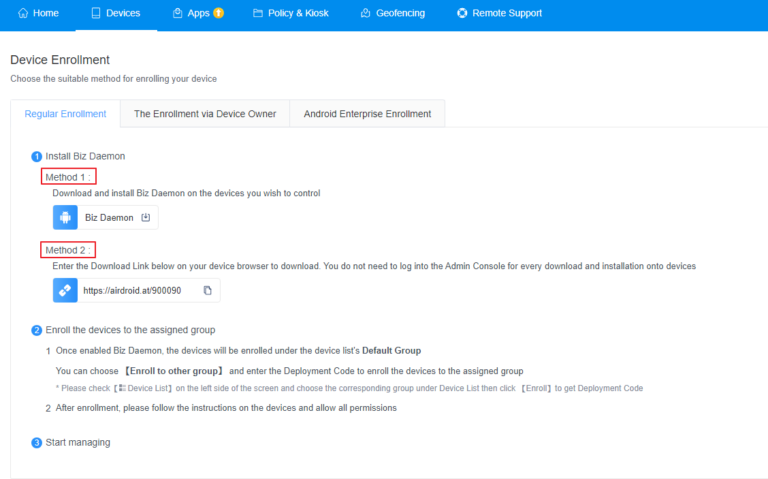
1Method 1
If you use Method 1 to install AirDroid Biz Daemon, You will have to manually enroll the device via the Deployment code.
- Step 1Open the Biz Daemon
- Open AirDroid Biz Daemon on your device>Manually insert the Deployment Code, or click to Scan QR Code icon
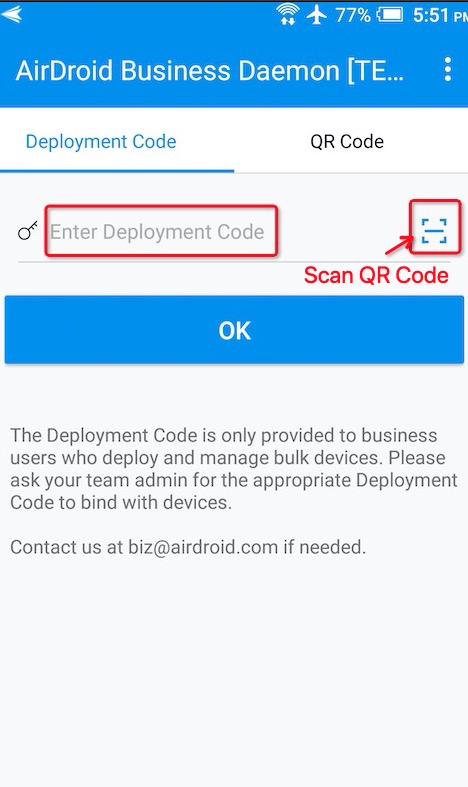
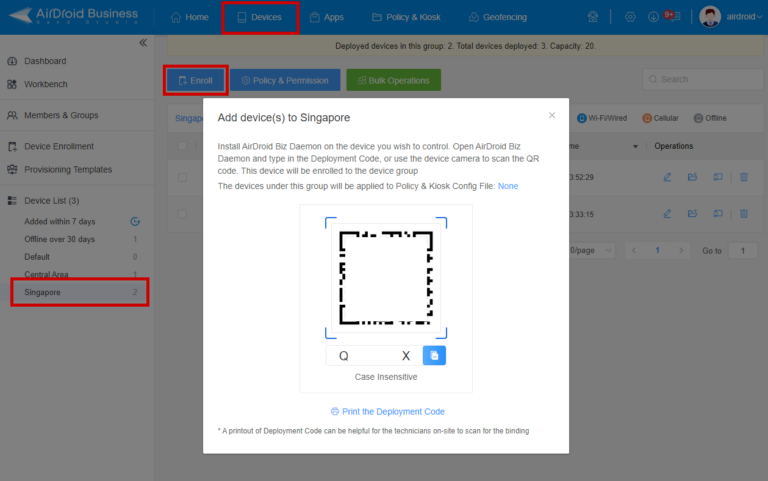
- Step 2Look for the Deployment Code / QR Code
- Log in to Admin Console>Devices > Device List > click Enroll > you will see the Deployment Code and the QR code for enrolling the device.
2Method 2
If you use Method 2 to install AirDroid Biz Daemon:
After entering the download link (the URL with the 6-digits code at the end) on your device, download the Biz Daemon, it will automatically enroll your devices to the Default Group.
You can choose Enroll to other groups on Biz Daemon to enroll the devices into the assigned group.
Congratulations! You have enrolled your devices and please check this article to grant permissions for Biz Daemon and start managing your devices on AirDroid Business.
Still need help? Submit a request >>
Related Articles
You May Also Like
- What features are available for Remote Access on AirDroid Business?
- How to remote access a device via Admin Console on AirDroid Business?
- How to Manage Devices on AirDroid Business Desktop Client?
- How do I use the View Mode on AirDroid Business?
- How to use Black Screen Mode to maintain the remote device during Remote Control?