- Part 2 : Steps on Airdroid Business Admin Console
- Step 1: Register/Enroll your Gmail account
- Step 2: Setup Provisioning Templates


How to use Samsung Knox Mobile Enrollment (KME) to enroll your devices with AirDroid Business?
- Part 2 : Steps on Airdroid Business Admin Console
- Step 1: Register/Enroll your Gmail account
- Step 2: Setup Provisioning Templates
Samsung Knox Mobile Enrollment (KME) is a feature of the Samsung Knox platform designed to automate the enrollment of Samsung devices into a Mobile Device Management (MDM) system. It simplifies the deployment process by allowing administrators to pre-configure devices with MDM profiles, ensuring they meet corporate security standards from the start.
KME is part of the Knox Platform for Enterprise, which integrates with third-party MDM solutions. This integration is validated by Samsung’s Knox program, ensuring security and compliance across the device fleet while saving time and reducing errors in device setup.
In this article, we will guide you on how to use KME Enrollment to enroll your Samsung devices with AirDroid Business.
1Before you start
Before you start using Samsung KME Enrollment, you need to meet the following conditions:
1. Samsung devices running Knox 2.4 and higher that support Samsung Knox Mobile Enrollment.
2. A Samsung Account.
3. A Knox Mobile Enrollment Portal account.
4. A KME supported browser, such as Chrome, Edge and Firefox.
5. The necessary firewall exemptions needed to access beyond your local and protected network domain and establish a secure connection with the Knox Mobile Enrollment server
2Steps on Airdroid Business Admin Console
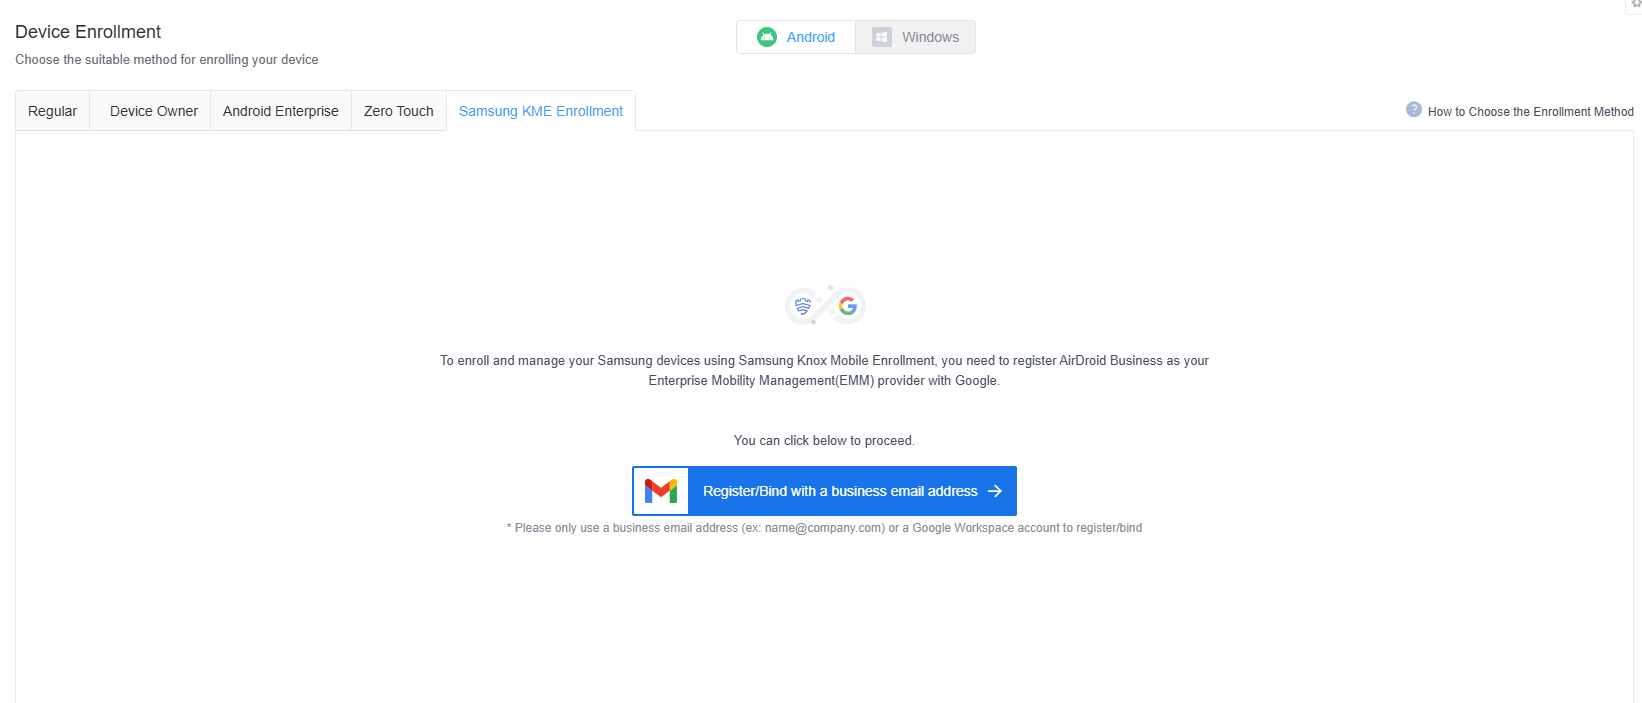
- Step 1Register/Enroll your Gsuite/company address
- To use Samsung KME Enrollment, you must first bind/ enroll your Gsuite/company address in Admin Console. This part of the steps is similar to the steps of Android Enterprise Enrollment. Please refer to this article.

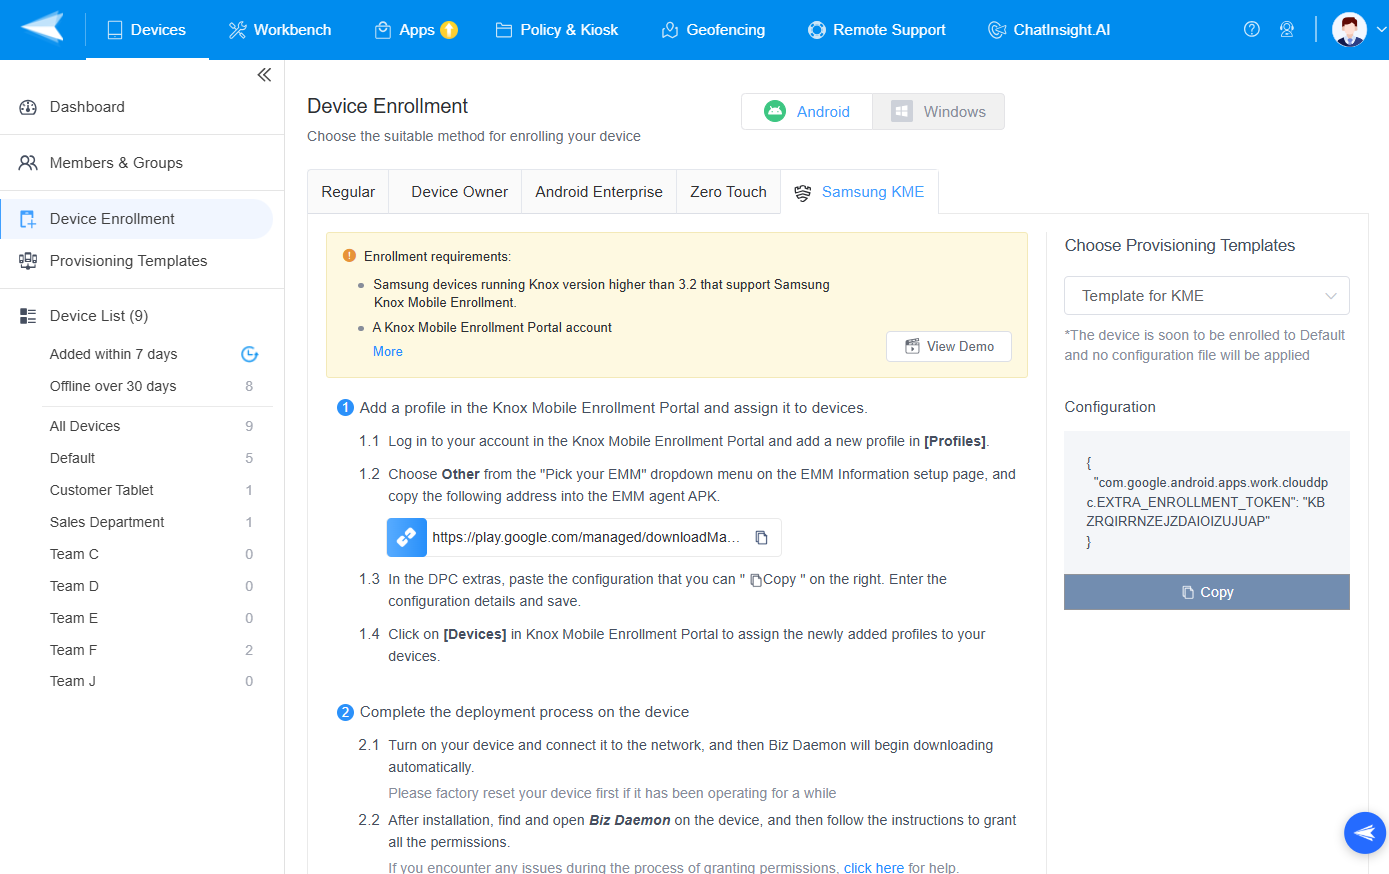
- The following figure shows the interface after the binding is successful; on the left is the enrollment guide, and on the right is the configuration token.

- Step 2Setup Provisioning Templates
- With Samsung KME Enrollment, you can take advantage of the Managed Google Play Store feature within AMS. During device enrollment, you have the option to utilize the "Add from Managed Google Play Store" feature in the Provisioning Template.
- Please ensure that you have completed the setup of Provisioning Templates. If not, refer to this article to complete your Provisioning Templates settings.
3Steps on Knox Mobile Enrollment Portal
- Step 1Create a New Profile
- Log in to Knox Mobile Enrollment Portal, click on the Knox Mobile Enrollment tab, choose Profiles, click on the ACTION Button to choose the [Create profile] on the drop-down box.


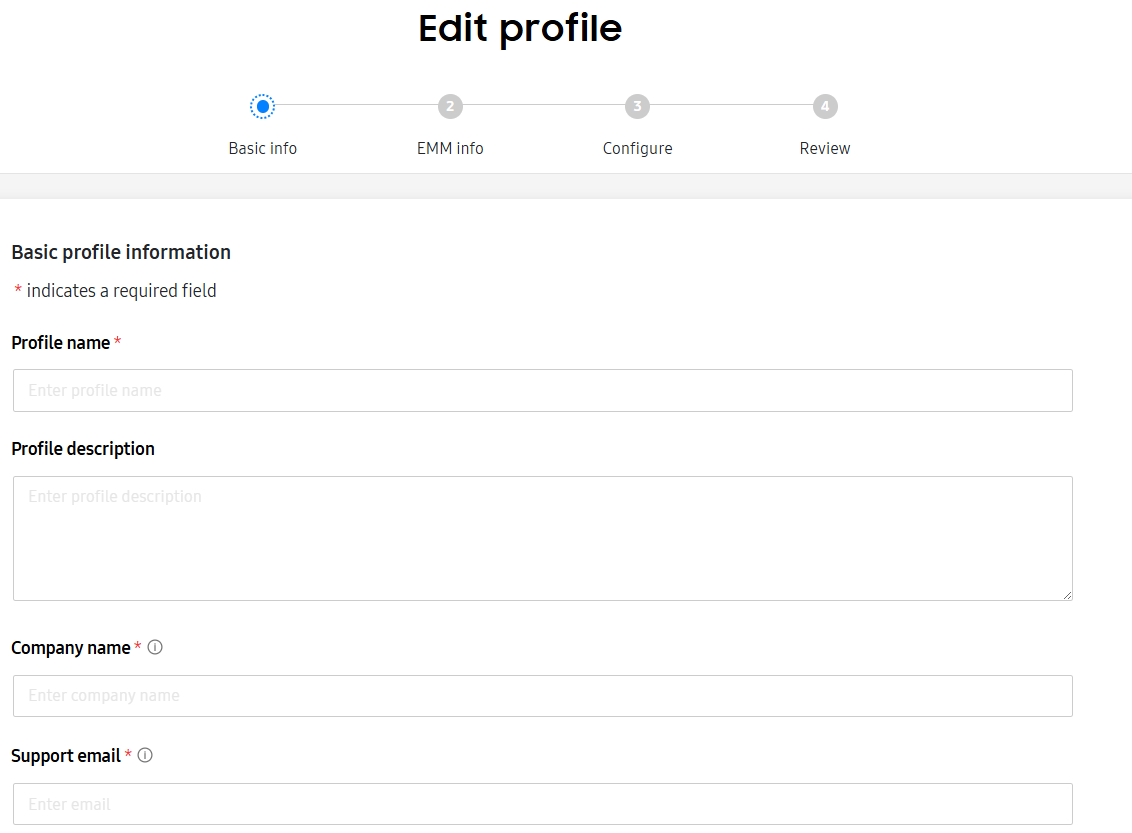
- Step 2Fill in the Basic Profile Information
- Fill in the Basic Profile information and tap NEXT.
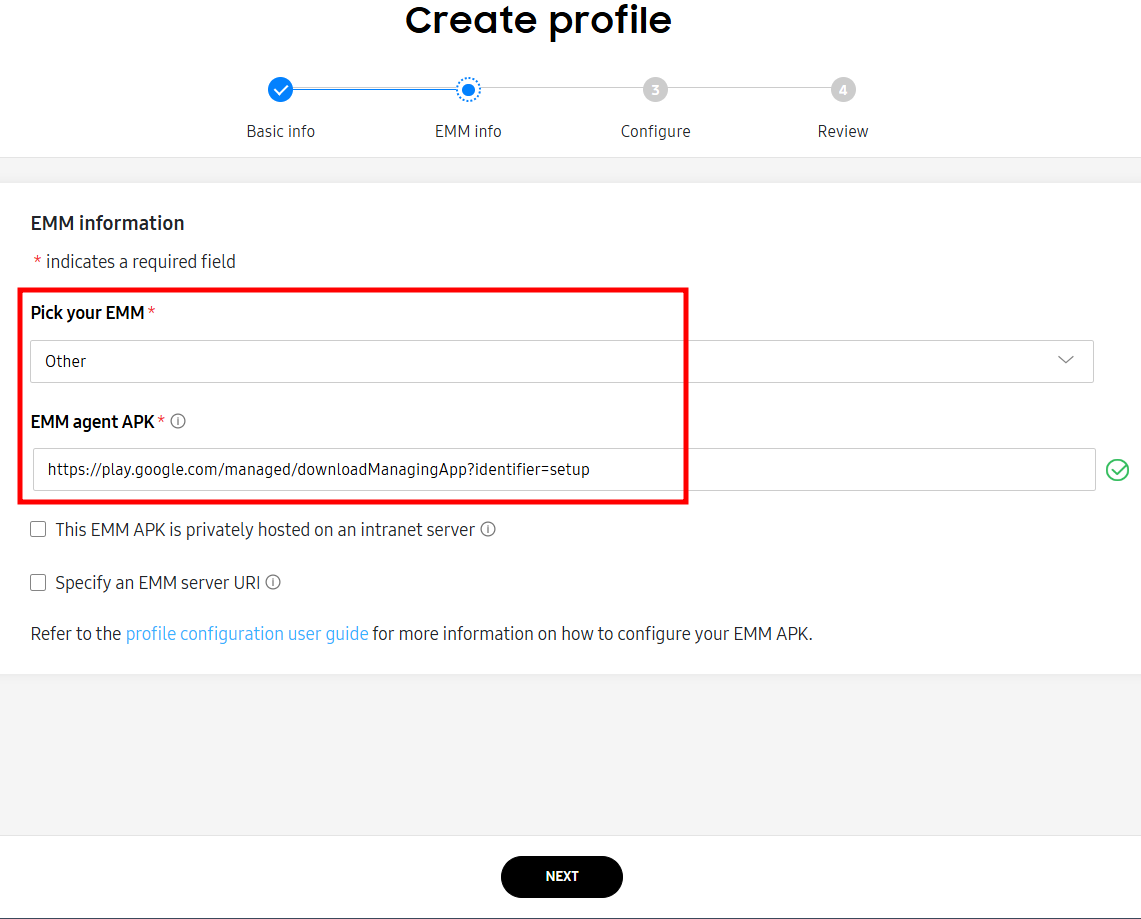
- Step 3Complete the EMM information
- Choose "Other" in the "Pick your EMM" dropdown menu on the web page for setting up EMM Information.
- Copy the installation package link "https://play.google.com/managed/downloadManagingApp?identifier=setup" and paste to the EMM agent APK. Then click [NEXT].
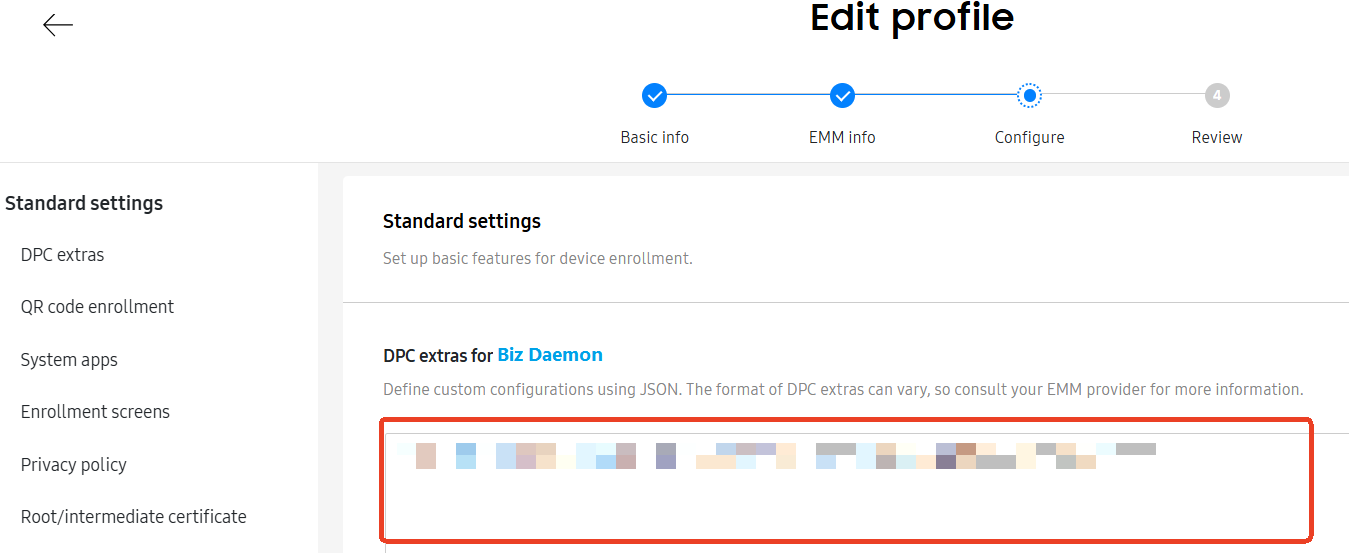
- Step 4Set Up Configuration Token
- Go to Admin console> Devices > Device Enrollment > Samsung KME > Select the provisioning template > tap on the Copy icon on the Configuration code.
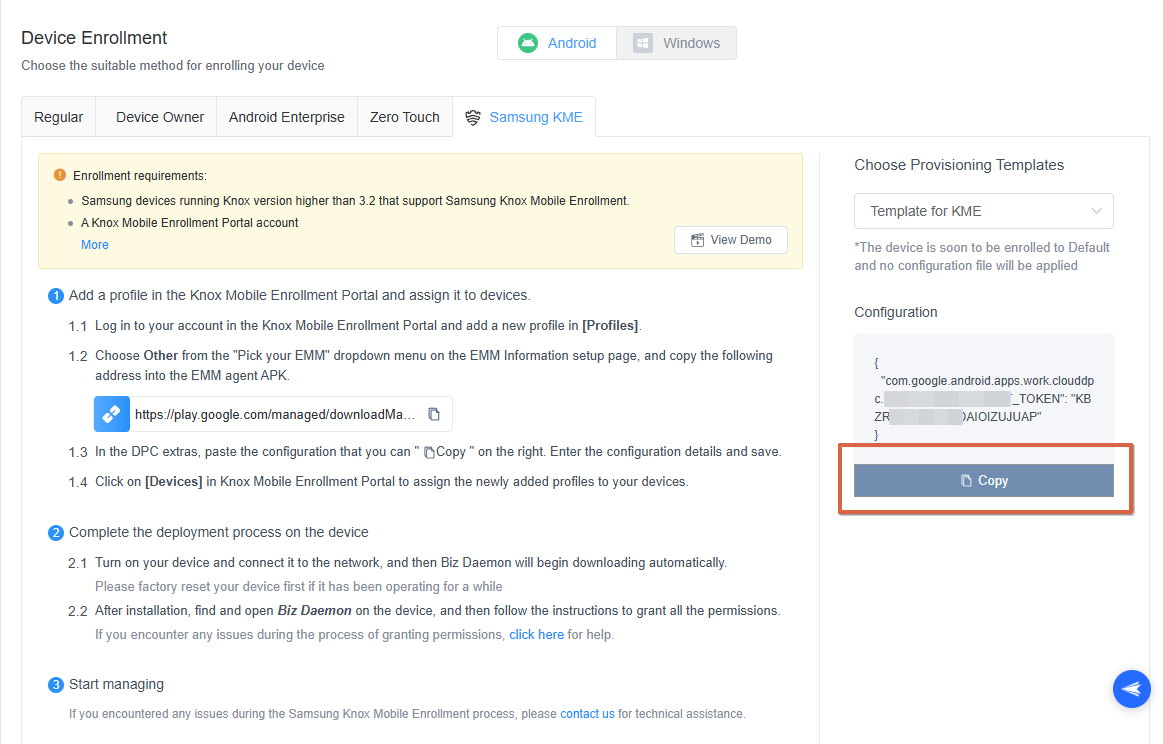

- Go back to the Knox Mobile Enrollment Portal and paste the configuration token on the DPC extras for AirDorid Business.

- Then, complete your company information in the rest of the columns.
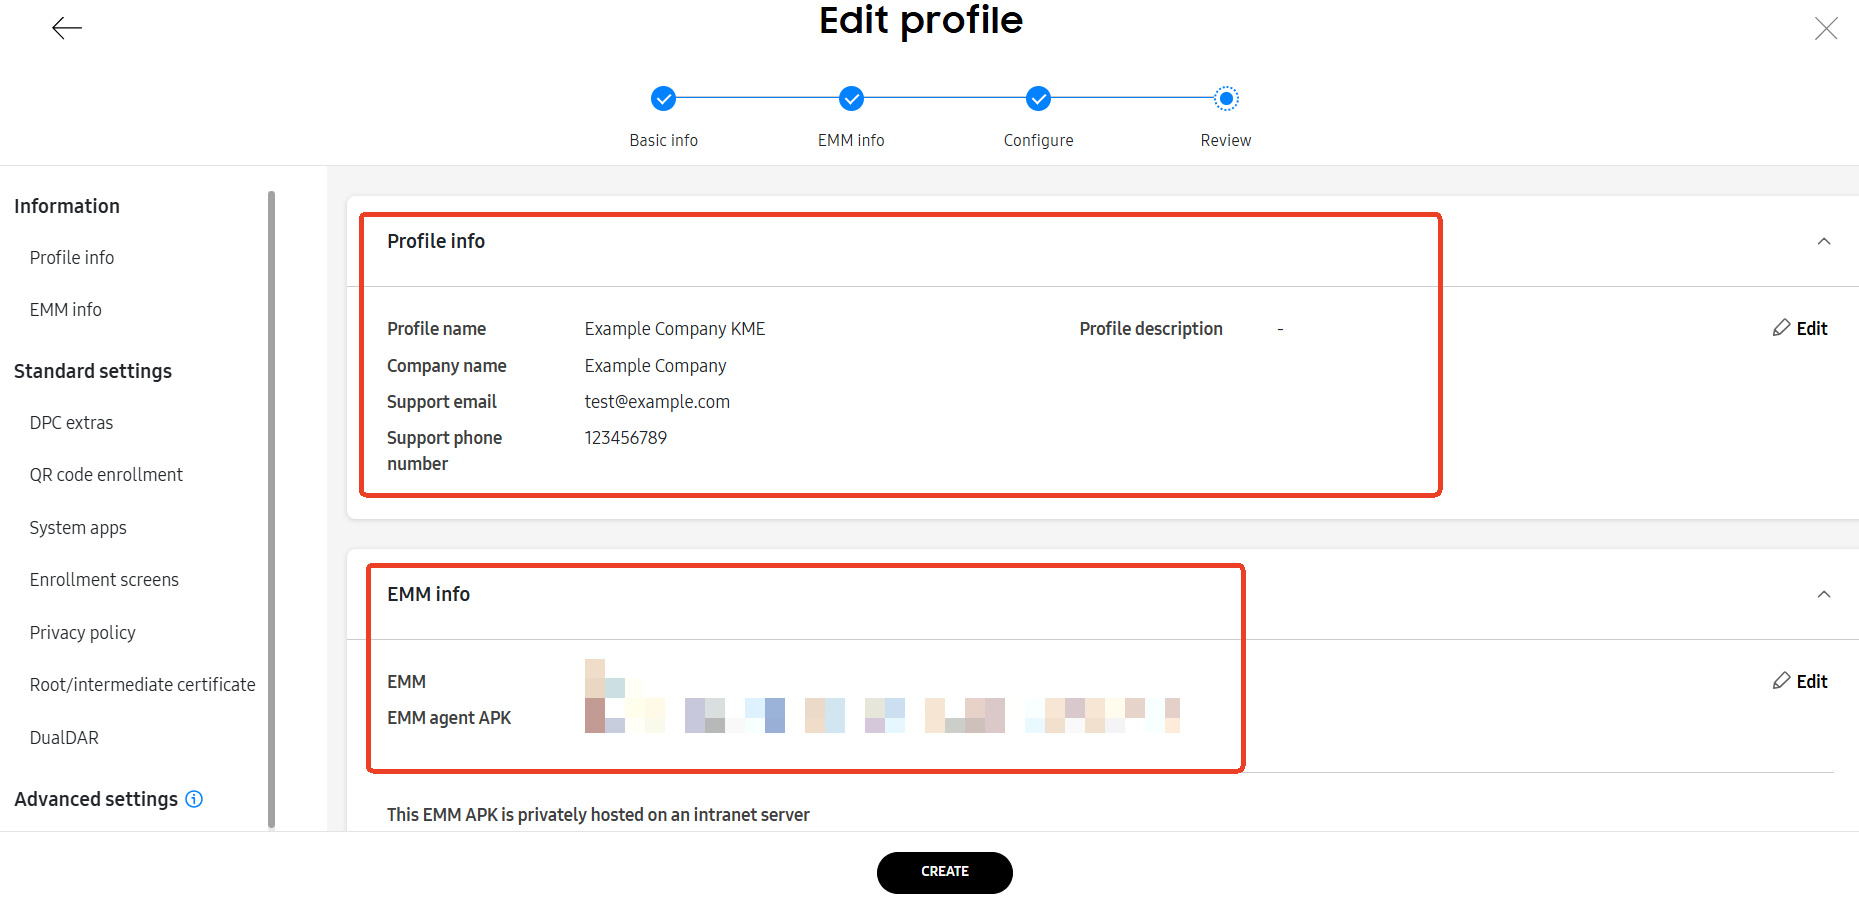
- Step 5Complete the Profile Setting
- Review the profile and tap Create to proceed.
-

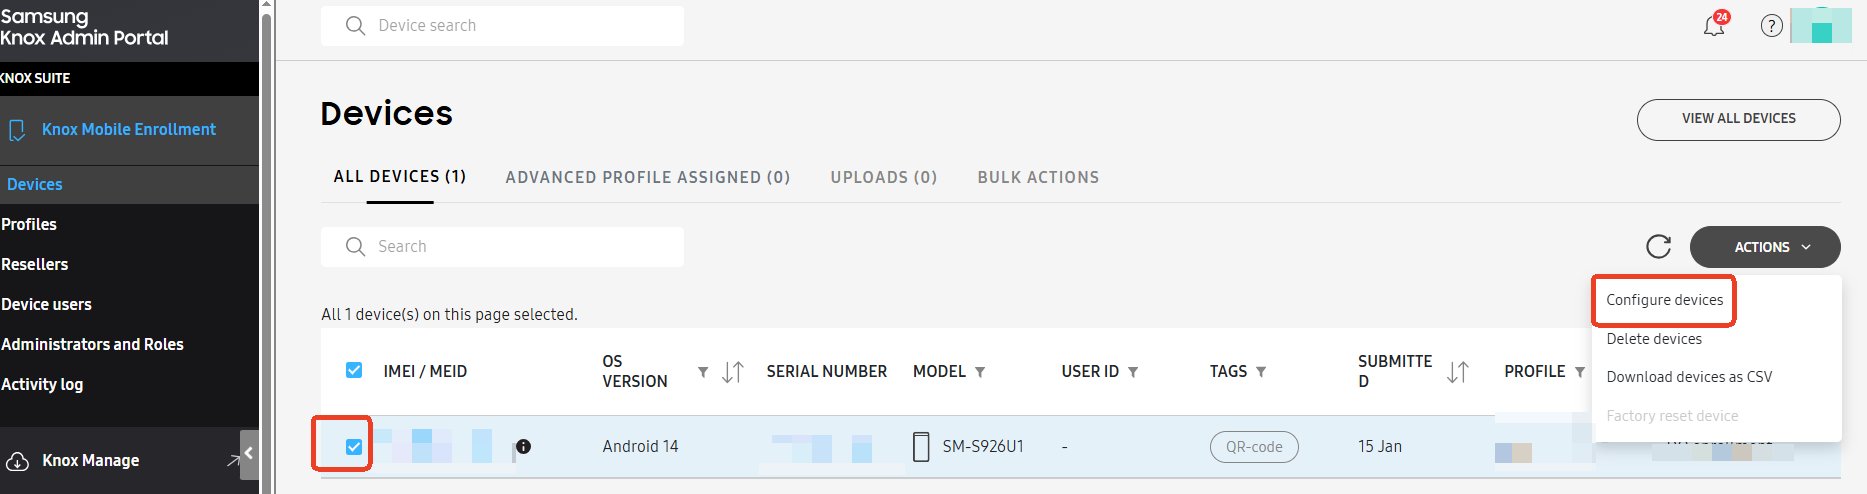
- Step 6Assign the Profiles to Your Devices
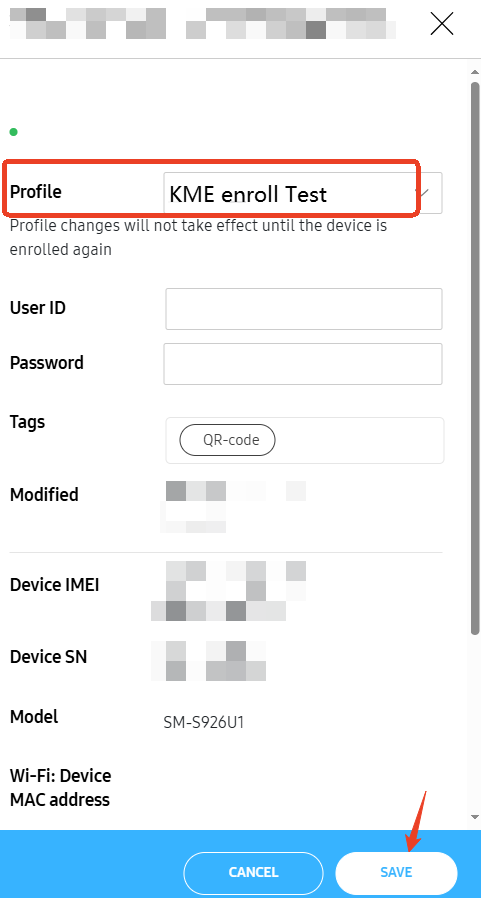
- Click on [Devices] in Knox Mobile Enrollment Portal, click [ACRTIONS] and choose Configure devices.
- Click Profile - choose AirDroid Business - click save to assign the newly added profiles to your devices.
-

-

4Start the Devices
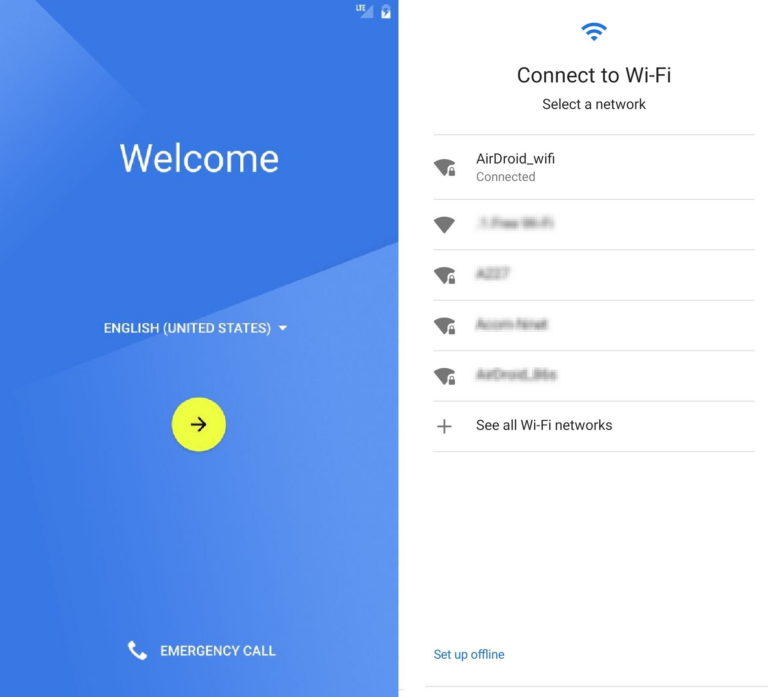
- Step 1Powering On and Setting Up Your Device
- Power on your device and connect it to the network.
- Then, follow the on-screen instructions to complete the installation process.
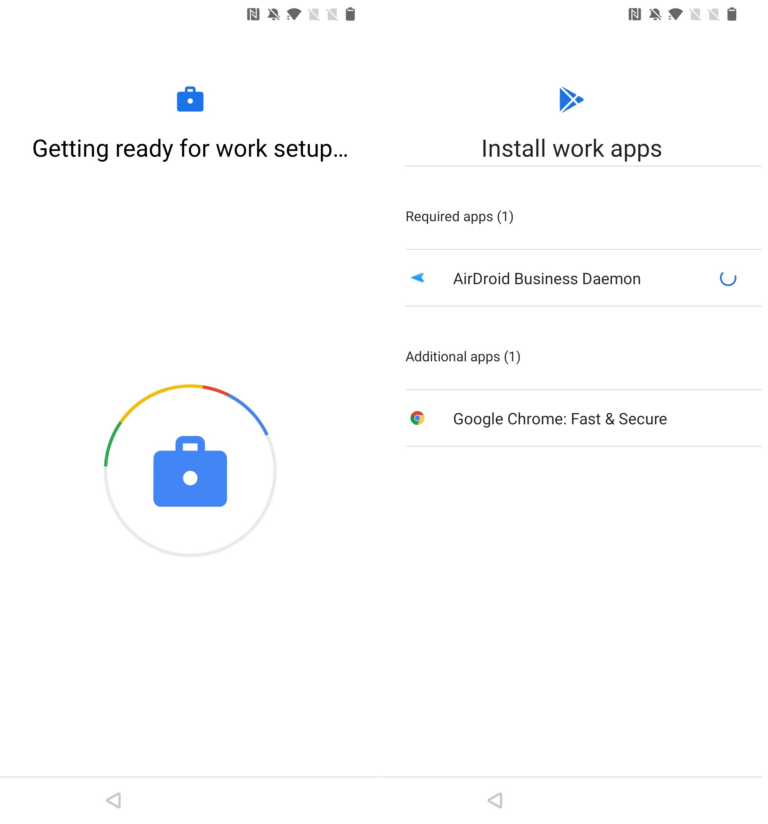
- Step 2Grant Biz Daemon permissions
- After installation, find and open Biz Daemon on the device, and then follow this article to grant all the permissions.
Congratulations! You have deployed your device with the Samsung KME Enrollment.
If you need to unenroll the Android Enterprise, you can refer this article.
If you want to optimize the overall management experience, please check the next step.
Still need help? Submit a request >>
Related Articles
You May Also Like
- What features are available for Remote Access on AirDroid Business?
- How to remote access a device via Admin Console on AirDroid Business?
- How to Manage Devices on AirDroid Business Desktop Client?
- How do I use the View Mode on AirDroid Business?
- How to use Black Screen Mode to maintain the remote device during Remote Control?