

User Guide for AirDroid Business Windows Management
Using AirDroid Business Windows Management solution can help Enterprises or organizations enhance their Windows devices' security, optimize their performance, increase user productivity, and ensure a consistent and secure usage environment.
In this article, we will provide a comprehensive guide for you on how to use the AirDroid Business Windows Management solution.
Video Tutorial: Enroll Windows Devices in AirDroid Business
1Devices Enrollment
1Enroll the device with regular method
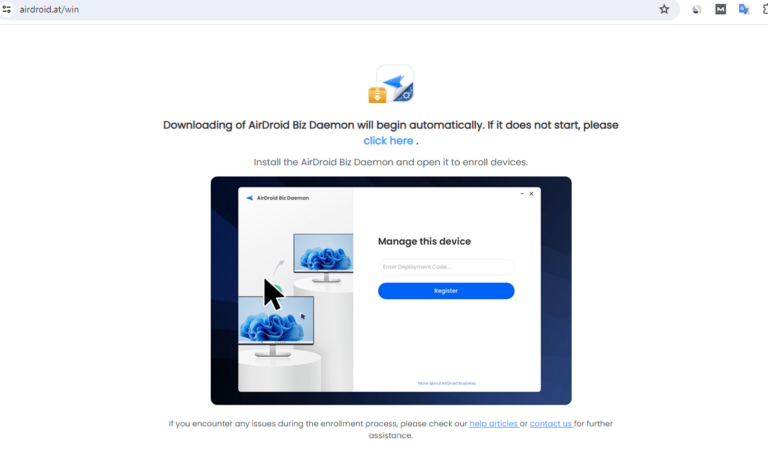
- Step 1Download the AirDroid Biz Daemon
- Before enrolling the windows device, you'll need to download the AirDroid Biz Daemonon the device you want to manage.

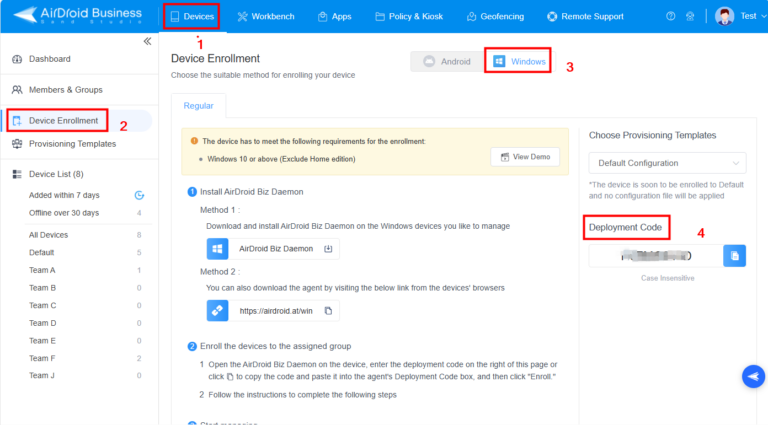
- Step 2Find out the Deployment Code
- Go to Admin Console > Devices > Device Enrollment > Windows Section, and you will see the deployment code.

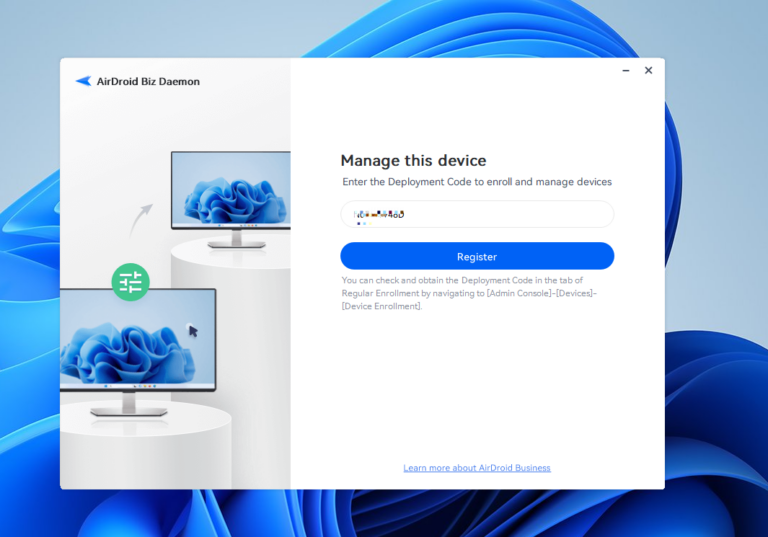
- Step 3Enroll the Device
- Enter the deployment code into the managed device and click Register to enroll the device. Then, wait for the enrollment process to be completed automatically.

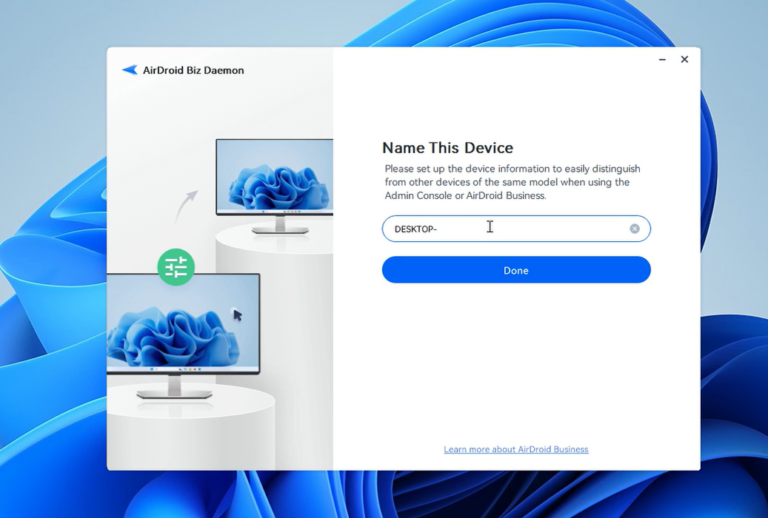
- Step 4Set up the Device’s Name
- After completing the enrollment, you will enter the last step to set up the device's name to easily distinguish it from others.

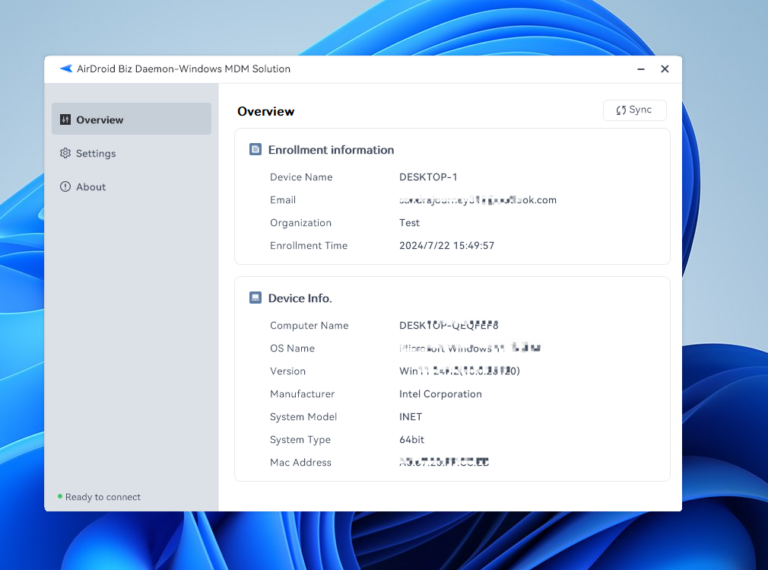
- Step 5Complete the Enrollment
- Now, you have already finished the enrollment, and you will see the device information shown in the picture, which means that you enrolled successfully.

2Set provisioning template to enroll the device
You can also set up a provisioning template to enroll the devices. The Provisioning Templates can help you set up the pre-configurations when enrolling your Windows devices. You can set default groups, policy & kiosk, and install pre-configured applications in the template for the devices you want to manage. here are the steps to create a provisioning template:
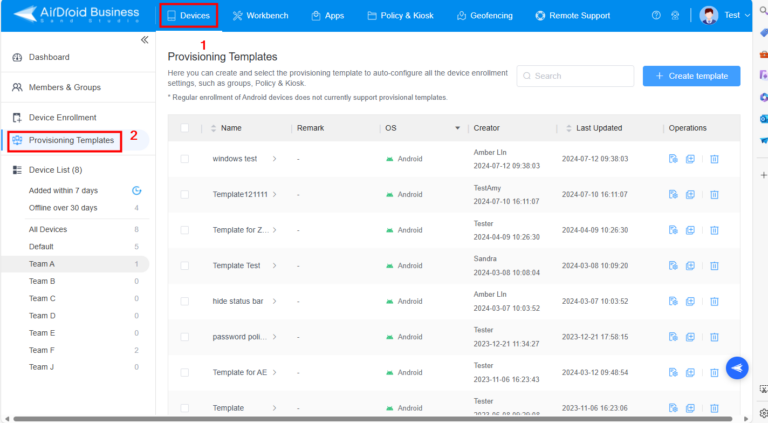
- Step 1Navigate to the Provisioning Templates
- You can go to Admin Console > Devices > Provisioning Templates.

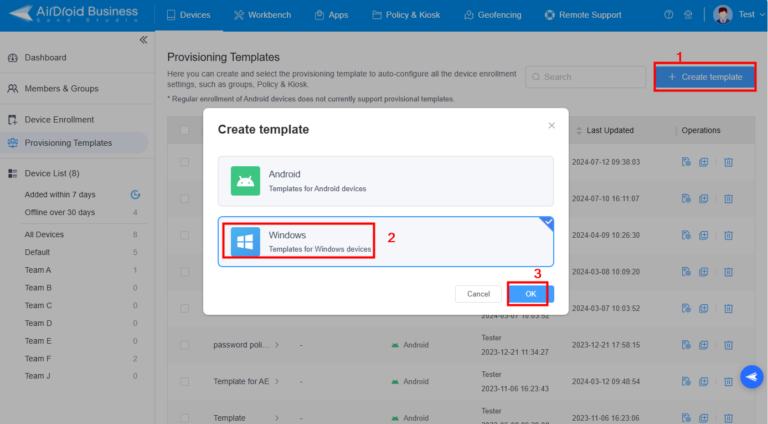
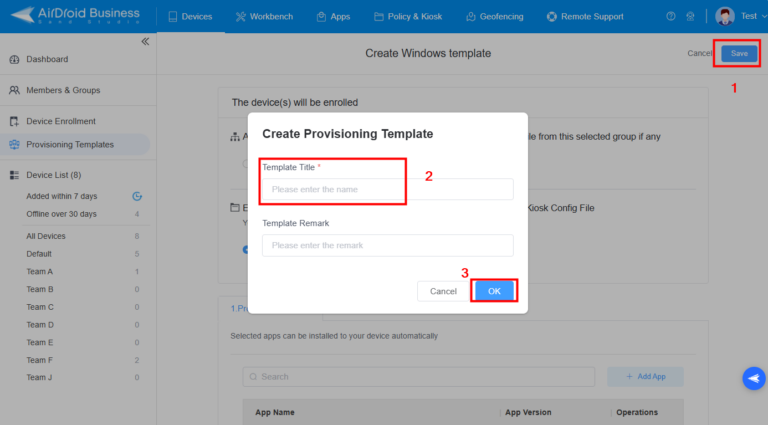
- Step 2Create a template for Windows Devices
- Click to "+ Create template" to create a provisioning template for Windows devices.

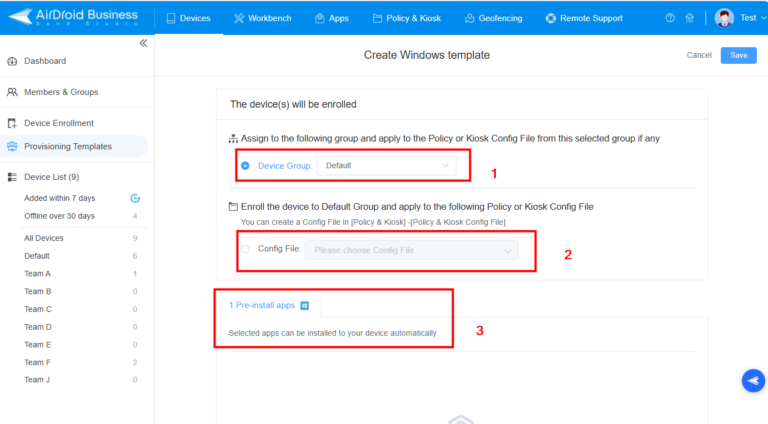
- Step 3Set configurations
- You can set the default group, Policy & Kiosk, and pre-installed apps here to auto-configure the device enrollment.
- Step 4Save the template
- Then, fill the tmeplate name and save the template.
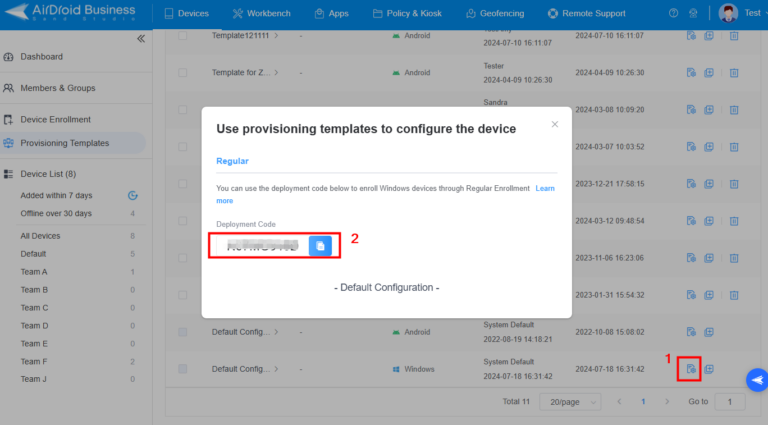
- Step 4Enroll the devices with the provisioning template
- Find out the template you created, then, click the provision code icon to copy the code and enroll the devices you want to manage by using this code. For the further process of enrollment, click here.
2App Management
App management is one of the most important features of Windows device management. It helps enterprises or organizations manage applications that are installed on the managed devices, including checking the application version and install date, uninstalling apps, and adding apps to the devices remotely. Here, we will introduce how to use App Management feature in AirDroid Business.
1Add apps to the managed devices
AirDroid Business supports 2 types of application formats, that are MSI and UWP. Here, I will add an app with MSI format as an example to tell you how to add apps in the AirDroid Business admin console.
- Step 1Access to the App Libary Section
- Go to Admin Console > Apps > App Libary>Organization App Library, here you can see all your enterprise apps and add apps to the organization app library.


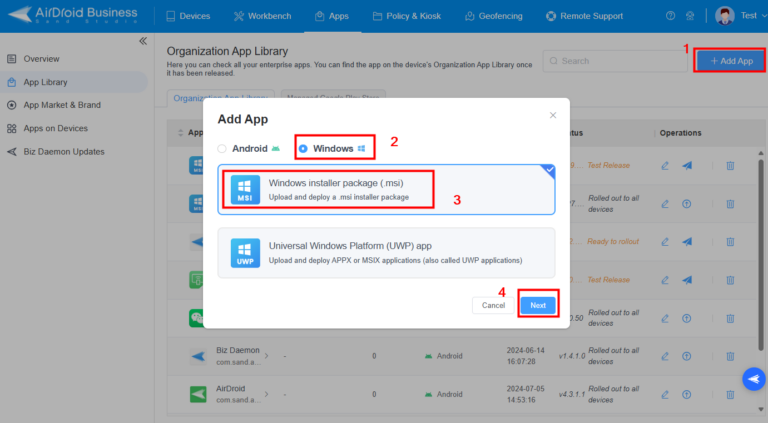
- Step 2Select "Add App"
- Click "Add App" icon and select Windows option, then, choose the format of the application file that you want to upload.
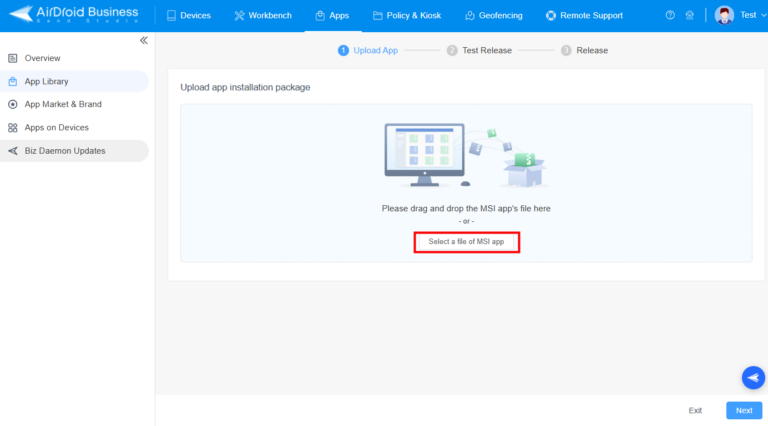
- Step 3Upload application file
- Now, you can select the app file to upload. And then click "next" for test release.

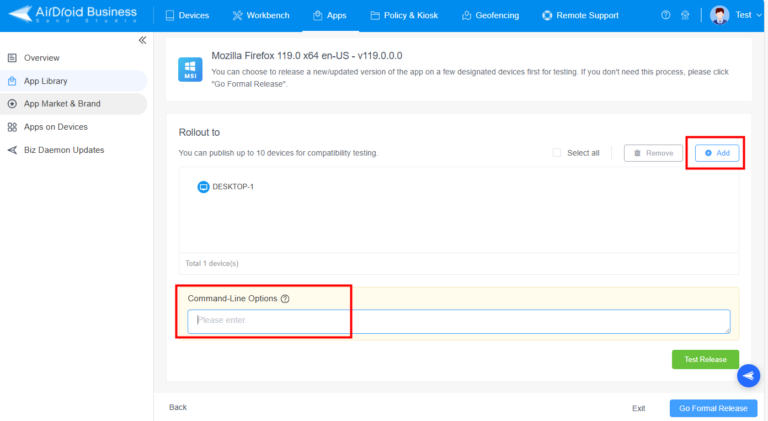
- Step 4Test Release the application
- Here you can choose the device you want to install the app and add the command for further restriction to run this app on the managed device. Then click "Test Release" to know wether it can be used normally.

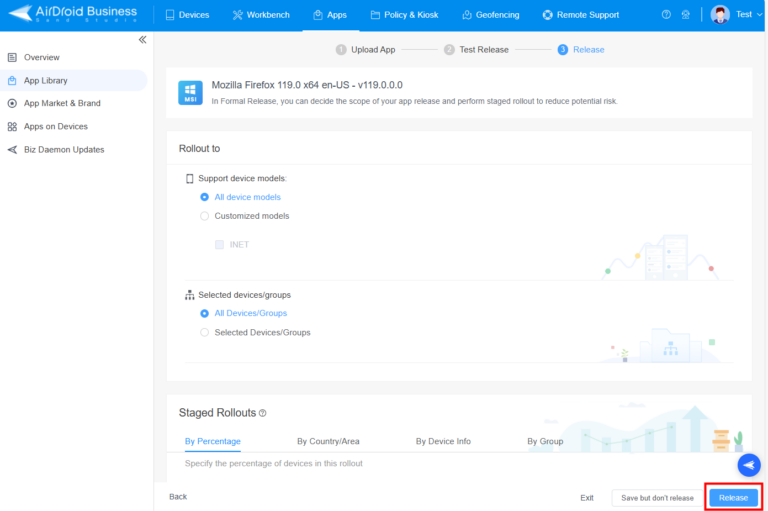
- Step 5Formal Release the application
- Aftering verifying the app can be used aproporiately, now you can navigate to the Formal Release to release the app on the controlled devices. In Formal Release, you can decide the scope of your app release and perform staged rollout to reduce potential risk. Then click the "Release icon".

2Manage Apps on Devices
Aside from adding apps to the managed devices, AirDroid Business also allows you to manage all the apps that installed on the devices, including uninstalling apps, checking the app uninstall history and the apps‘ information like application version, the types of the apps, the installation time, etc,. Here are the detailed steps:
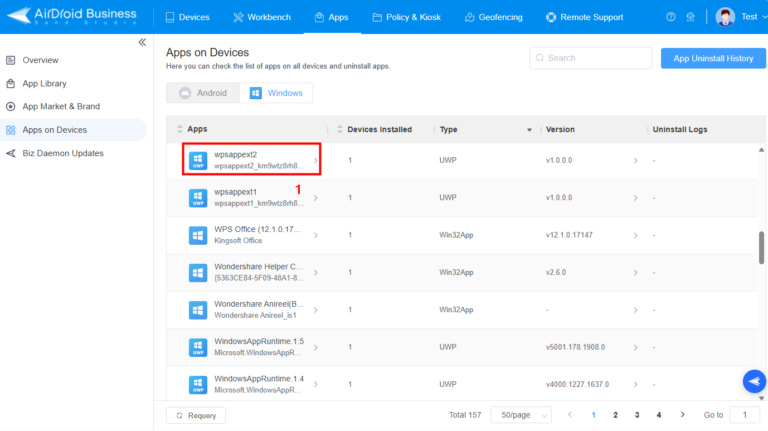
- Step 1Access to Apps on Devices
- Go to Admin Console > Apps > Apps on Devices, then, select "Windows" option.
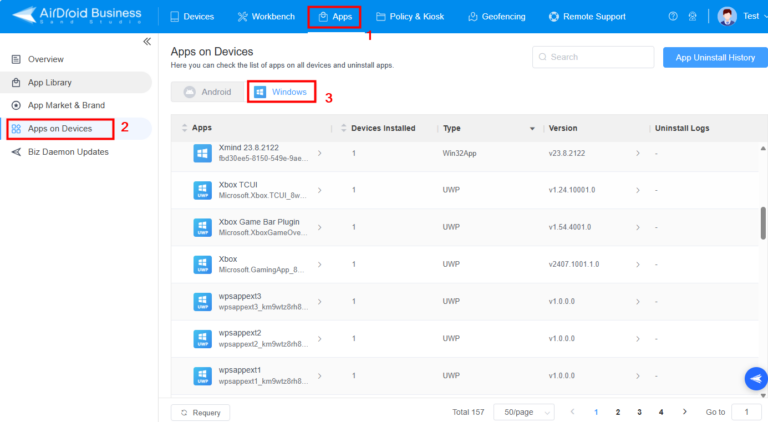

- Step 2Using the functions in Apps on Devices
- 1. Check Apps’ information
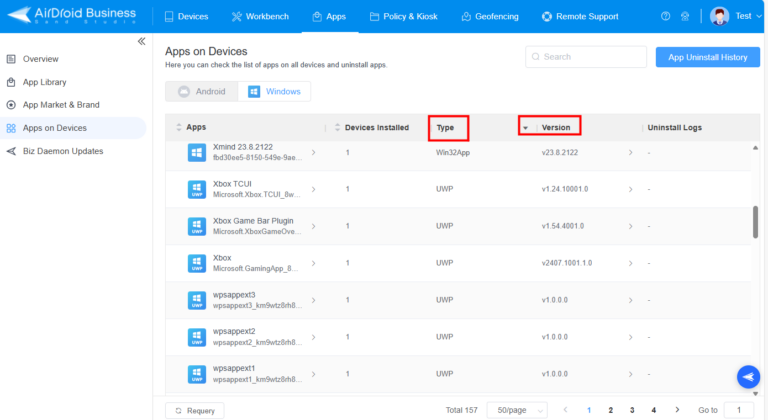

- 2.Uninstall the App
- Here, you can choose the app that you want uninstall, and then click the uninstall icon.


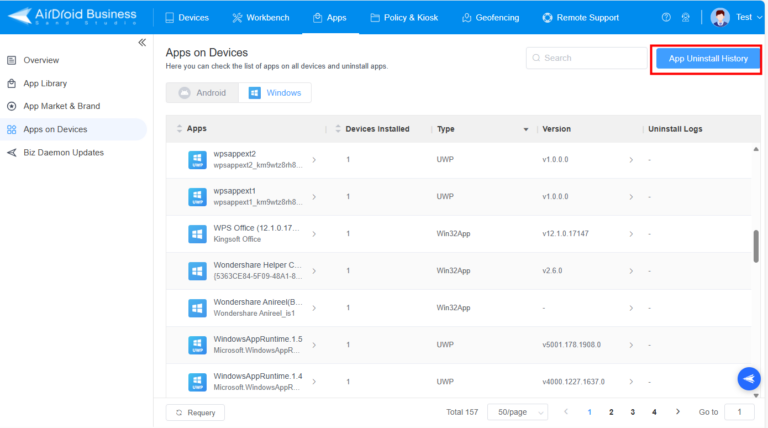
- 3. Check App uninstall history

3Set Up Policy
MDM policy is another important part for enterprises to manage their company-owned devices. By setting up policies, the enterprises can restrict the usage of the devices to ensure their safety. For example, they can set up app blocklist and allowlist, control network connection, manage devices' permissions, and more. To set up policies for your Windows devices, here are the detailed steps:
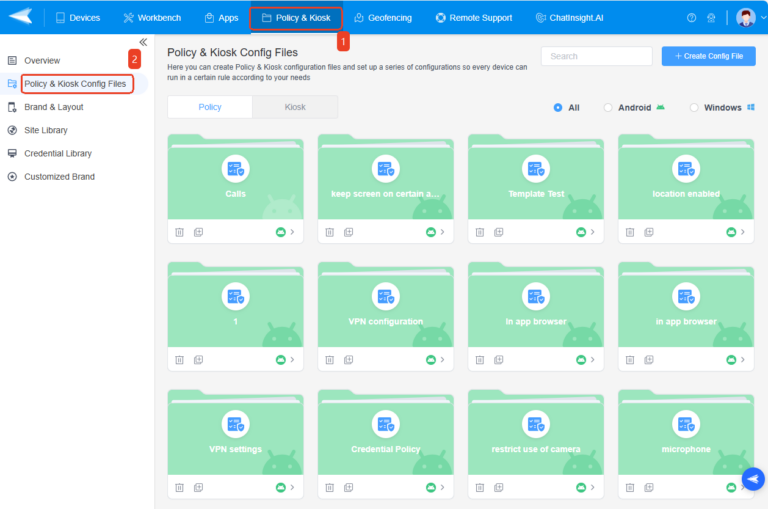
- Step 1Access to the "Policy & Kiosk" Section
- Go to Admin Console > Policy & Kiosk > Policy & Kiosk Config Files to create a policy file.

- Step 2Create a Policy File
- You can click the "+Create Config File" button, and then create a policy for your Windows devices.


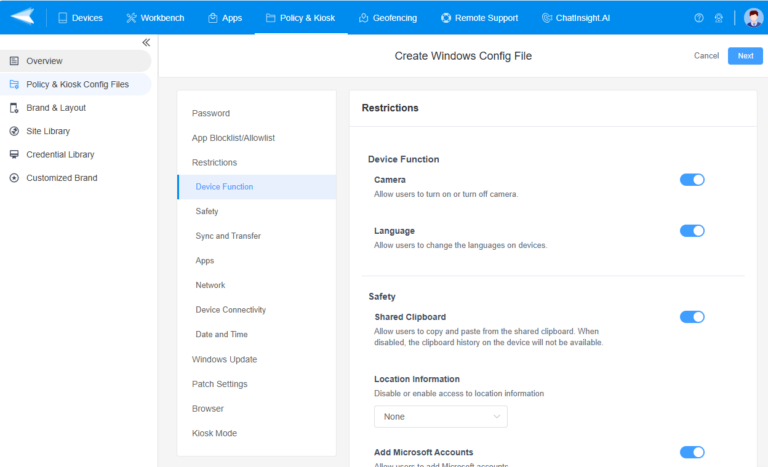
- Step 3Set Up Restrictions
- Here, you can set up restrictions for your devices, for example, password rules, app allowlist, app blocklist, network settings, etcs, to ensure your devices' security.

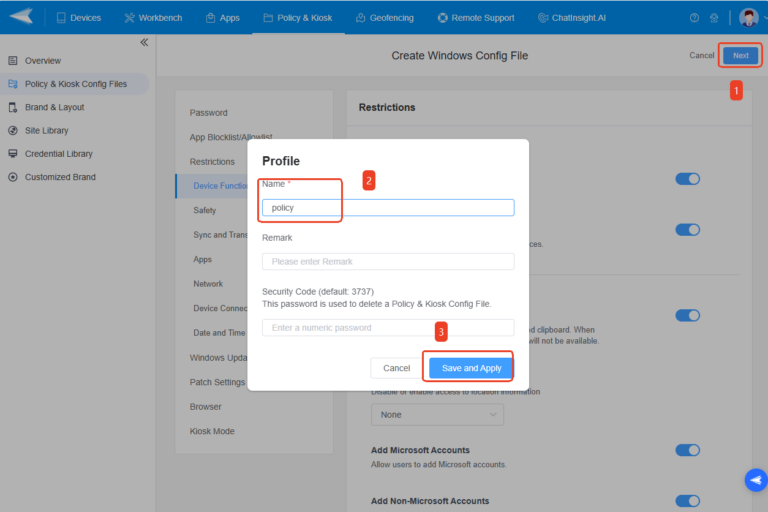
- Step 4Save the Policy
- After setting up the restrictions, you can click the "next" button in the upper right corner to save the policy.

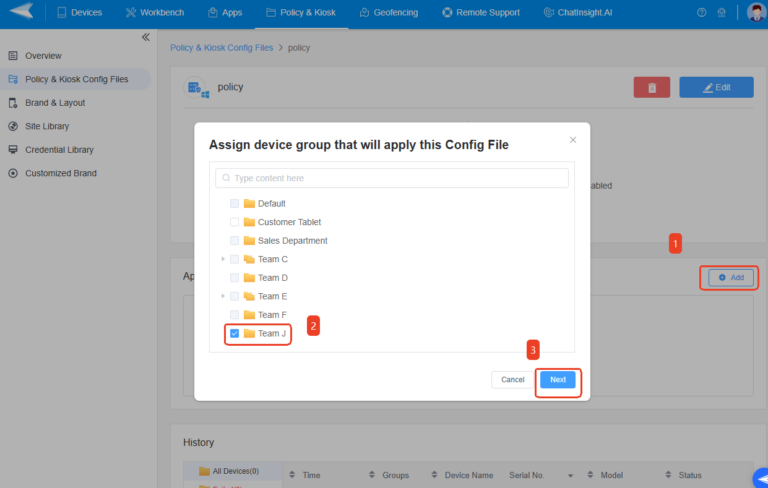
- Step 5Apply it to the Devices
- Now, you can choose the devices/groups to apply the policy.

4Set Up Kiosk Mode
Windows kiosk mode allows you to lock down your Windows devices for specific needs. You can lock down your devices only to run approved apps or websites, preventing cyber risks and boosting productivity by eliminating all unnecessary access. Here I will show you how to set up Windows kiosk mode:
1Single App Mode
The single app mode restrict users can run the only one app that approved by administrators. Let's see how to set it up:
- Step 1Access to the "Policy & Kiosk" Section
- Go to Admin Console > Policy & Kiosk > Policy & Kiosk Config Files to create a policy file.

- Step 2Create a Policy File
- Now, you can click the "+Create Config File" button, and then create a policy for your Windows devices.
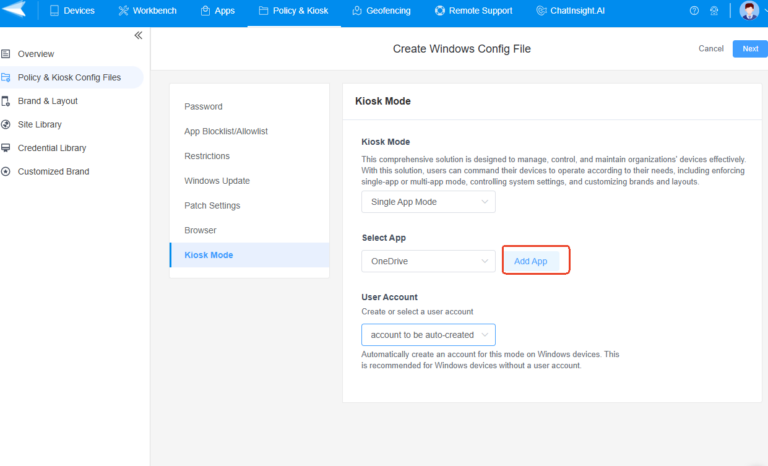
- Step 3Select "Single App Mode"
- Here, you can select "Single App Mode" in the kiosk mode section.
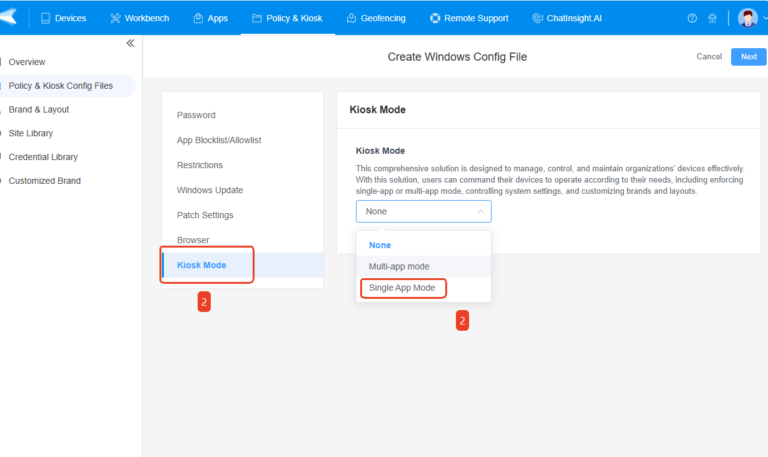

- Step 4Start to Configure
- After selecting the mode, you'll need to select the app and create the user account.

- Step 5Save and Apply It
- Click the "next" button to save the file, and then apply it to the devices.


2Multi-app Mode
You can also select multiple apps to lock according to your needs, and here are the steps for you:
- Step 1Access to the "Policy & Kiosk" Section
- Go to Admin Console > Policy & Kiosk > Policy & Kiosk Config Files to create a policy file.
- Step 2Create a Policy File
- You can click the "+Create Config File" button, and then create a policy for your Windows devices.
- Step 3Select "Multi-app mode"
- In the "Kiosk Mode" section, you can choose the "multi-app mode" selection. And then create the user account.
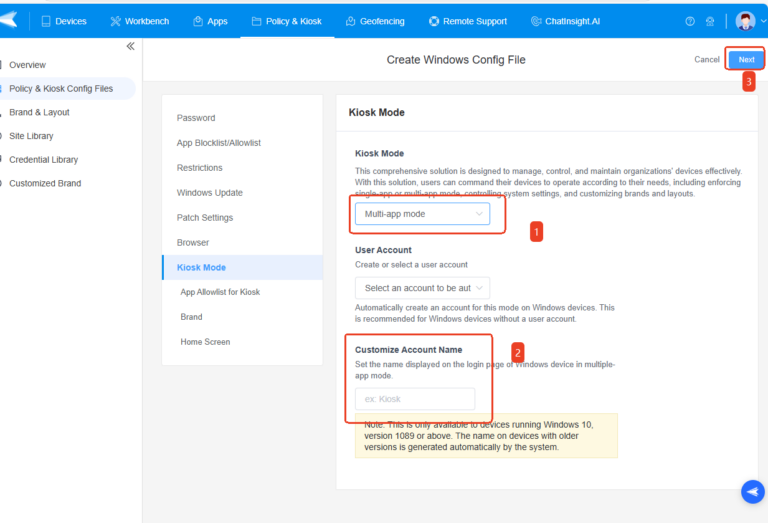
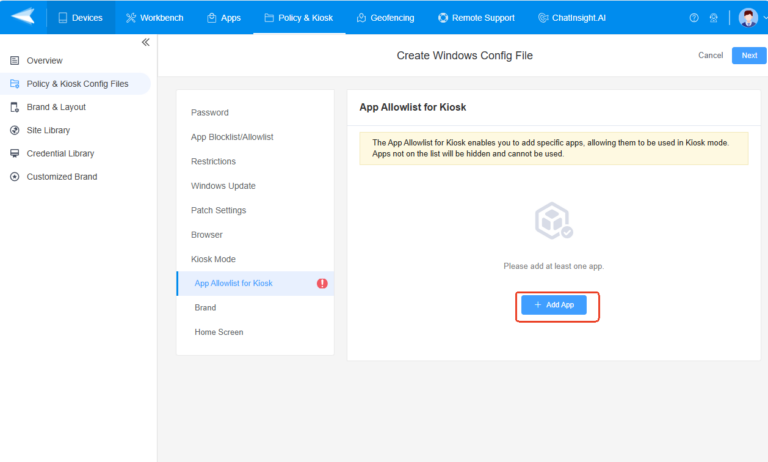
- Step 5Add Apps
- After creating the user account, you can click the "next" button and add the apps according to your needs.

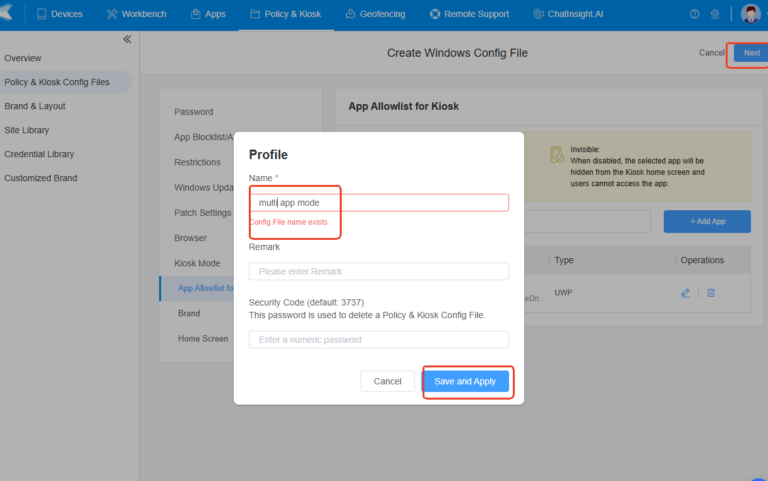
- Step 6Save and Apply It
- Last, save the file and apply it to the devices that you want to manage.

2Kiosk Browser
Aside from restricting apps, you can also lock down websites for your specific needs. Following the steps to do it:
- Step 1Access to the "Policy & Kiosk" Section
- Go to Admin Console > Policy & Kiosk > Policy & Kiosk Config Files to create a policy file.
- Step 2Create a Policy File
- You can click the "+Create Config File" button, and then create a policy for your Windows devices.
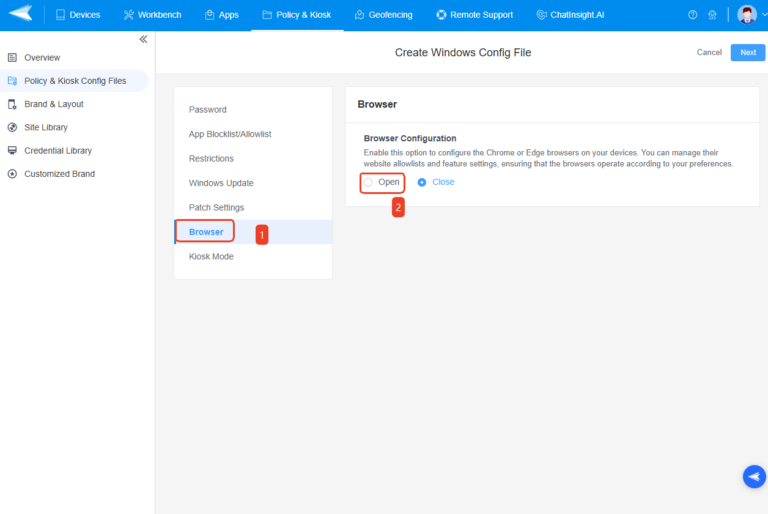
- Step 3Navigate to "Kiosk Browser" Section
- Now, you will see the "Kiosk Browser" section, select it and open the kiosk browser.

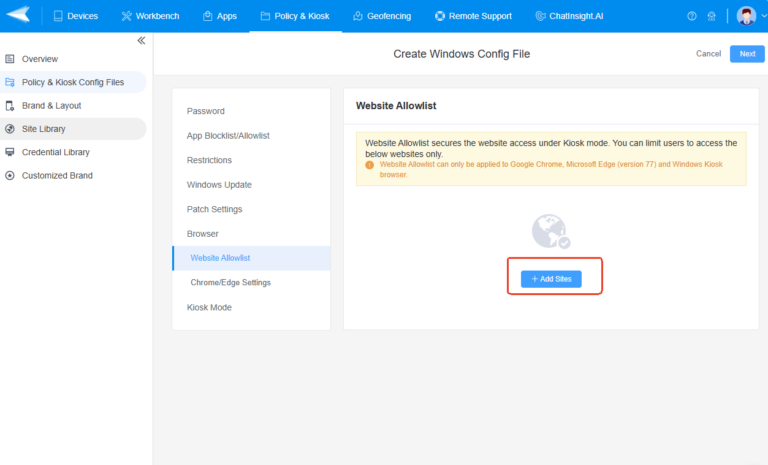
- Step 4Add Sites
- After opening the kiosk browser, you will need to add the sites that you are allowed for your employees to use. Click "+Add Sites" to do it.

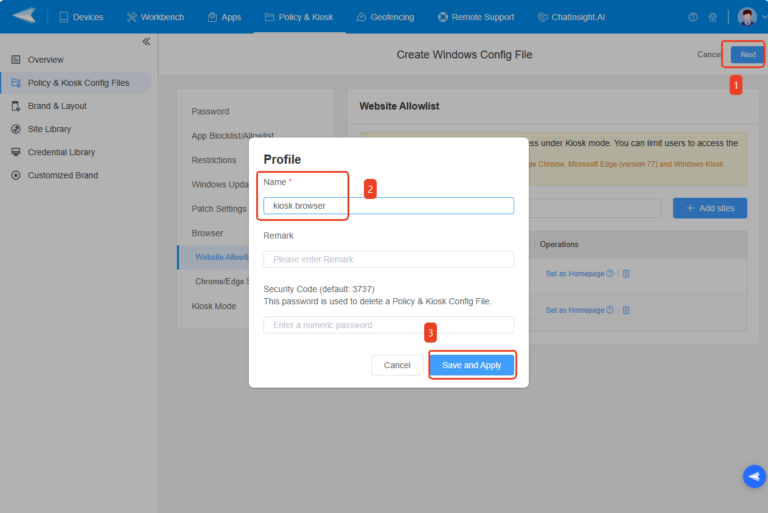
- Step 5Save and Apply It
- Finally, you can click the "next" button in the upper right corner to save the file and apply it to the devices.
Still need help? Submit a request >>
Related Articles
You May Also Like
- How do I Choose the Enrollment Method on AirDroid Business?
- Enrollment Preparation: How to use Provisioning Template?
- How to use The Enrollment via Device Owner?
- How to use Android Enterprise Enrollment?
- How to use Zero Touch to enroll your devices with AirDroid Business?