

Enrollment Preparation: How to use Provisioning Template?
We have created a YouTube video to help you understand this guide better and faster.
Video Tutorial: Pre-configure Your Devices with Privisioning Templates
The Provisioning Templates can help you set up the pre-configurations when using The Enrollment via Device Owner and Android Enterprise Enrollment. You can edit the Provisioning Templates to add Wi-Fi and pre-configured applications and download it on the device directly.
Before using The Enrollment via Device Owner and Android Enterprise Enrollment, please make sure that you have completed the registration configuration settings in order to improve device deployment efficiency.
Please refer to the following steps to set up the registration configuration:
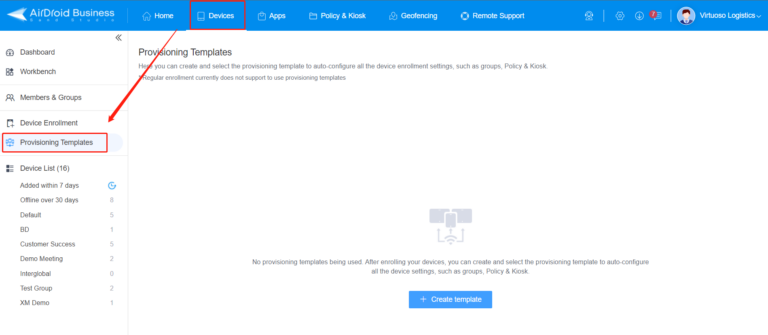
- Step 1Access Provisioning Templates
- Step 1
Go to Admin Console > Devices > Provisioning Templates
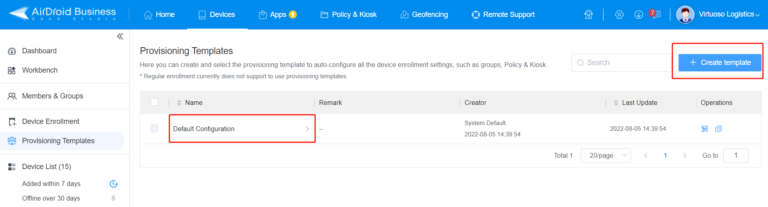
- Step 2Edit or Create a Provisioning Template
- Step 2
You can click Default Configuration to edit a default provisioning template.
Or you can click +Create template to create a new provisioning template.
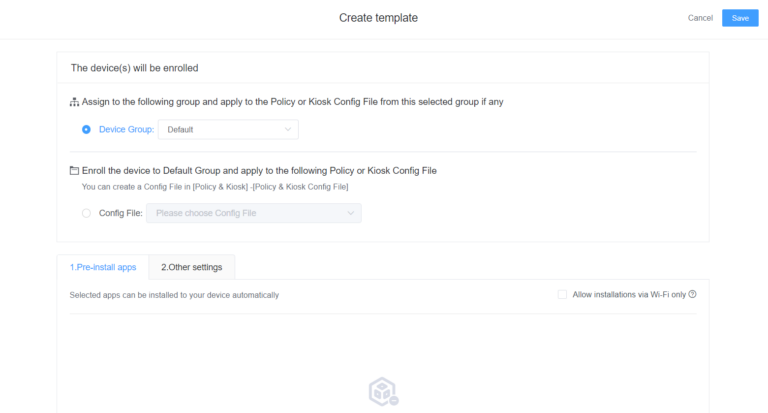
- Step 3Select Device Group or Config File
- Step 3
When setting up Provisioning Templates, you need to decide whether to apply the template to a Device Group or use a Config File. Here's a brief explanation to help you make the right choice, especially for beginners who might not be familiar with Config Files, Policy, and Kiosk configurations.
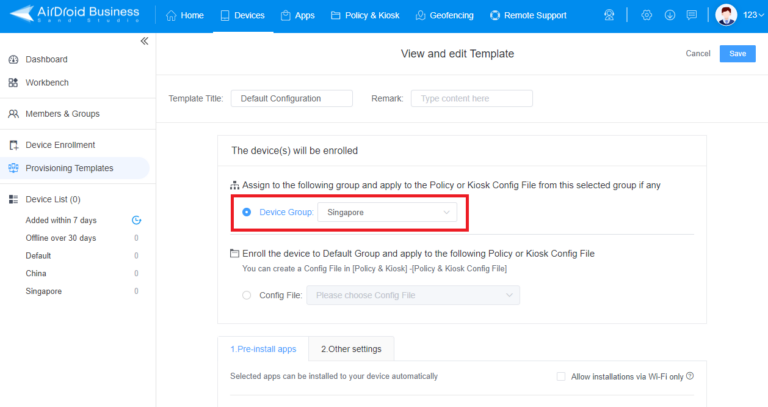
Option 1: Select Device Group
Selecting Device Group is suitable when you have already organized your devices into specific groups based on their purpose or function.
(Select the device group that should be established according to your needs in advance.
By selecting this option, your device will be assigned to the device group you set through the Provisioning Templates QR Code, and the Policy and Kiosk configuration of the device group will be applied.
Note: What is Policy & Kiosk?
- Policy refers to the rules and restrictions applied to devices, such as password input limit, app disallowlist, device limitation(sound/video recording, developer mode) and general settings(APN, VPN, language, etc).
- Kiosk Mode configuration allows you to set up a dedicated environment on the device, limiting users to specific apps & websites, and functions.
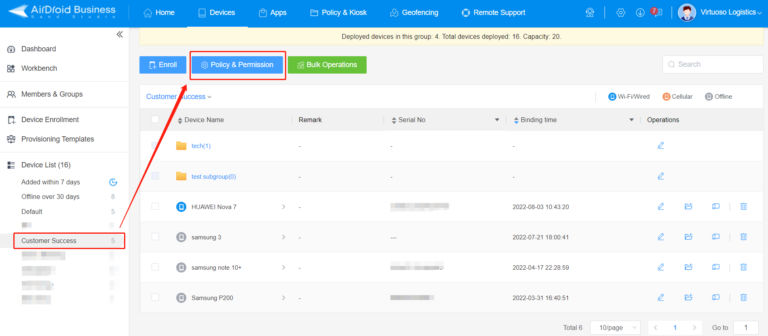
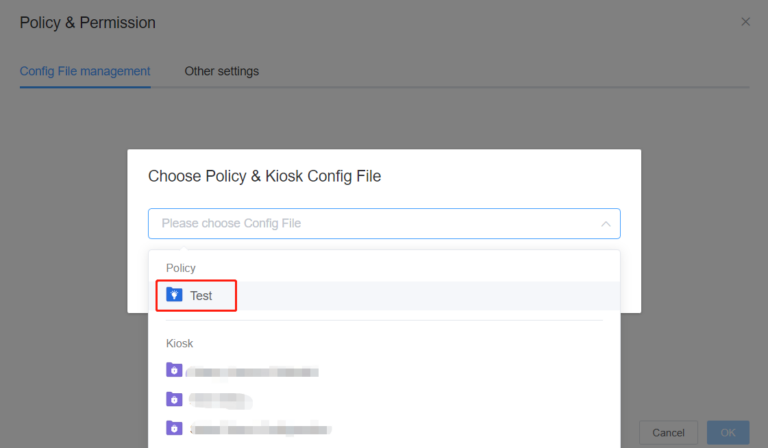
Suppose you have already determined which Policy and Kiosk Mode to use for the device group. In that case, you can save the selection on this page and then go to Device List > Policy & Permission > Select the Policy and Kiosk configuration to be applied to the device group.
Of course, if you only plan the device groups and are not sure which policy and Kiosk Mode permissions you need to set, you can configure them after the enrollment.
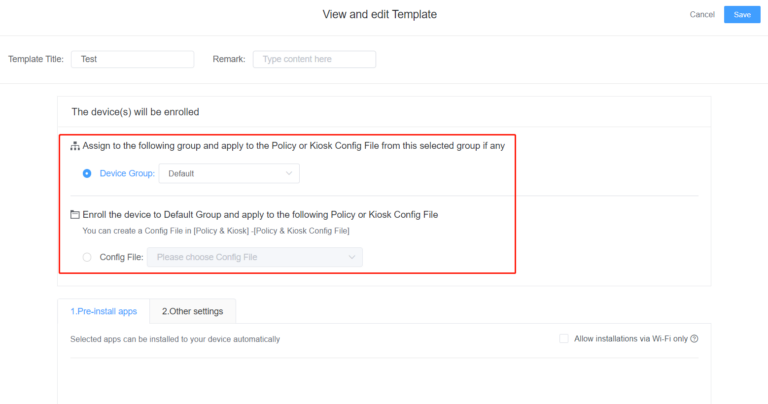
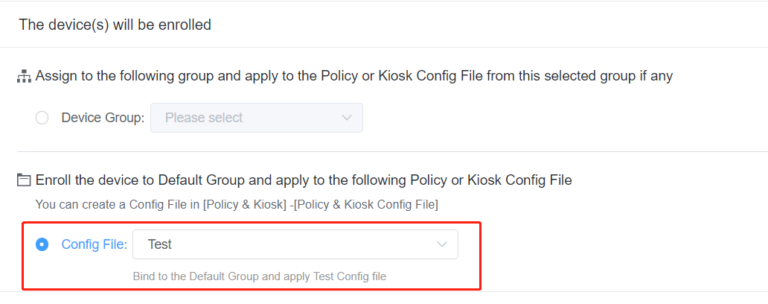
Option 2: Select Config File
If you haven't organized your devices into groups but have already determined which Policy and Kiosk to use for the devices, you can select Config File.
(Config File should be established according to your needs in advance, you can refer to this article.)
By selecting this option, your device will be applied to the policy you set through the QR Code and will be assigned to the "Default Group". You can later move the device to another device group as needed.
This option provides more flexibility for beginners who might still be exploring the best way to manage their devices.
- Step 4Pre-install Apps
- Step 4
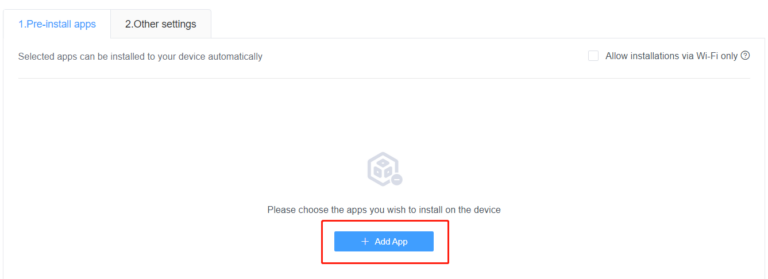
In Pre-install apps, you can choose the Apps to automatically install on your device when using enrollment via Device Owner or Android Enterprise enrollment.
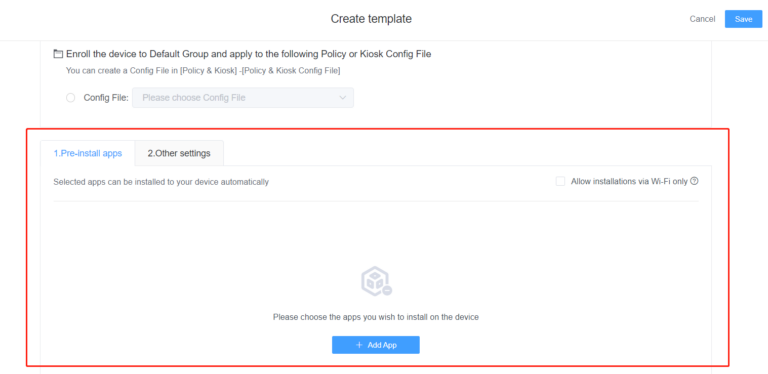
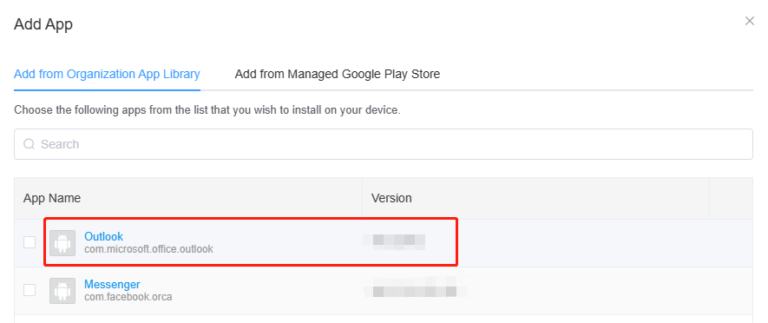
To add an app, click + Add App and you can select an app to be automatically installed when enrolling the device from the "App Library."
If you have not uploaded the App to the App Library, please go to Apps > App Library > Select Organization App Library to upload the App's apk file.
Or you can select Managed Google Play Store to select apps from the Play Store.
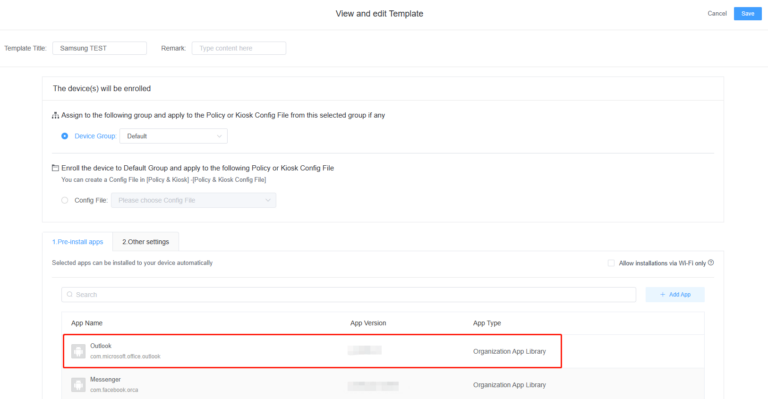
Once you upload the App to the App Library, you can directly select the app and add it to the Provisioning Templates.
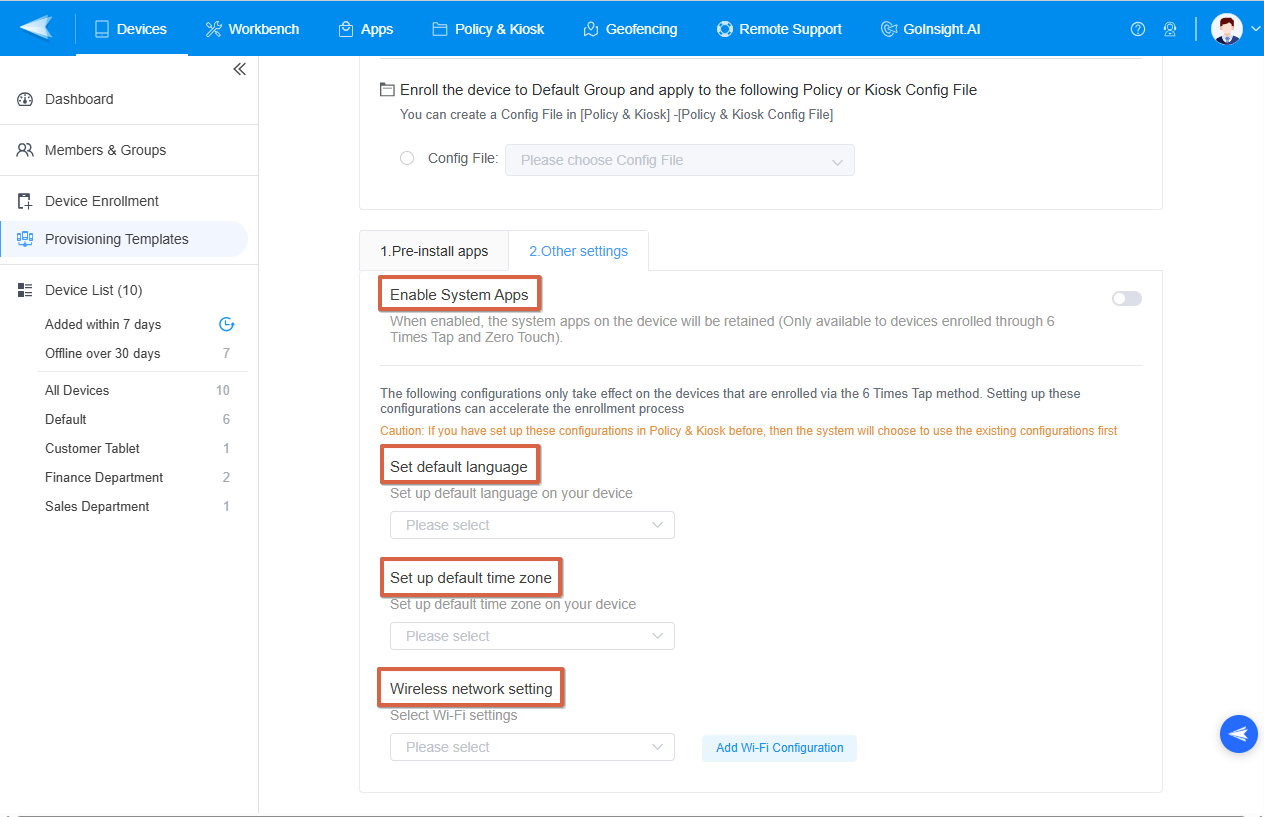
- Step 5Configure Other Settings
- Step 5
In Other settings, you can set up whether to allow the system apps on the device will be retained, the default language, default time zone, Wireless network setting.
These configurations can speed up the registration process when you register through 6 times Tap,Android Enterprise Enrollment and Zero Touch Enrollment.
After completing all the settings above, you can proceed with device enrollment using The Enrollment via Device Owner and Android Enterprise Enrollment.
You can refer to How to use The Enrollment via Device Owner?or How to enroll your device with Android Enterprise (AE) Enrollment?
Still need help? Submit a request >>
Related Articles
- How do I Choose the Enrollment Method on AirDroid Business?
- How to use The Enrollment via Device Owner?
- How to use Android Enterprise Enrollment?
- How to use Zero Touch to enroll your devices with AirDroid Business?
- How to use Samsung Knox Mobile Enrollment (KME) to enroll your devices with AirDroid Business?
You May Also Like
- What features are available for Remote Access on AirDroid Business?
- How to remote access a device via Admin Console on AirDroid Business?
- How to Manage Devices on AirDroid Business Desktop Client?
- How do I use the View Mode on AirDroid Business?
- How to use Black Screen Mode to maintain the remote device during Remote Control?